

Top coat is a type of gel coat with an additive to seal the surface when it hardens so it does not stay sticky like a gel coat does - You top coat or flowcoat as a covering to seal the inside of laminates.
Just as the gel coat provides a barrier for the outside of a panel so that moisture cannot wick along any exposed fibres and compromise the laminate the top coat does the same for the inside of a laminate to seal it and provide a decorative hard wearing finish.
I bought the topcoat I have for doing the foot wells and floors of my car - forgot I had it and just painted them instead.
Monkey business
Moderator: phpBB2 - Administrators
Top coat is a type of gel coat with an additive to seal the surface when it hardens so it does not stay sticky like a gel coat does - You top coat or flowcoat as a covering to seal the inside of laminates.
Just as the gel coat provides a barrier for the outside of a panel so that moisture cannot wick along any exposed fibres and compromise the laminate the top coat does the same for the inside of a laminate to seal it and provide a decorative hard wearing finish.
I could not have said it better
P
Just as the gel coat provides a barrier for the outside of a panel so that moisture cannot wick along any exposed fibres and compromise the laminate the top coat does the same for the inside of a laminate to seal it and provide a decorative hard wearing finish.
I could not have said it better
P


Hi Andrew
I use an air hacksaw which is fantastic for that kind of work as long as you put a blade in it
24tpi is what I normally use.
If I am out on site and need to cut a hole or trim something I use a Fein Multi Master as these are fantastic and versatile bits of kit and now not that expensive but glass does tend to bugger the blades fairly quickly.
Used a MM on this very recently
And used masking tape to hold the former in place!
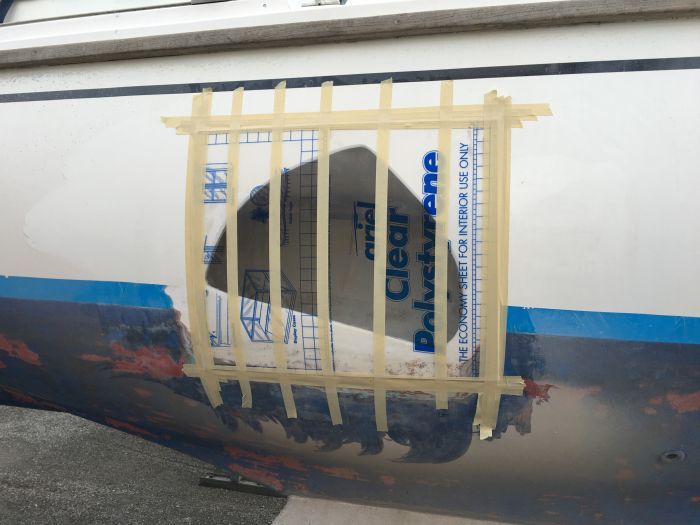
A slightly bigger gel repair for this yacht
Great work that you are doing up there mate
I use an air hacksaw which is fantastic for that kind of work as long as you put a blade in it
24tpi is what I normally use.
If I am out on site and need to cut a hole or trim something I use a Fein Multi Master as these are fantastic and versatile bits of kit and now not that expensive but glass does tend to bugger the blades fairly quickly.
Used a MM on this very recently

And used masking tape to hold the former in place!

A slightly bigger gel repair for this yacht
Great work that you are doing up there mate

Every day is a school day and I made a couple of mistakes. The main repairs on the mould above worked out okay - this was the worst of the errors - I did not make sure the whole area was covered and I set the masking tape down to firm - the texture should sand out and the inclusion is very very small.

However - I thought while I had a bit of gel still in the pot I would "improve" a couple of area's on the other mould - Rushing, the application of the masking tape was even worse on this mould and again - only worse - I did not make sure a had covered all of the repair area with gel - The masking tape created a bridge and so prevented the gel from covering the lower part of the repair. This actually made matters worse than before I tried the repair.
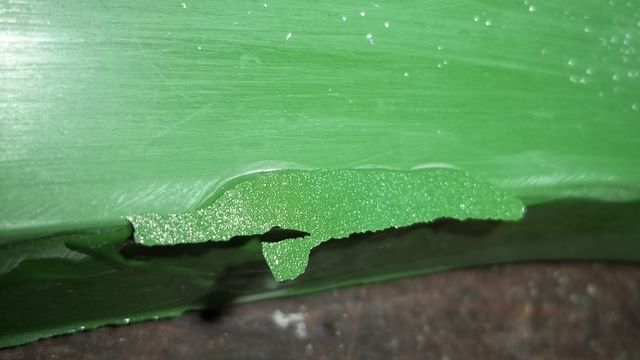
So out with the die grinder to scuff it out and apply some more gel - a blob mixed up on a filled pad. with a single drop of catalyst.
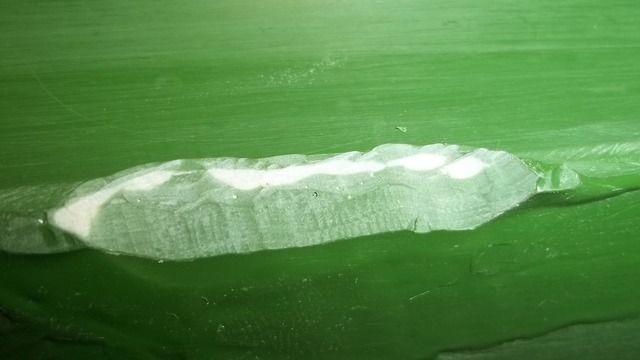
This time I made sure that the entire repair area was covered in gel before I set the tape in place and I also made sure that the tape had a bulge over the repair. Having to spend a few extra minutes sanding is infinitely preferable to having to chop out, mix apply and wait another day.
We will find out tomorrow if I got it right this time around.
Andrew

However - I thought while I had a bit of gel still in the pot I would "improve" a couple of area's on the other mould - Rushing, the application of the masking tape was even worse on this mould and again - only worse - I did not make sure a had covered all of the repair area with gel - The masking tape created a bridge and so prevented the gel from covering the lower part of the repair. This actually made matters worse than before I tried the repair.

So out with the die grinder to scuff it out and apply some more gel - a blob mixed up on a filled pad. with a single drop of catalyst.


This time I made sure that the entire repair area was covered in gel before I set the tape in place and I also made sure that the tape had a bulge over the repair. Having to spend a few extra minutes sanding is infinitely preferable to having to chop out, mix apply and wait another day.

We will find out tomorrow if I got it right this time around.
Andrew
4.5L V8 Ginetta G27
I will have to order myself up an air hacksaw - something I have meant to get for ages.
You can never have too many rolls of masking tape
Out of curiosity - how thick is the gel coat and the laminate on something like that?
You can never have too many rolls of masking tape
Out of curiosity - how thick is the gel coat and the laminate on something like that?
gelmonkey wrote:Hi Andrew
And used masking tape to hold the former in place!
A slightly bigger gel repair for this yacht
Great work that you are doing up there mate
4.5L V8 Ginetta G27
Oh and parcel tape is another good one that give a smoother un-textured finished . A mate uses it for making ducting tubes and quick mouldings for all sorts as no wax or PVA required
For making large straight intercooler type tubes cardboard tube wrapped in parcel tape - wind impregnated tape around it and then dent and fold the tube out once cured - never tried it as not had much use for making tubes but he says it works great.
For small flat panels he will often just cover in parcel tape and then gel and lay up straight onto it.
To enable this thread to be an easier read as Paul completes the mould and makes the panel I have started another thread on my amateur panel works and experiments
http://www.v8forum.co.uk/forum/viewtopi ... 323#108323
4.5L V8 Ginetta G27
-
unstable load
- Top Dog

- Posts: 1279
- Joined: Mon May 04, 2009 6:53 am
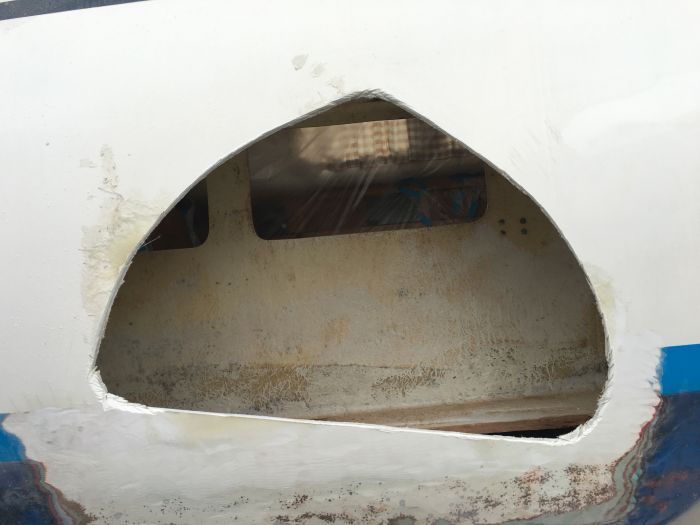
The hole in the yacht was a bit of a challenge as the only access available was through the locker holes that you can see in the first picture.
Laminate and gel thickness on this an old Westerly was approximately 7mm so not massively thick.
With regard to how much and how far back do you grind the general rule of thumb is two thirds bigger than the breach where possible.
This allows for a techinque called back grinding which in simple terms means that you have to chamfer grind from a very thin edge around the breach back to almost no material removed at the outer edges.
In this instance the floor of the locker was cut out so that the laminates could be feathered out over the ground back area and then the floor was reinstated.
Thank fully there was just enough room to go upwards to just underneath the deckhead and all was good in the end.
Without question this was a structural repair and it was imperative that the Lloyds register specs were followed as closely as possible so that the craft was returned to a safe and strong condition.
Hope this answers your questions guys?
I have done some more of the finishing on the two sections of my filter housing and if I get time this evening I will post up the progress pictures but got to go and finish a large yacht that we are currently working on so may well be Donald ducked by the time I get home tonight.
cheers
P
-
unstable load
- Top Dog
- Posts: 1279
- Joined: Mon May 04, 2009 6:53 am
Yup, answers mine 100%, thanks!
I have been nagging my various bosses for an Aviation Composites course, but none of them have bitten so far.....
I haven't done any structural repairs due to qualification/certification issues, but I have done a few small ding and crack repairs on non-structural panels and doors, using a light woven mat and Hysol EA9396 structural adhesive with microbaloons used for filler if needed.
So far, none of them have come apart, so I must be doing something right....
Cheers,
John
John
Good afternoon all
Here's another load of stuff for you to have a look at.
Its not very interesting I'm afraid but as so many of you are watching my rubbish it's only fair that you see all that is going on.
As the plug was never final finished because I was impatient to get the moulding started I knew I was going to have some flatting back to sort out once the mould was released.
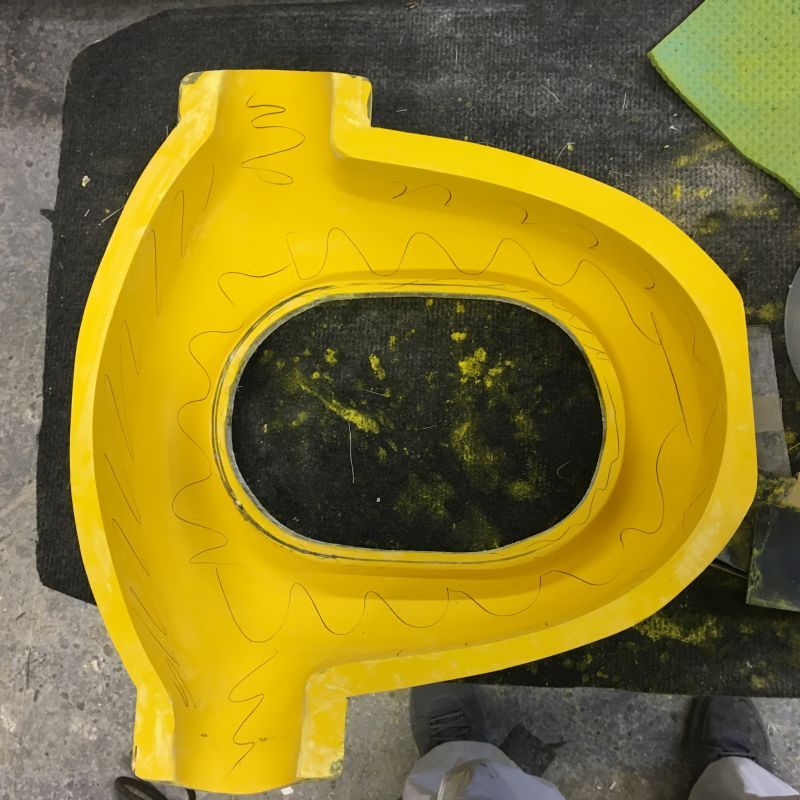
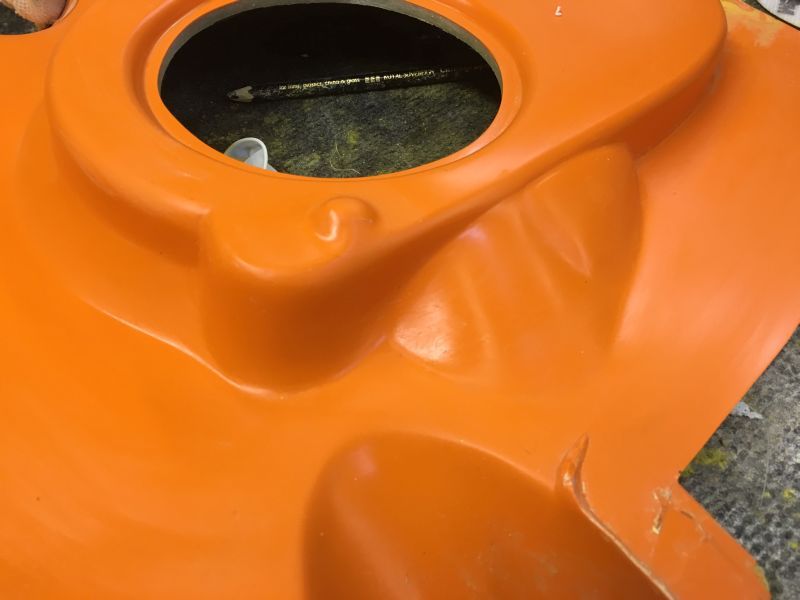
So scribbling around the internal faces of the mould with my black pencil it could clearly be seen where attention was required (it all needed a flat back but some areas more so )
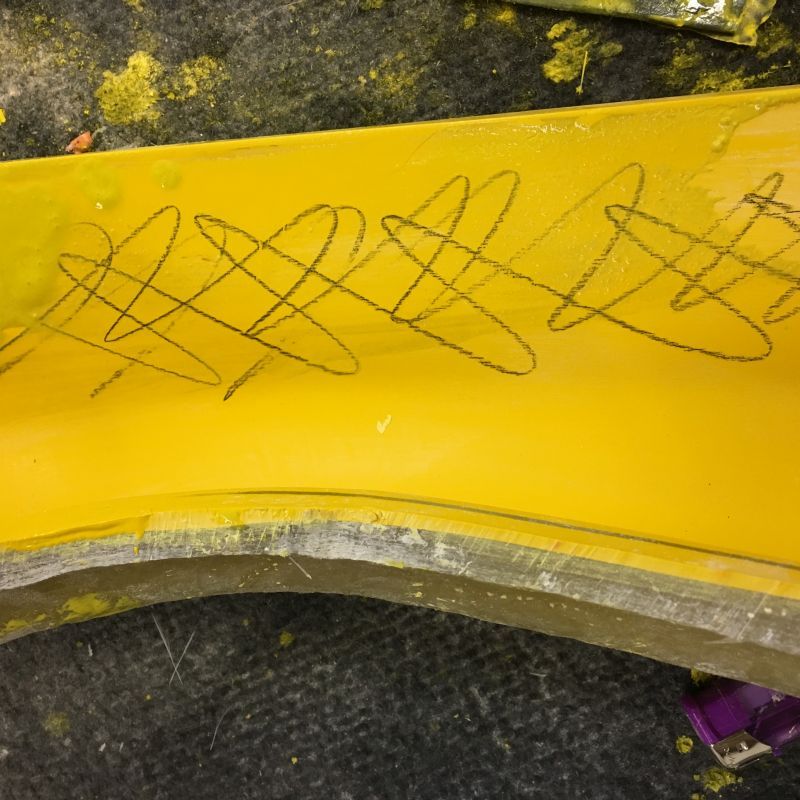
The original sanding marks can be seen easily here so a couple of hours were spent flatting back with 400 and 1200 to get a really nice surface finish and then as explained the other day a final scribble with the pencil to double check that all was good .
Since it will be impossible to glass this whole lot in one go I have to make sure that the important release areas are perfect so with that in mind these areas shown below could potentially cause a problem.
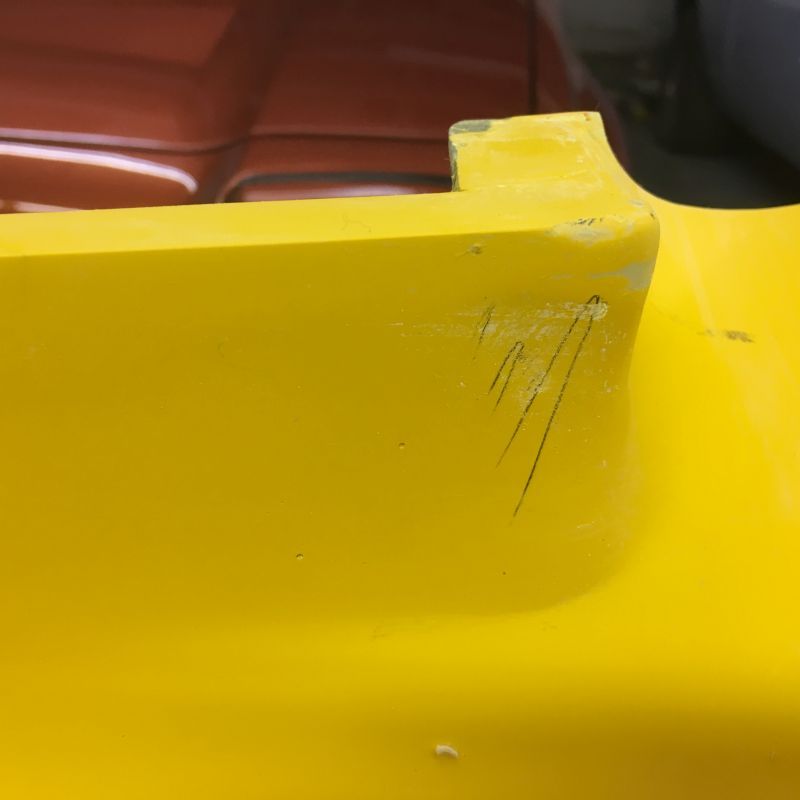
To get around these little issues I needed to make them good with more gel so I keyed up with 60 grit and then painted gel onto the surfaces.
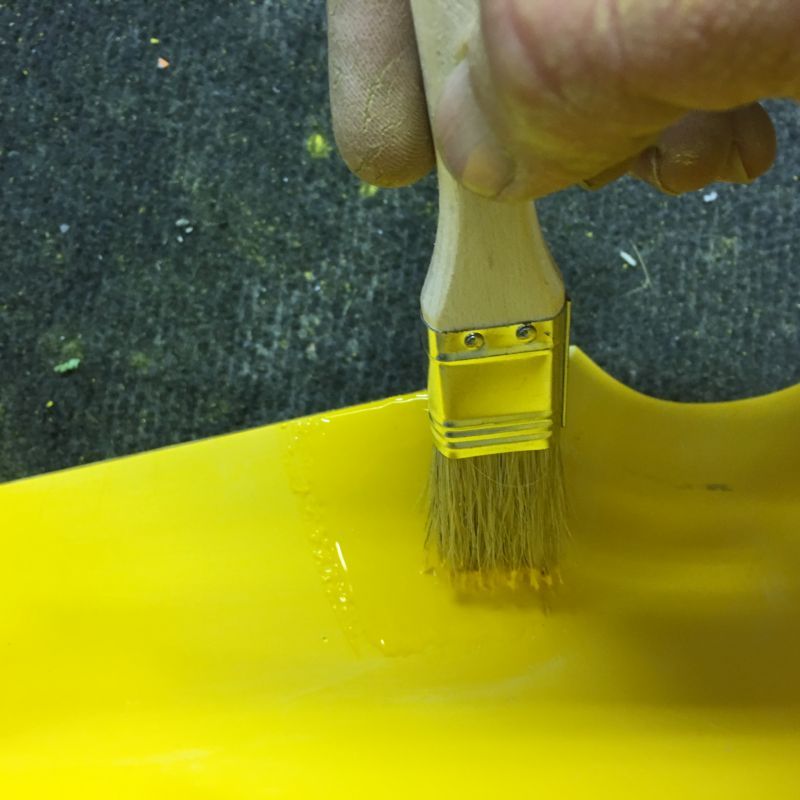
With any 'paint in ' it is vital that the keyed area is much bigger than the repair site itself as the gel need to be flowed out to almost the keyed edge and with at least two coats being applied.
Reason being is that when flatting back you need to have the all important throw on your sanding block and also to fill up the hollow or imperfection or whatever it is you are repairing.
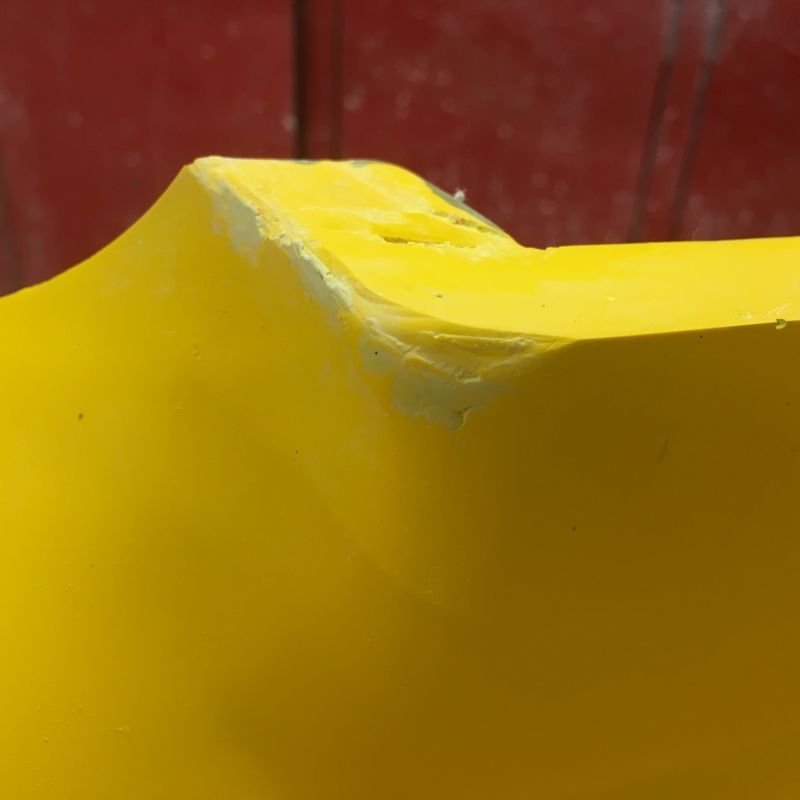
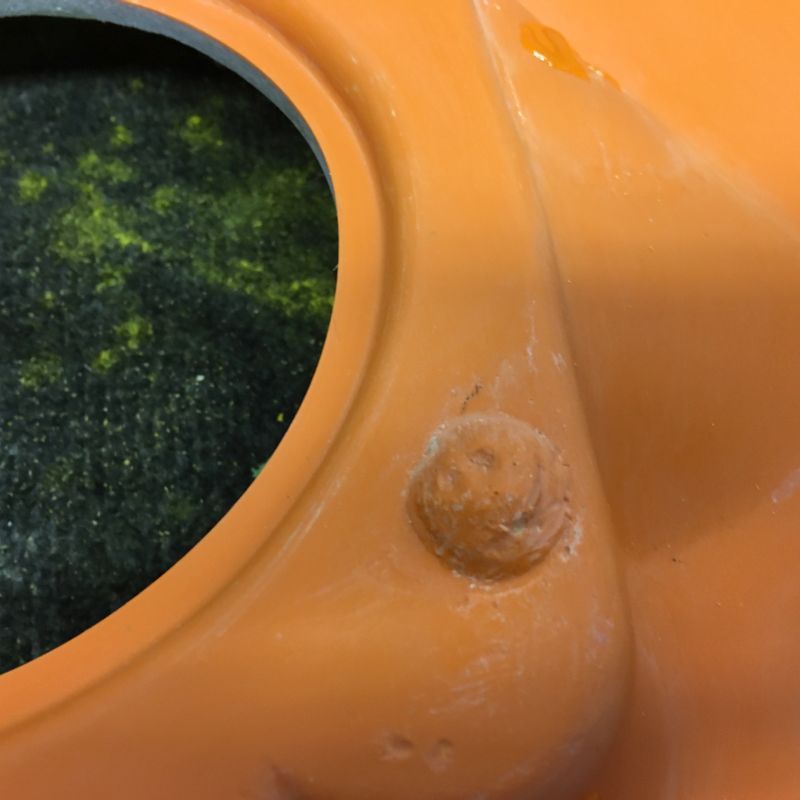
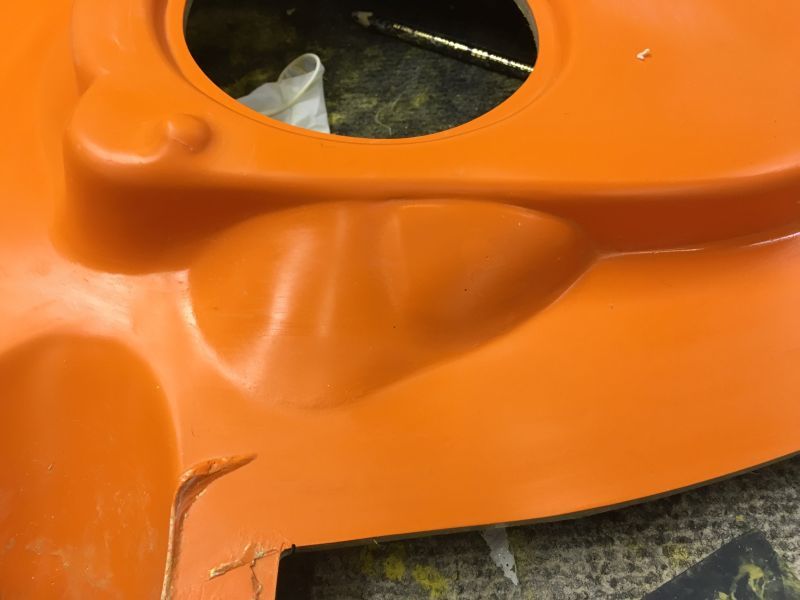
A few smaller other defects had to be dealt with including the small lip at the bottom of the mould which caused me the initial release problems.
Most of it sanded out but these two areas where just a little bit too deep to sand back and yet still keep a uniform shape.
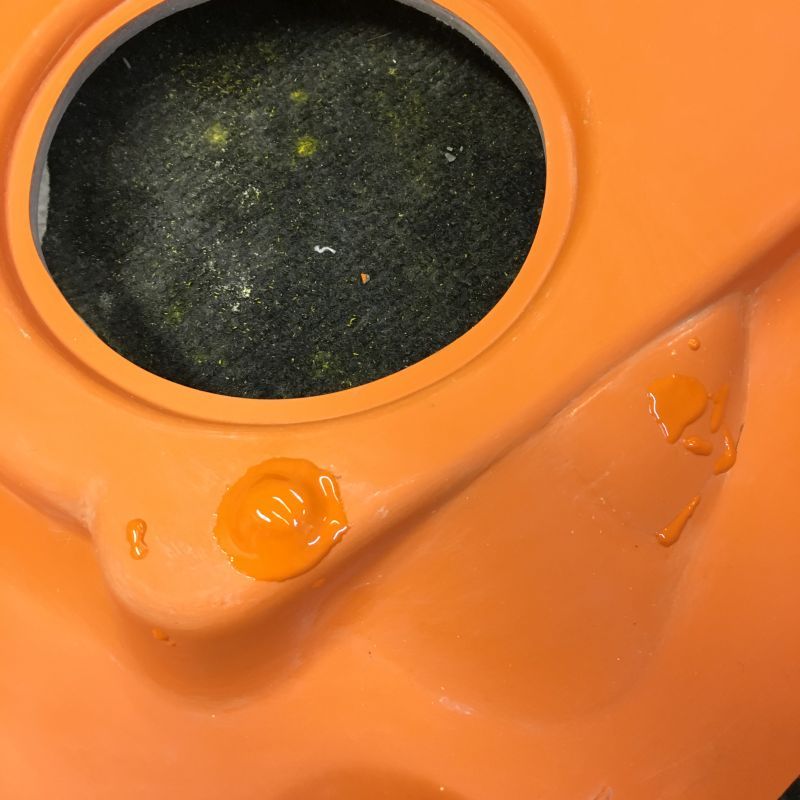
After thrashing my son to within an inch of his life for taking the orange pigment ( he said he needed it for a proper job and not my p*ssing about in the garage crap ) ( how rude ) I finally got to repair the small bits on the base section mould.
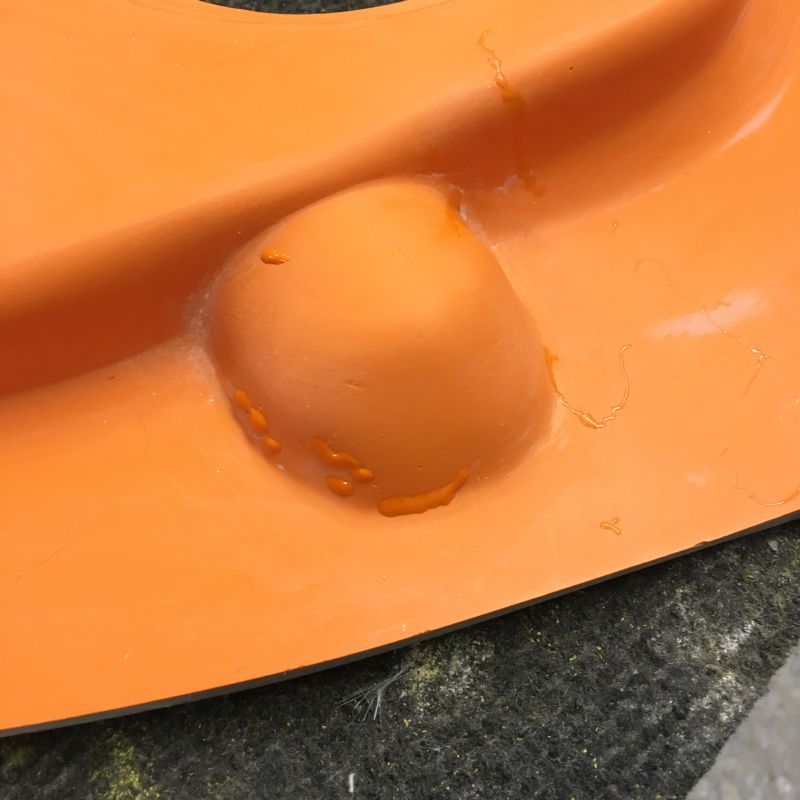
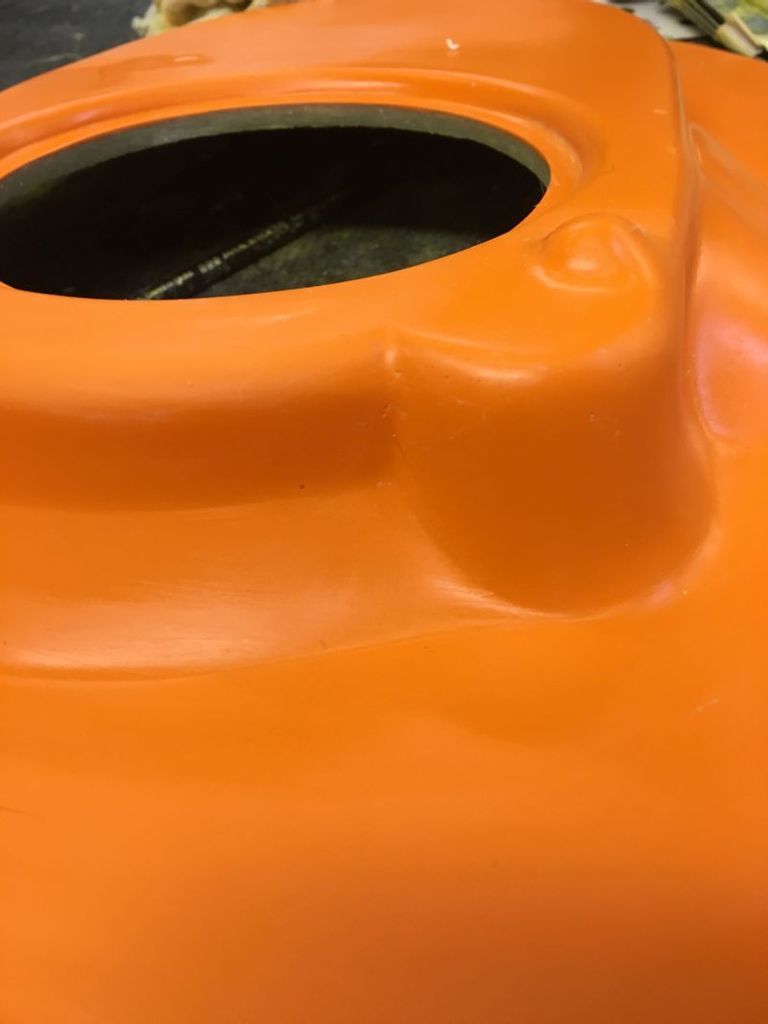
The indent for the accelerator pump was hideous looking once released so the easy way to deal with this was to key it with a Dremel and then just simply blob the gel on top and let it flow down over the shape so that when it comes to sanding back all I should have to do is lose the edges.
Like it?
Work smart not hard
The other small bits simply needed a few minutes attention.
All I have to do now is flat back these bits and give it a good polish and we are ready to make the real thing which I cant wait to do now.
I just really hope it works after all this
Catch you later and thanks again for your comments and interest.
cheers
P
PS John
Keep nagging the bosses for that structural course .
Here's another load of stuff for you to have a look at.
Its not very interesting I'm afraid but as so many of you are watching my rubbish it's only fair that you see all that is going on.
As the plug was never final finished because I was impatient to get the moulding started I knew I was going to have some flatting back to sort out once the mould was released.
So scribbling around the internal faces of the mould with my black pencil it could clearly be seen where attention was required (it all needed a flat back but some areas more so )

The original sanding marks can be seen easily here so a couple of hours were spent flatting back with 400 and 1200 to get a really nice surface finish and then as explained the other day a final scribble with the pencil to double check that all was good .

Since it will be impossible to glass this whole lot in one go I have to make sure that the important release areas are perfect so with that in mind these areas shown below could potentially cause a problem.


To get around these little issues I needed to make them good with more gel so I keyed up with 60 grit and then painted gel onto the surfaces.


With any 'paint in ' it is vital that the keyed area is much bigger than the repair site itself as the gel need to be flowed out to almost the keyed edge and with at least two coats being applied.
Reason being is that when flatting back you need to have the all important throw on your sanding block and also to fill up the hollow or imperfection or whatever it is you are repairing.
A few smaller other defects had to be dealt with including the small lip at the bottom of the mould which caused me the initial release problems.
Most of it sanded out but these two areas where just a little bit too deep to sand back and yet still keep a uniform shape.
After thrashing my son to within an inch of his life for taking the orange pigment ( he said he needed it for a proper job and not my p*ssing about in the garage crap ) ( how rude
The indent for the accelerator pump was hideous looking once released so the easy way to deal with this was to key it with a Dremel and then just simply blob the gel on top and let it flow down over the shape so that when it comes to sanding back all I should have to do is lose the edges.
Like it?
Work smart not hard
The other small bits simply needed a few minutes attention.
All I have to do now is flat back these bits and give it a good polish and we are ready to make the real thing which I cant wait to do now.
I just really hope it works after all this
Catch you later and thanks again for your comments and interest.
cheers
P
PS John
Keep nagging the bosses for that structural course .
Hi All
Well been back out there tonight and done a bit more.
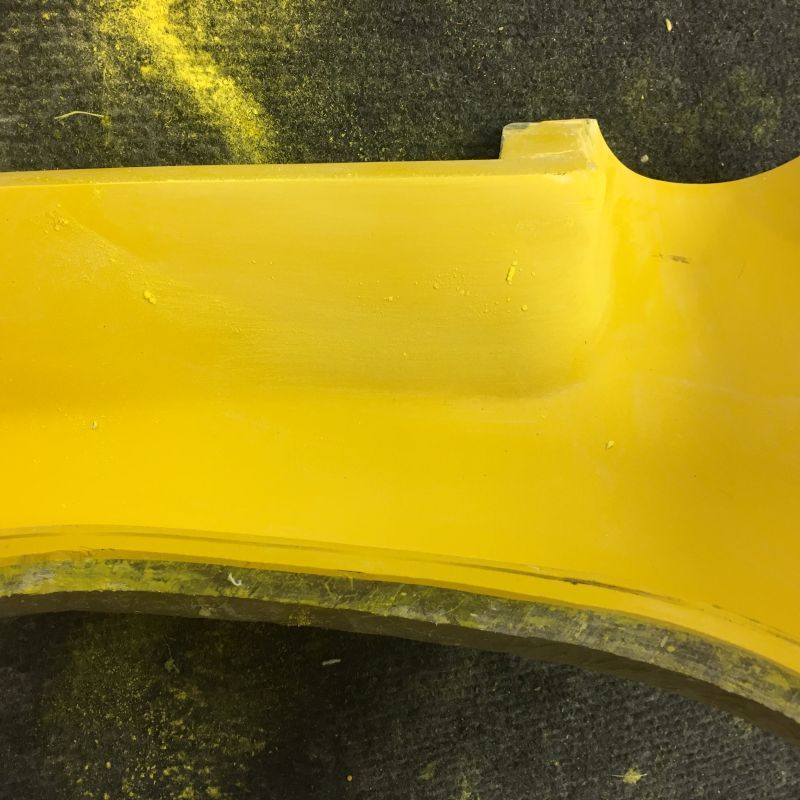
Having gelled the repairs on the base section it was time to flat them back.
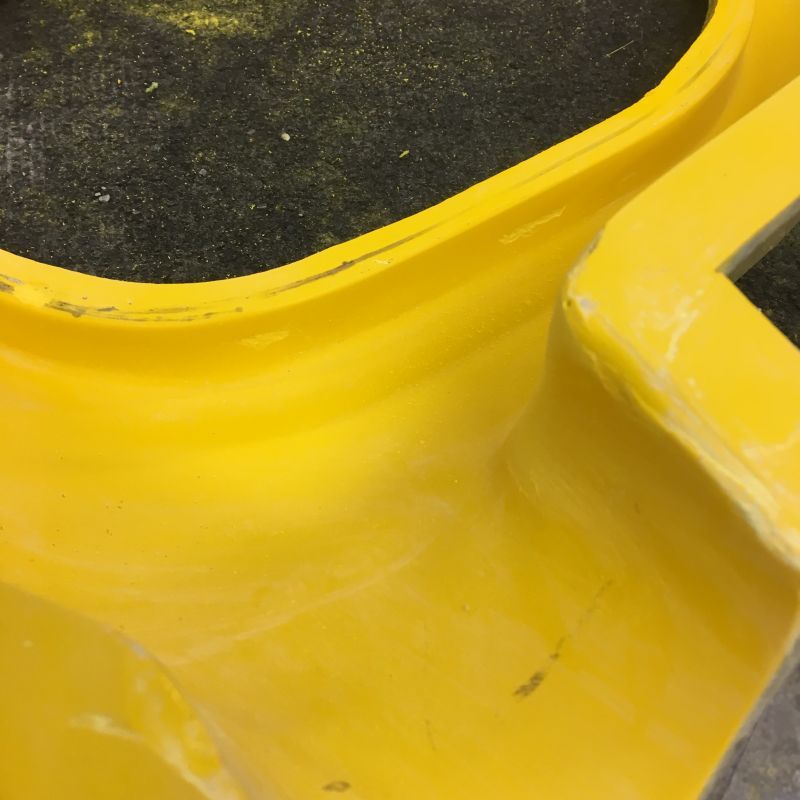
The question is how to rub these down but not make finger tracks or alter the shape by rubbing too hard and struggling to get a block in to the corners .
The radii are also of concern.
There are some tricky areas here but they can be sorted no problem
This is how I tackle the issues.
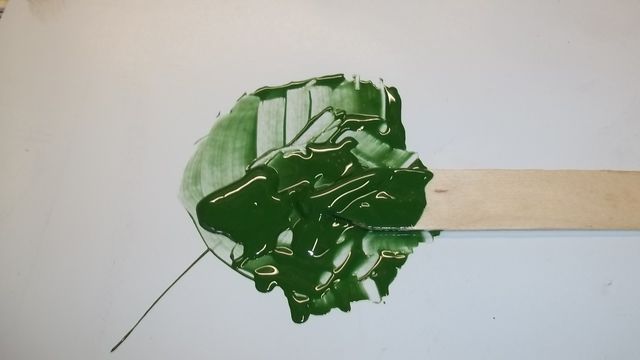
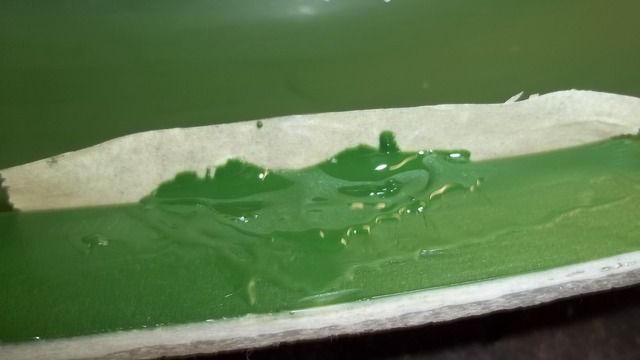
1 Take a section of paper and a wooden bat.
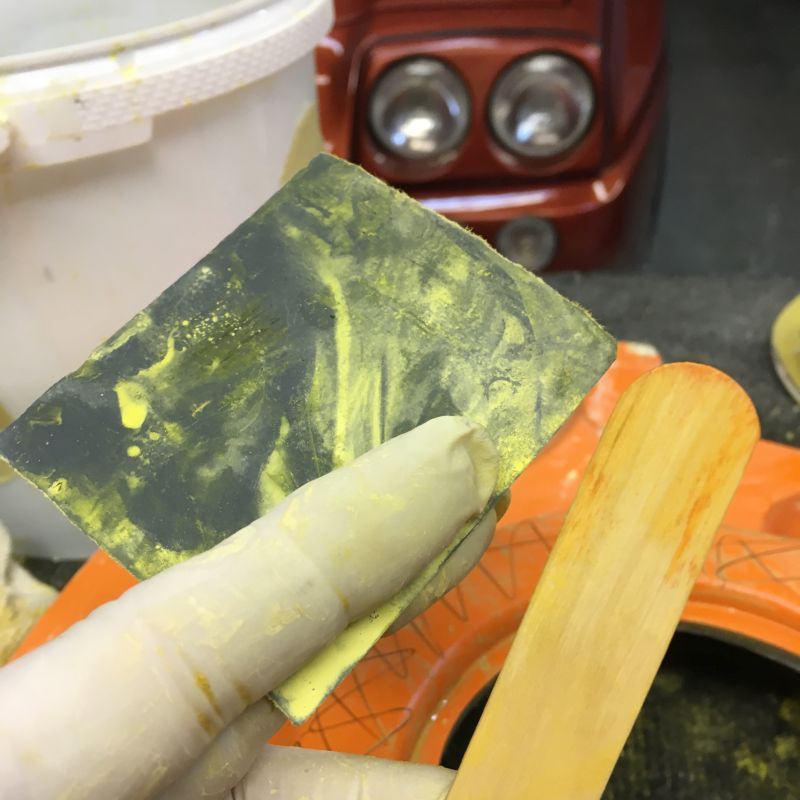
2 Wrap it tightly around the bat and then get it wet.
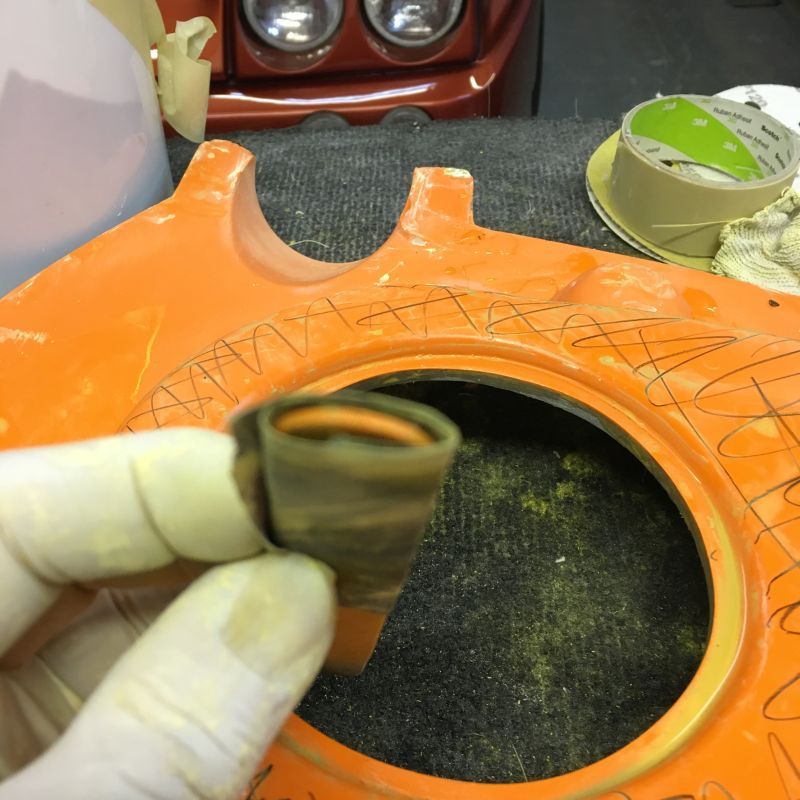
3 With the repair site marked up it was just a case of working away with the bat and as it is so small and thin it can be worked into the awkward areas with ease.

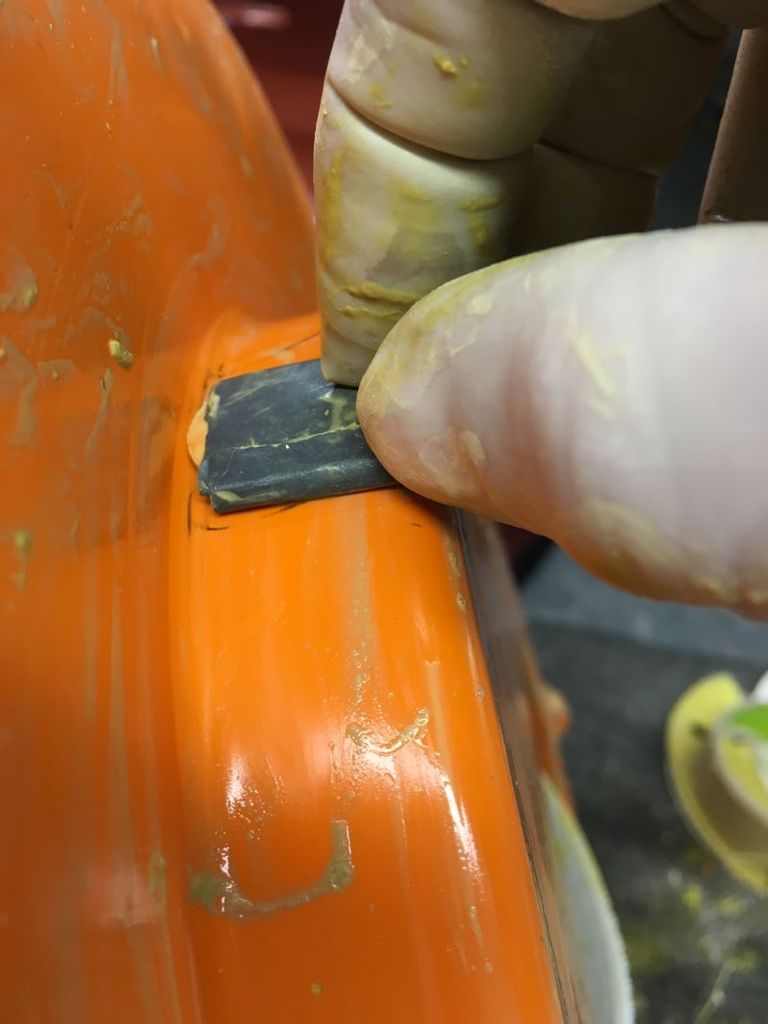
In the last picture you can see that the bat is slightly lower than the paper and there is a reason for this.
As I had spent some time getting the radius right at the base I did not want to mess these areas up so by extending the bat through the paper you create a stop so all you are rubbing down is the flat face and not cutting a groove with the paper on the radius.
Using this method also allows for you to get right into the corners whilst allowing you to see where you are working.
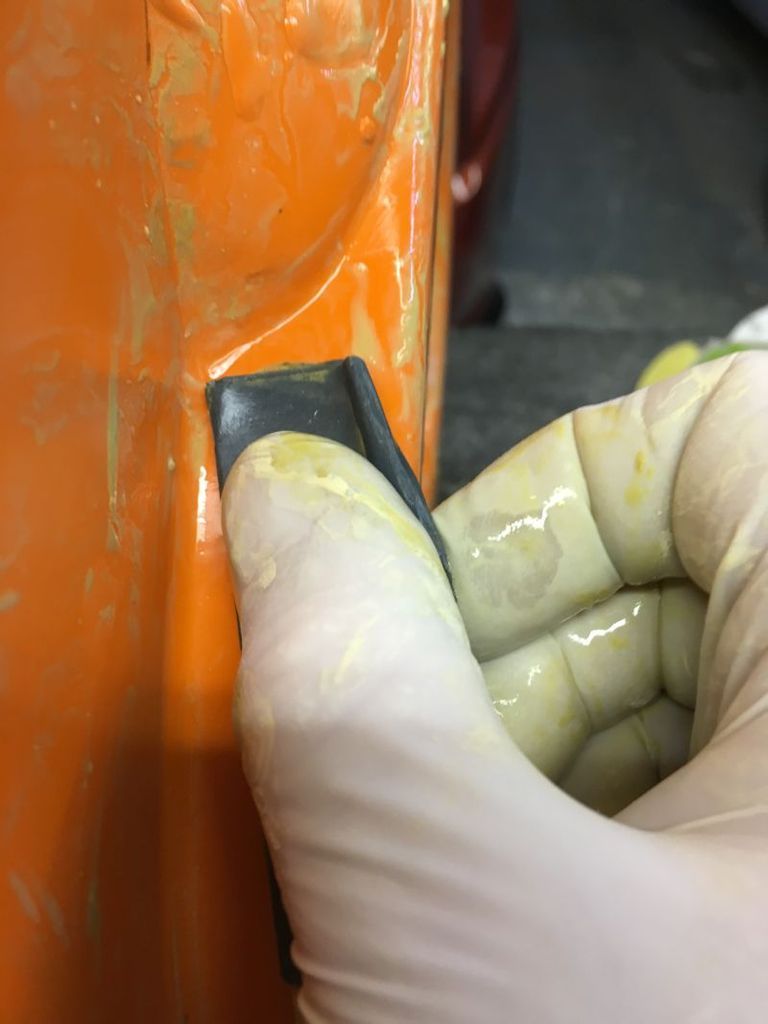
Working away methodically and with lots of water you eventually end up with great looking repairs and all corners radii and flats exactly as they should be.
I just have a small amount left on the base plate to do now so all is looking good .
Thats it for now
cheers
P
Well been back out there tonight and done a bit more.
Having gelled the repairs on the base section it was time to flat them back.


The question is how to rub these down but not make finger tracks or alter the shape by rubbing too hard and struggling to get a block in to the corners .
The radii are also of concern.
There are some tricky areas here but they can be sorted no problem
This is how I tackle the issues.
1 Take a section of paper and a wooden bat.

2 Wrap it tightly around the bat and then get it wet.

3 With the repair site marked up it was just a case of working away with the bat and as it is so small and thin it can be worked into the awkward areas with ease.


In the last picture you can see that the bat is slightly lower than the paper and there is a reason for this.
As I had spent some time getting the radius right at the base I did not want to mess these areas up so by extending the bat through the paper you create a stop so all you are rubbing down is the flat face and not cutting a groove with the paper on the radius.
Using this method also allows for you to get right into the corners whilst allowing you to see where you are working.

Working away methodically and with lots of water you eventually end up with great looking repairs and all corners radii and flats exactly as they should be.


I just have a small amount left on the base plate to do now so all is looking good .
Thats it for now
cheers
P
-
stevieturbo
- Forum Contributor

- Posts: 4054
- Joined: Sat Nov 18, 2006 6:22 pm
- Location: Northern Ireland
