New project

Please post current V8 projects IN BUILD NOW in here, Any non relavent posts will be removed,

Moderator: phpBB2 - Administrators

gelmonkey
Sergeant Monkey Face
Posts: 1307
Joined: Sat Jun 27, 2009 11:58 am
Location: plymouth

Post by gelmonkey »

Hi John
It is only simple because Mike made such a good job of the plug.
Add that to the fact that anyone can do this kind of work with a bit of guidance and it becomes nothing like the black art that some people think it is.
Do you have any ideas of this motorbike fairing that you are planning on making?
I know that you are a couple of miles away :lol: but if I can or you need help I will do my best.
cheers
P


kiwicar
Forum Contributor
Forum Contributor
Posts: 5461
Joined: Sat Nov 18, 2006 5:00 pm
Location: Milton Keynes

Post by kiwicar »

Hi Paul
You comments about the plug are taken as a great compliment. However over the years I have laminated up a few things and I have never found it simple to get CSM to wet out as thoroughly and cleanly as you do, especially into the corners by the fences. For me you just get it to the stage where the the air bubbles are worked out and it finally agrees to go into the corner and the stuff decides it is easier to stick to your brush/ roller than the laminations below and you are in a real mess!
As an amature like myself you can get good results with the stuff, but I can only do it by taking it an smaller stages, two maybe three layers of lamination at a time. I would not even attempt 5 in one go, apart from anything else I cannot work quickly enough to get it all wetted out before the resin goes off. Your experience shows also in how little mess you make while working you don't want to be within 10 feet of me when I use polyester resin.. . .you would stick :lol:
Best regrads
Mike
poppet valves rule!
gelmonkey
Sergeant Monkey Face
Posts: 1307
Joined: Sat Jun 27, 2009 11:58 am
Location: plymouth

Post by gelmonkey »

Hi Mike
Its only because I'm an old fart and have had a bit more practice than some at this malarky that it looks neat.
That's all.

cheers
P
User avatar
Ian Anderson
Forum Contributor
Forum Contributor
Posts: 2448
Joined: Sun Nov 19, 2006 9:46 pm
Location: Edinburgh

Post by Ian Anderson »

Mike and Paul
That looks fantastic and Paul thank you for putting up such an excellent blow by blow commentary

I have linked this to the GT40 site as (And Paul is aware of this) there are a number of people trying to do similar lay ups on their cars.

Paul you certainly make it look easy

cheers
Ian
Owner of an "On the Road" GT40 Replica by DAX powered by 3.9Hotwre Efi, worked over by DJ Motors. EFi Working but still does some kangaroo at low revs (Damn the speed limits) In to paint shop 18/03/08.
gelmonkey
Sergeant Monkey Face
Posts: 1307
Joined: Sat Jun 27, 2009 11:58 am
Location: plymouth

Post by gelmonkey »

Just hope it helps a bit and is not too boring.
p
gelmonkey
Sergeant Monkey Face
Posts: 1307
Joined: Sat Jun 27, 2009 11:58 am
Location: plymouth

Post by gelmonkey »

Hi All
No pics tonight as even though work has progressed it has been slow as the cradle structure takes a bit of time and to post up pics would be like getting half p*ssed,not much point showing half a job.
I will finish the cradle completely tomorrow and then show how that was undertaken.

cheers
P
gelmonkey
Sergeant Monkey Face
Posts: 1307
Joined: Sat Jun 27, 2009 11:58 am
Location: plymouth

Post by gelmonkey »

Morning All
Even though there were no pics last night now might be a good time to just cover a few simple things that if you plan on having a go at some fibreglassing might help.

1 Make sure thast you have all of the gear that you need to hand before starting any kind of project.

2 Waxing is paramount in any mould preparation and if you are not sure how many coats you have put on put another 2 on.

3 Pre cut all of your laminates so that once you start laminating you can go right through and not waste any materials.

4 When gelling or laminating get a box of thin Latex gloves and put 2 or 3 pairs on at a time.
That way if you do get in all kinds of mess (MIKE) you can just peel one pair off and then carry on.

5 Have plenty of buckets to hand for gel,resin or acetone.
In the industry we use acetone to clean out brushes rollers etc but dont smoke over it as it is VERY FLAMMABLE.
All of the fluids that are being used on this project are flammable and without stating the blindingly obvious, be careful.

6 Have plenty of cloth rags to hand as you can use acetone on a rag to tidy up any spills or wipe resin ,gel catalyst off your skin.
Do not use acetone for prolonged periods on your skin as it enters your blood stream in 30 seconds and can cause health problems later on.

7 Keep your catalyst sealed at all times when not being mixed with resin or gel.
We use Butanox preoxide and this is again extremely dangerous stuff if not treated with total respect.
Spills and splashes on your skin WILL cause chemical burns.

8 Wear some kind of overall as your better half will go balistic if you go into the house covered in glass and resin.
Not that I speak from expierience you understand :lol:

Whilst there are numerous other things that could be covered at this time it would become very boring to read so all I will say is this....

"At the end of the day working on our projects is supposed to be fun and if you do want to have a go then these little tips may help you acheive what you want."

If anyone needs a bit of help or needs a question answered then please either pm me and I will give you my phone number or ask on here.

I will continue with the build tonight so stay tuned.

Lecture over

cheers
P
kiwicar
Forum Contributor
Forum Contributor
Posts: 5461
Joined: Sat Nov 18, 2006 5:00 pm
Location: Milton Keynes

Post by kiwicar »

Hi Paul
I have a question!! where do you get acetone, in quantities larger than in the bottle of nail pollish remover in Karen's handbag?
Are there any restrictions on how much of the stuff you can store at home?
Best regards
Mike
poppet valves rule!
gelmonkey
Sergeant Monkey Face
Posts: 1307
Joined: Sat Jun 27, 2009 11:58 am
Location: plymouth

Post by gelmonkey »

Evening guys
Here we go then with the cradle section.
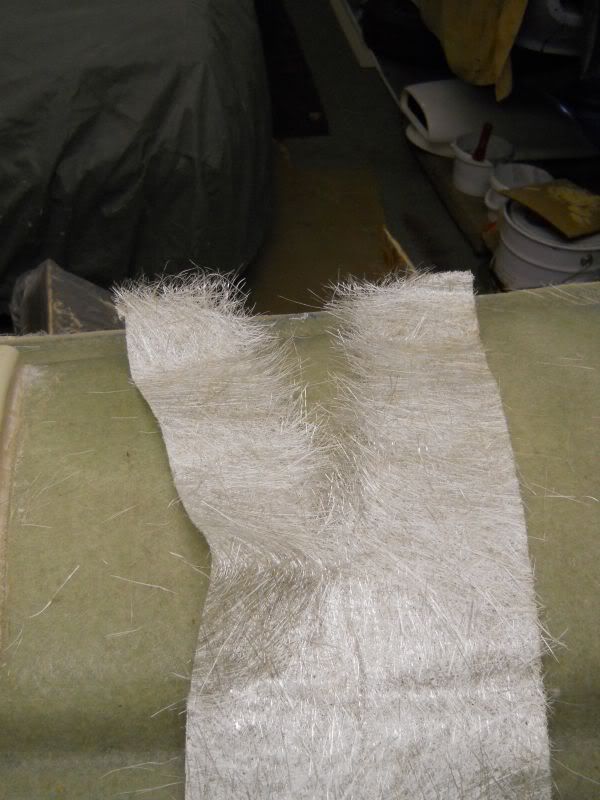
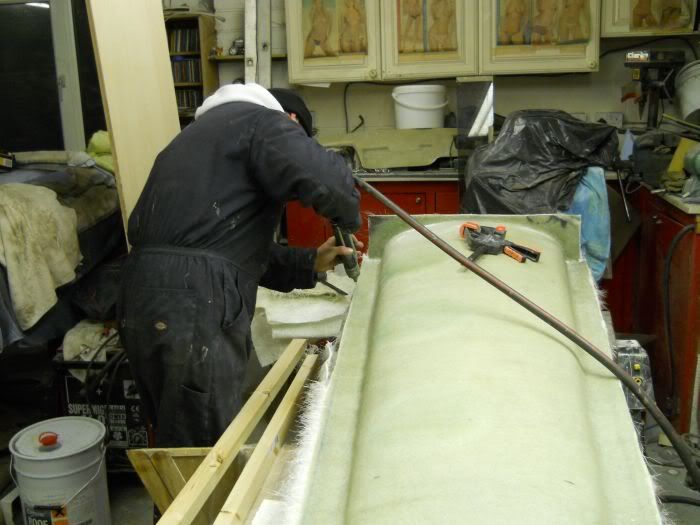
The main section was roughly trimmed down with the air hacksaw for two reasons.

1 Getting glass splinters in your mitts is not so good and unless you get them out right away they casn work their way in and stay there for good.
I have splinters in my fingers that have been there nearly 30 yrs.

2 When I'm working I try to keep my station as clean as possible as this for some strange reason just 'feels better'.(Yeah I know WEIRDO)

Image

Image

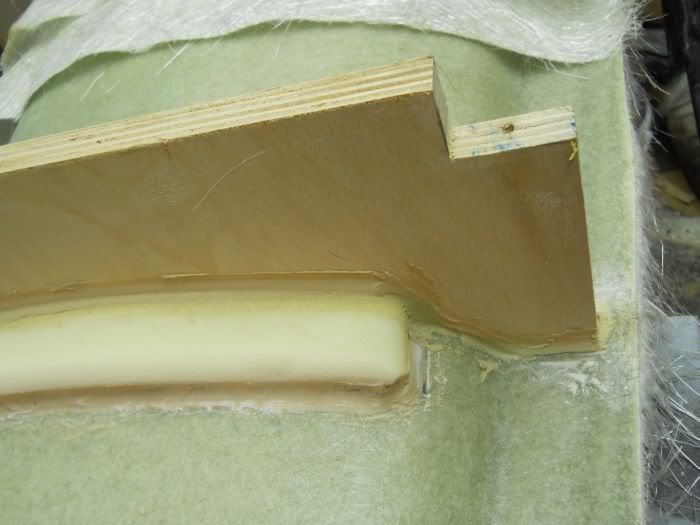
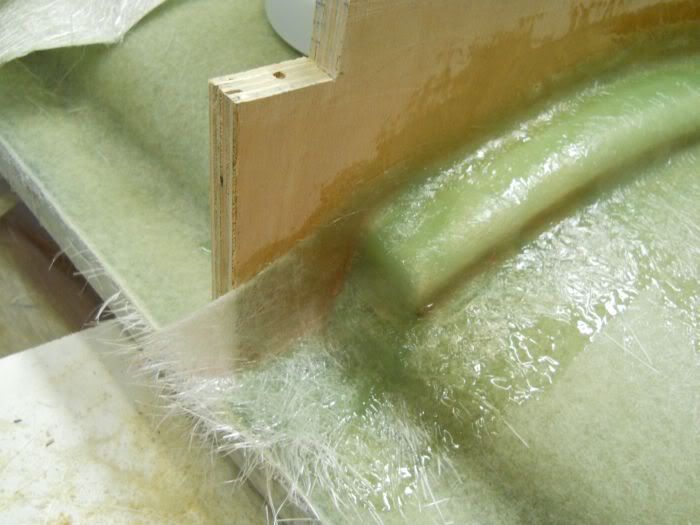
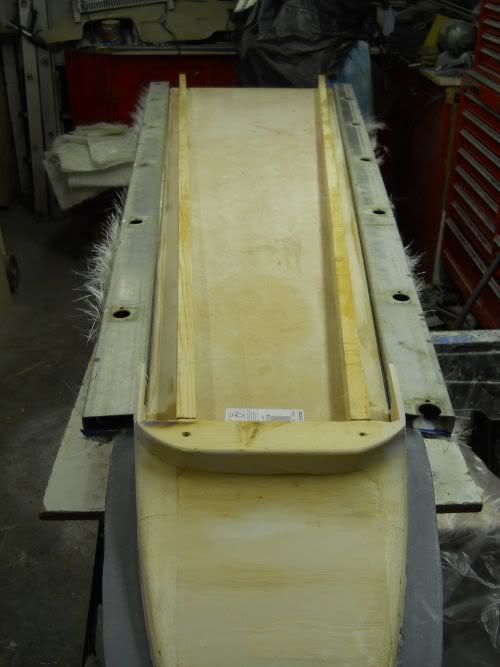
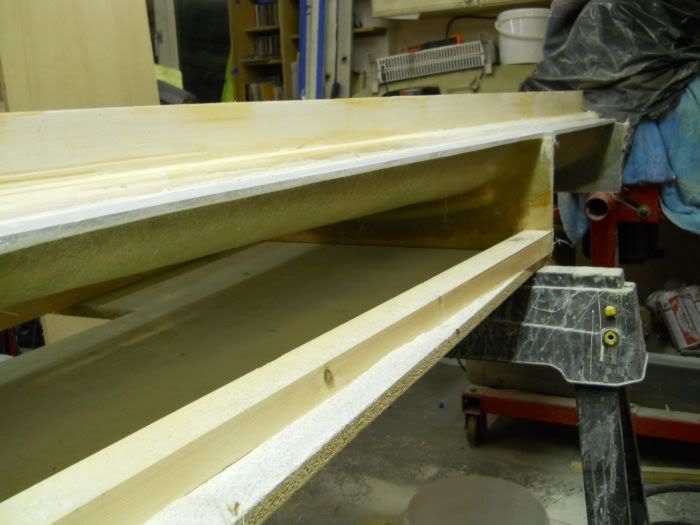
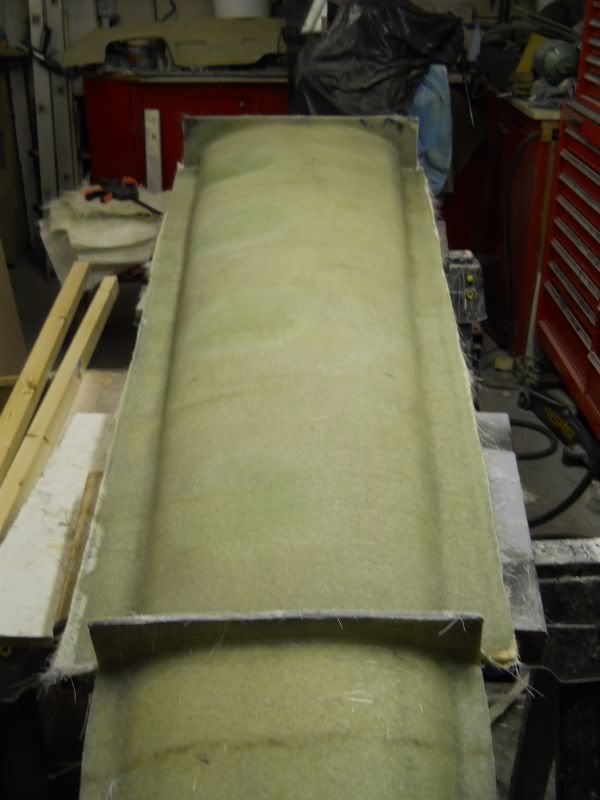
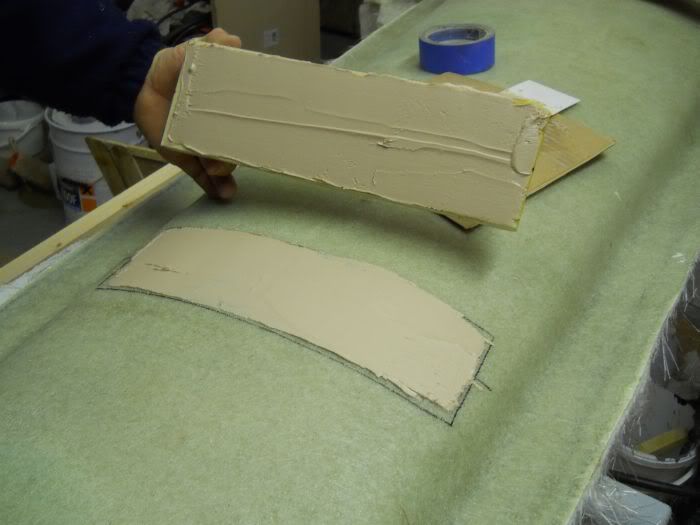
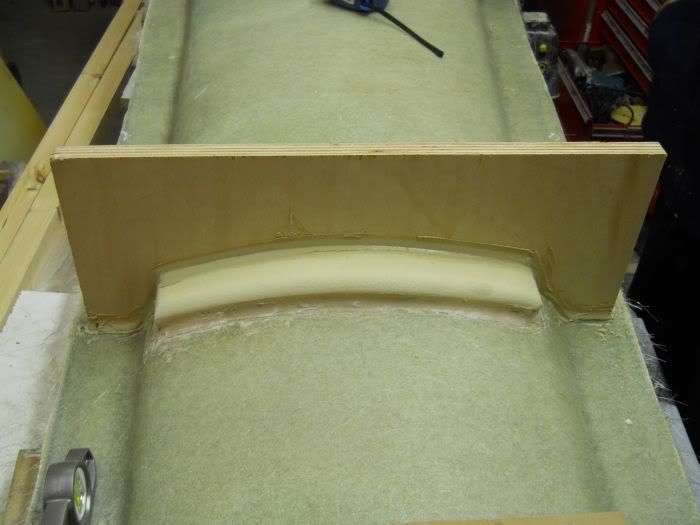
With the mould trimmed down it was time to break out the 1" thick bracing foam and cut that to size.

Image

Image

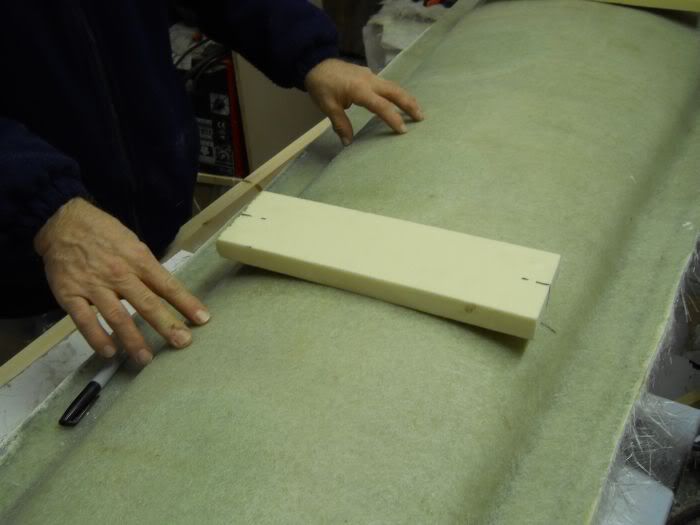
The foam is fairly rigid but with a bit of persuasion it will bend.

Image

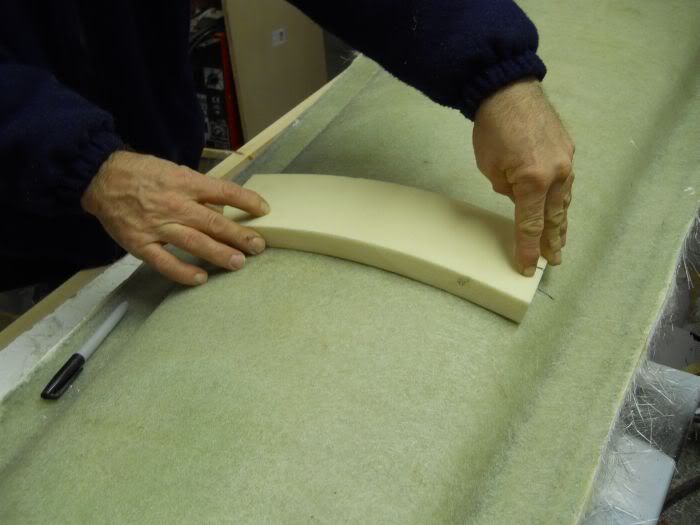
With measurements of 20" from each end of the flanges the areas were marked out on the laminates and then skimmed with car body filler and plonked into place.
They were then held in position with pig blocks (or kin heavy weights with handles on them)

Image

Image
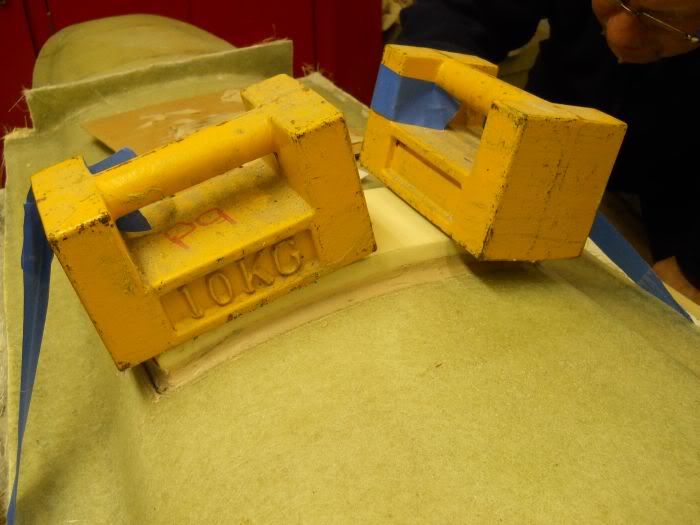
It should be noted that the CAVE TROLL hands belong to my very good friend John who came down to help for the evening.
Brilliant craftsman but absolutely crap when trying to weld stainless steel,another story another time that one eh John :lol:

A good point to note at this stage is that all Polyester resins and fillers go through a stage of exothermation which means that they generate heat as they cure and then as it cures it shrinks back causing an almost vacum like situation which then transfers to the mould itself and with something like this it is much better to do a slow/minimum hardener mix which allows for curing without pulling the underlying substrates away from the plug.

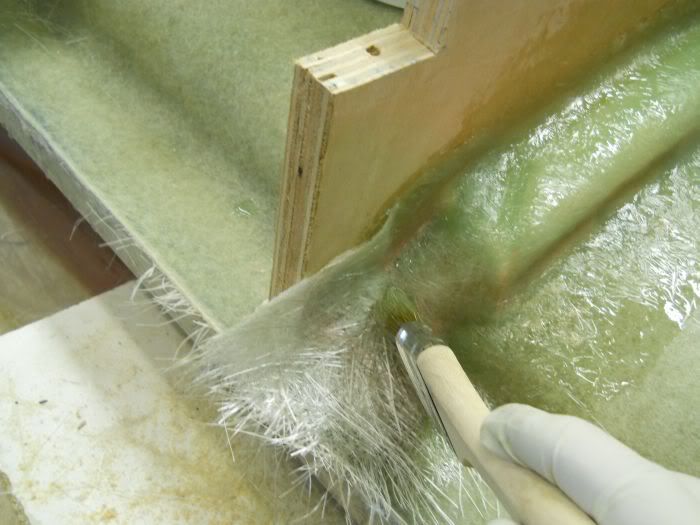
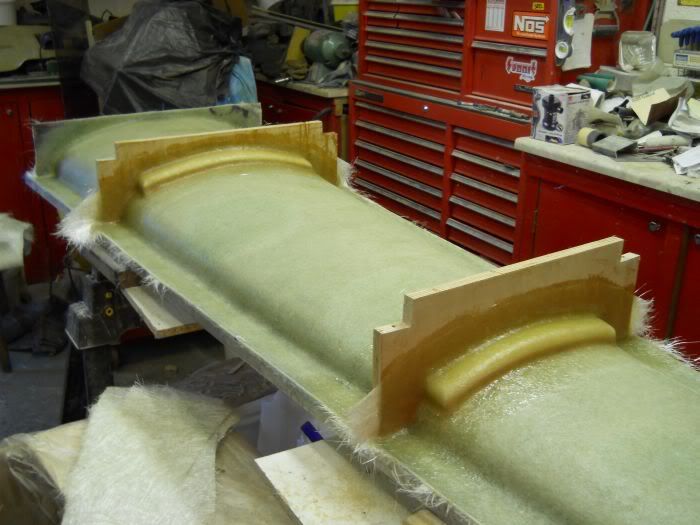
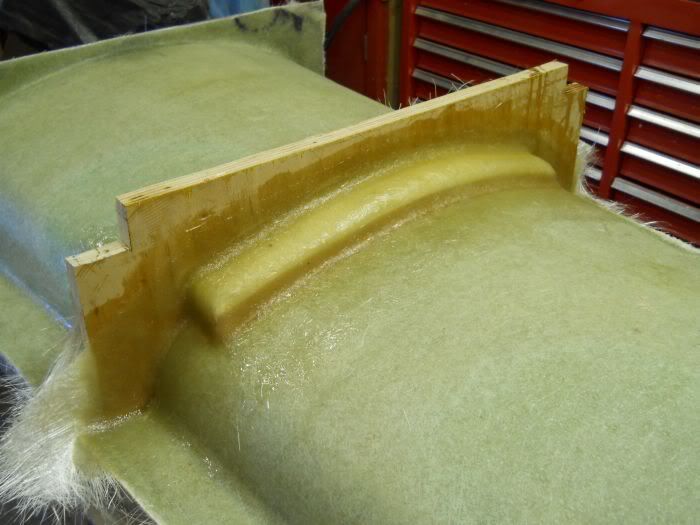
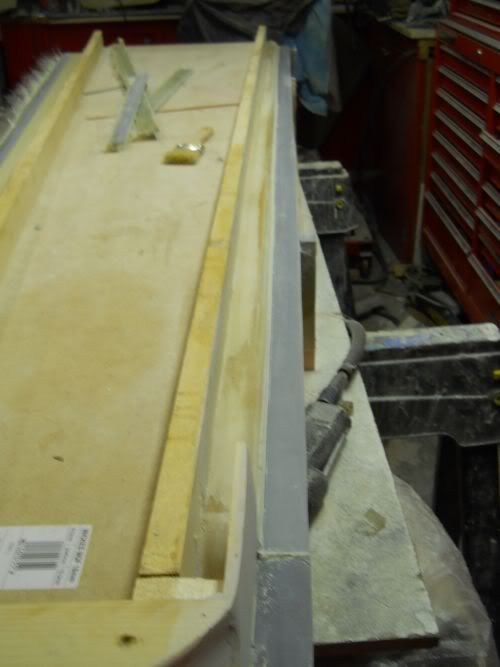
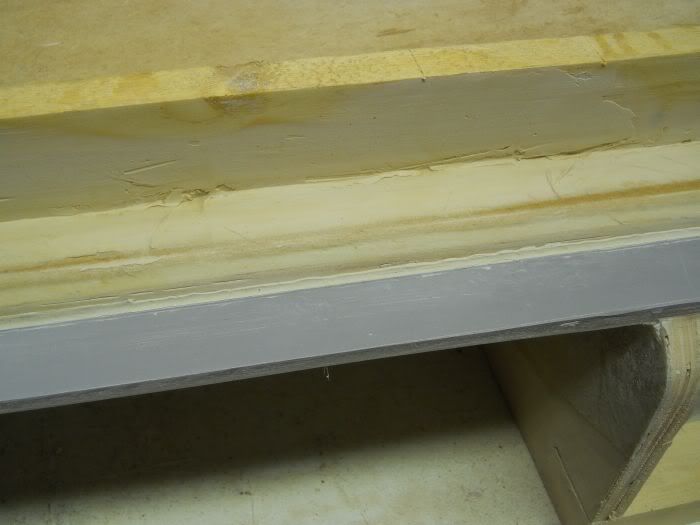
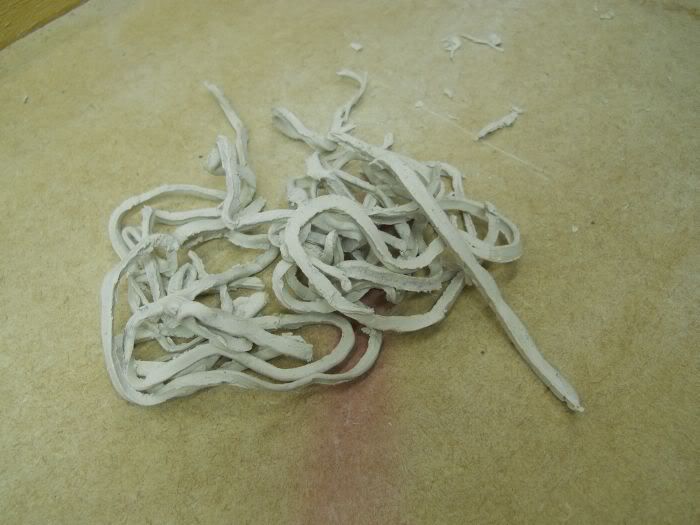
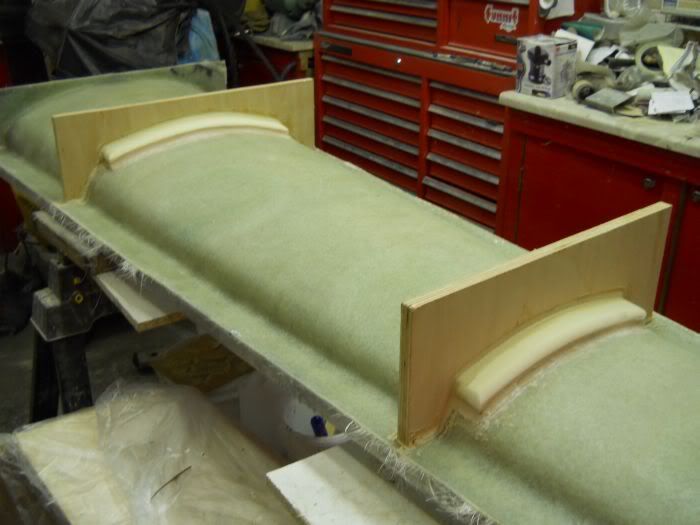
As the filler cured on the second brace we cut some cardboard and scribed the shape of the first brace to transfer to wood once we were happy.

Image

Image

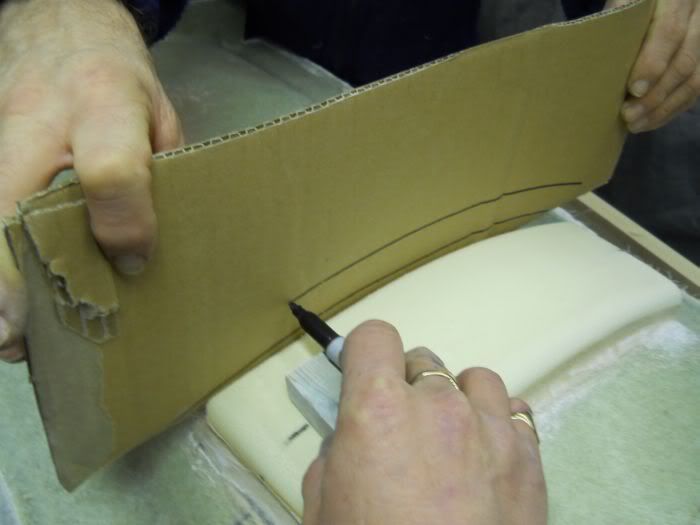
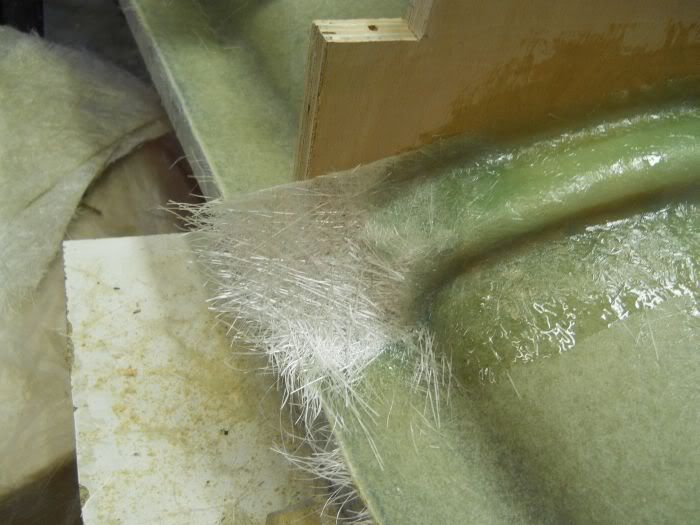
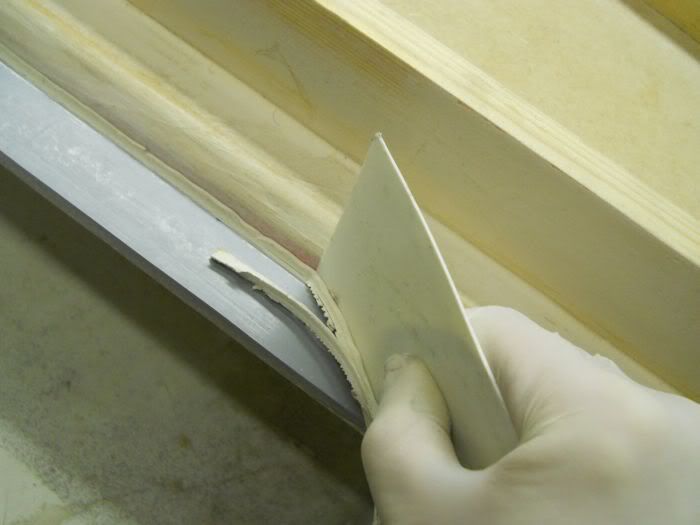
And then cut to fit and coved in with filler.

Image

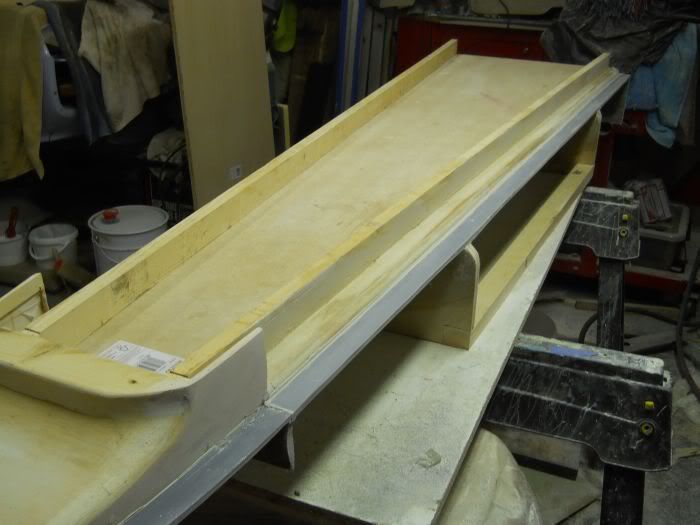
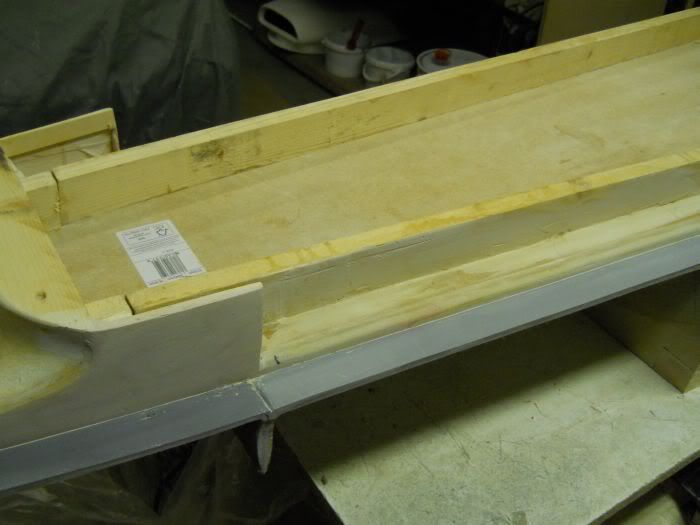
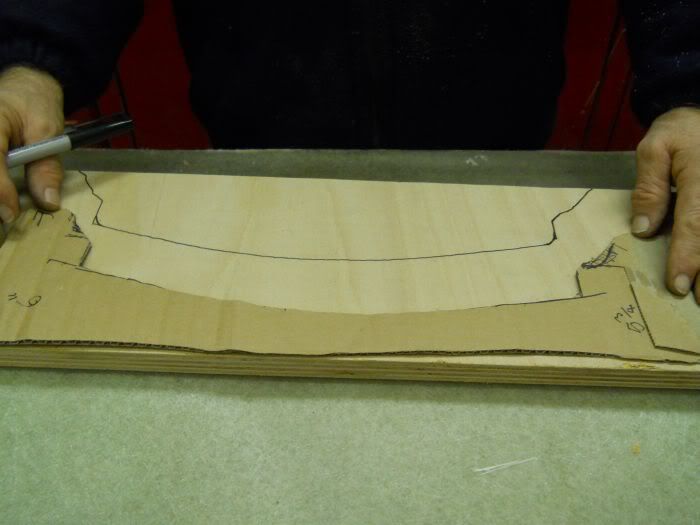
The same was done on the other brace and we ended up with this.

Image

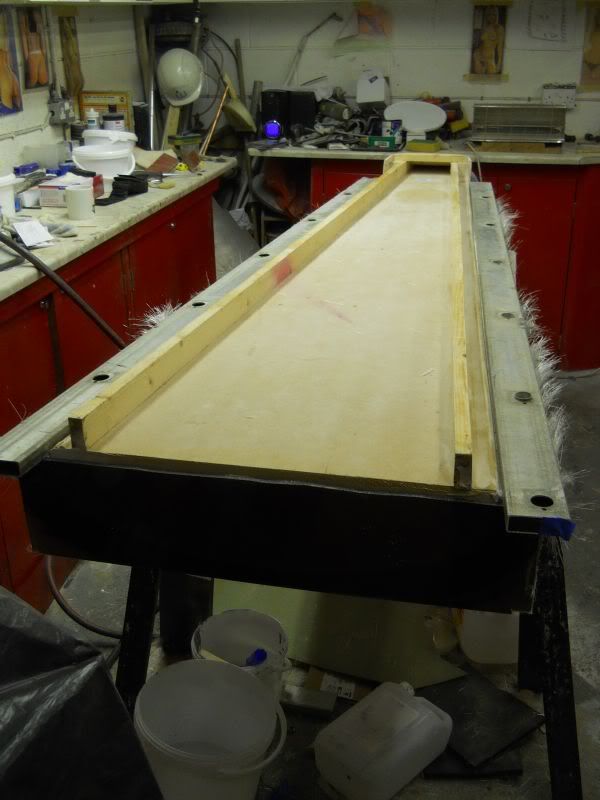
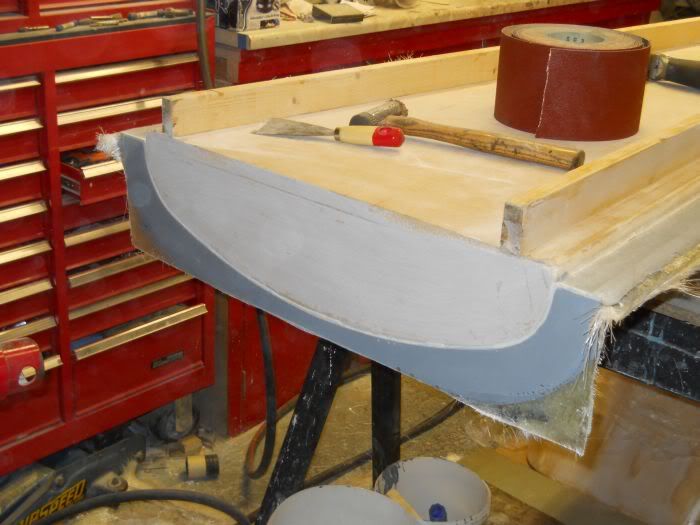
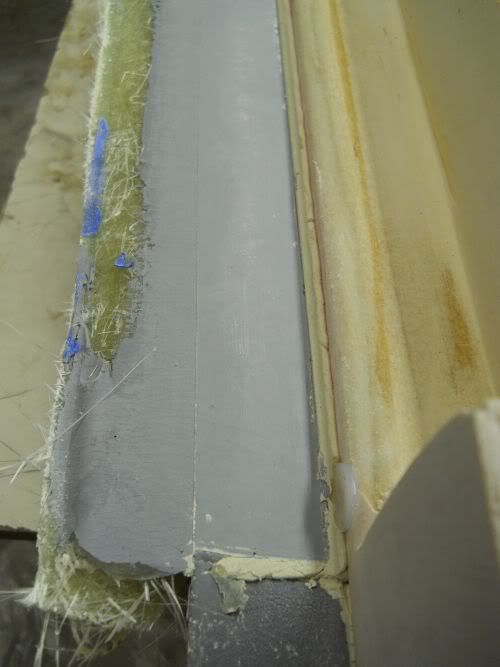
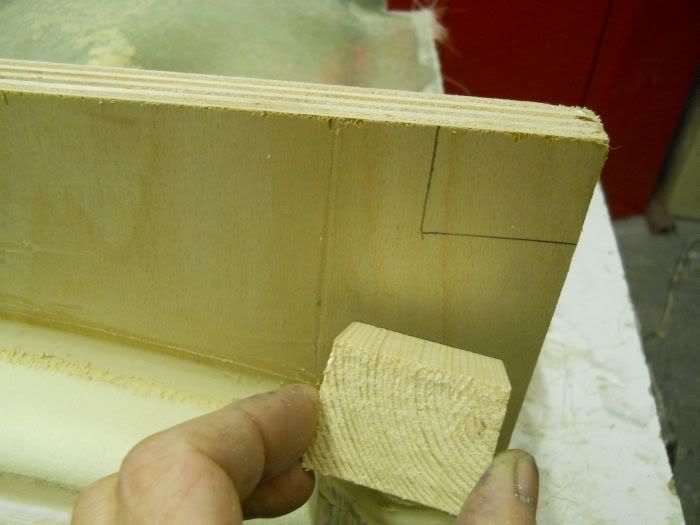
The corners were then cut to the shape of the timbers being used for the base lengths.

Image

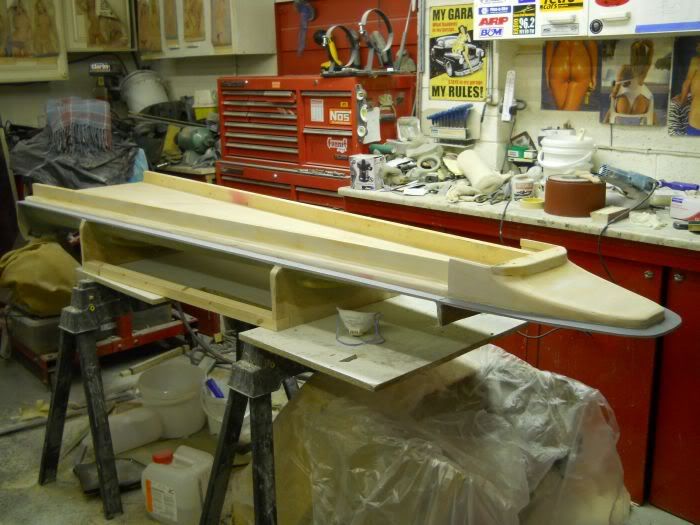
The base lenghts were then screwed onto position, trimmed and that was that, cradle completed.

Image

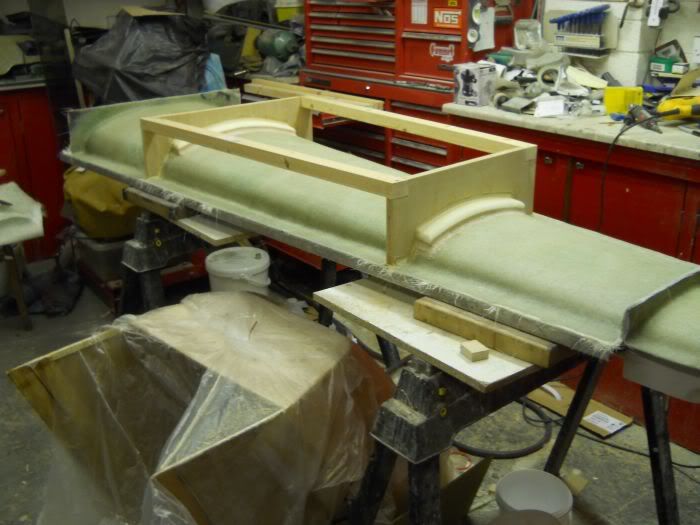
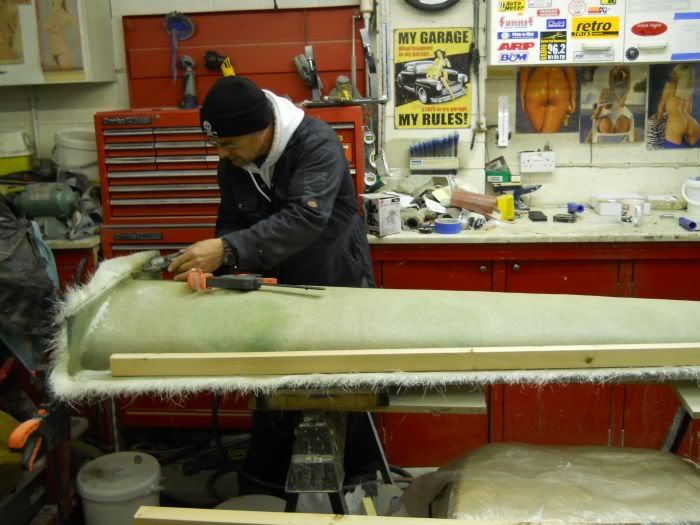
You might wonder why the cradle has not been glassed in yet and the answer is simple.
The temperature has to be fairly stable whilst the resin is curing (anything above 10 degrees c is fine)
The last 2 evenings have seen the temperature fall very quickly and whilst it is okay to have a heater in the workshop you will have to switch it off when you finish for the night.
The temperature will then obviously drop and this will cause an uneven cure rate which could and often does lead to crap results.
Glassing will take place tomorrow during the day.

Ok all thats it for tonight.

cheers
P

Mike you should be able to get acetone from all grp suppliers.
It is often known as brush cleaner and sold as such.
I buy it in 5 gallon kegs but could if I wanted have a 40 gallon barrel of it at home
:shock:
Do you want me to get you some for when you come down?
User avatar
ged
Forum Contributor
Forum Contributor
Posts: 668
Joined: Tue Feb 10, 2009 2:09 pm
Location: North Wales via NZ
Contact:

Post by ged »

Fascinating stuff Paul!!

Regards Ged.
Last edited by ged on Sun Jan 15, 2012 6:13 pm, edited 1 time in total.
gelmonkey
Sergeant Monkey Face
Posts: 1307
Joined: Sat Jun 27, 2009 11:58 am
Location: plymouth

Post by gelmonkey »

Hi All
Here we go again then ,glassing in the cradle.
Using off cuts from the main section laminates these were first offered up ,torn to rough size and then split down the middle.

Image

Once all sections were done they were layed out right to hand (much easier to work like) this.

Image

Resin mixed wetting out begins.
I like to put the cut edge of the laminate to the top of the timber as the torn edges can be rollered into the main laminate section and you can get an almost seamless joint,it also makes it stronger.

Image

As you can see from this next shot there are a few corners and drops to work and it can be a bit tricky but if you take your time you can gently ease the laminates into position.

Image

Image

Just keep teasing the laminates with the brush and the little buggers will go in eventually.

Image

Keep working away and in a short space of time you end up with this.

Image

Image

This will left to cure now overnight and then trimmed tomorrow evening.
Allow yourself plenty of time for curing even on small sections like this.
The timber lengths can then be re attached and the mould turned over for the final stages.

cheers
P
kiwicar
Forum Contributor
Forum Contributor
Posts: 5461
Joined: Sat Nov 18, 2006 5:00 pm
Location: Milton Keynes

Post by kiwicar »

Hi Paul
No I am OK on the acetone front for now, it was more a case of "do I have to have a licence/ permit for the stuff. If it can be got in reasonable quantities when I get resin then it is fine.
Best regards
Mike
poppet valves rule!
gelmonkey
Sergeant Monkey Face
Posts: 1307
Joined: Sat Jun 27, 2009 11:58 am
Location: plymouth

Post by gelmonkey »

Hi Mike
When you come down bring a couple of 2ltr milk cartons and I can dispense some for you no problem ok.

cheers
P
Cavman
Forum Contributor
Forum Contributor
Posts: 120
Joined: Mon Dec 31, 2007 10:07 am

Post by Cavman »

didn't get a chance o check this over the weekend, I was actually a bit excited when i realised there were 2 installments together today! :D it felt a bit like Christmas again! :lol:

as always, quality work and fascinating to read.

J
I wish I had a pound for every time some one told me "My Dad had one of those!"

'78 Cavalier Coupe GLS 2000
gelmonkey
Sergeant Monkey Face
Posts: 1307
Joined: Sat Jun 27, 2009 11:58 am
Location: plymouth

Post by gelmonkey »

Having dressed up like Nanook of the North this evening because it was bloody freezing I ventured out to the play house and carried on with Mikes mould.

Here are tonight's efforts.
After screwing the timber lengths back on the mould it was turned and this was mine and your first proper veiw of the underside.

Image

Image

The next thing to do was release the fences and this was accomplished by using a wide paint scraper pushed into the now underside joint.
Gently tapping it up the length with a rubber sledgehammer the fences could be heard popping and sucking and then as if by magic the things came away in me 'and (How lucky was that ?)

Image

Image

Now remember the blue tape a little while back?
Well now all will become clear,the gel takes the shape of everything it flows over and once the fences are released you have a perfect cut line to follow and to make your flanges neat and tidy.

Image

Also remember that the gel and the glass were taken out over the tape.
Well when you cut down the tape line you can virtually guaranttee that the laminate thickness will be the same for the full length thus making you a smart arse :lol:

Image
The edges of the cradle where they meet the flanges can then be shaped and I use a power file for this task,quick ,clean and simple to do.

Image

The next thing to do was scrape out the plasticine and a body filler spreader was used as it causes no damage to the plug.

Image

Image

Keep going until you end up with a bundle of snakes.
Don't throw this away it will be used again.

Image

With that done a quick sweep out of the joint with a brush and then a wipe over with acetone and we end up with this a really neat joint and a locating ledge for the full length of the mould on either side.

Image

That completed we can see Mikes version of the Bullet Train or Bullet Slingshot if you like.
OR is it K9?
Or any other silly suggestions you might like to share.

Image

By this time Hypothermia was setting in so I called it a night.
Depending on temperatures tomorrow evenig we will either just wax the front section and gel or just wax the whole of the underside.

Ta ta
P
Post Reply

Return to “Your Garage Scene”