
Hi Mike
When I come up to get the plugs we can have a look at the screen situation together.
There is a new bonding agent just released which may well help with getting ally to blend into the grp.
We could have a look at making a surround from grp itself and feathering that into the top of the body.
There are plenty of options available to you we just need to find the right one ok.
Will look forward to a call after your hols and we can take it from there.
cheers
P
New project
Moderator: phpBB2 - Administrators
Hi Paul
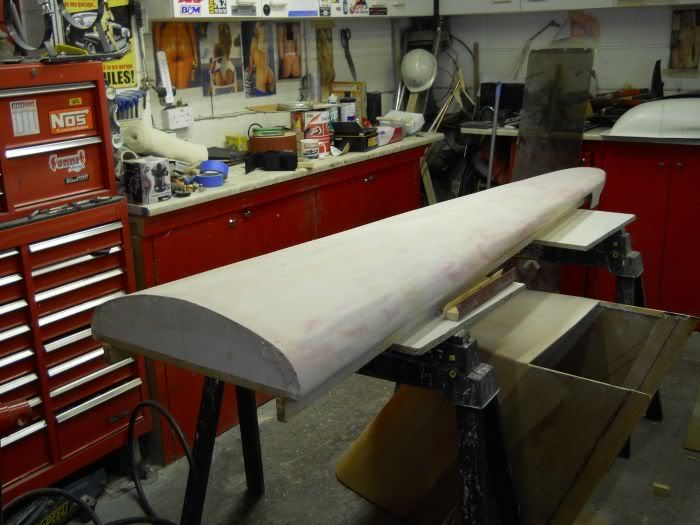
Thanks, the "plug" for the rear is in a mixture of MDF, hardboard and balsa, strange choice in some ways, but I hoped I would be able to work it into the right shape quite easily. It turns out over the last 5 years since I last worked with balsa I had forgotten quite how allergic I had become to the stuff over the previous 35 or so years of working with it. I am now more than a little embaresed by the fact I have created something I am going to have more than a little difficulty in finishing, though now there is a bit more breeze about I should be able to sand it a bit outside then seal the surface and work it that way. What sort of surface do you need to take a mould off? will a water based acrilic varnish over emulsion paint and filler work? or do you need somthing tougher?
Best regards
Mike
poppet valves rule!
Hi Mike
Ideally you would use a shellack based timber seal.
This stuff stinks to high heaven but is very good.
Typically I have galloooons of it here but not much use to you up there.
I suspect that I will have to do a bit of final finishing prior to the start of the moulding process so would not worry too much.
Bear in mind that the plug will be waxed up at least 8 times before I lay any gel onto it so that will help to seal things as well.
If you need to work indoors whilst sanding just fire up Mrs Kiwicar's hoover and give yourself a fighting chance(she wont mind honest ).
).
Might be able to send some of the sealer to you but you would need to let me know how much you need.
cheerds
P
Ideally you would use a shellack based timber seal.
This stuff stinks to high heaven but is very good.
Typically I have galloooons of it here but not much use to you up there.
I suspect that I will have to do a bit of final finishing prior to the start of the moulding process so would not worry too much.
Bear in mind that the plug will be waxed up at least 8 times before I lay any gel onto it so that will help to seal things as well.
If you need to work indoors whilst sanding just fire up Mrs Kiwicar's hoover and give yourself a fighting chance(she wont mind honest
Might be able to send some of the sealer to you but you would need to let me know how much you need.
cheerds
P
Hi Paul
I have shellack sanding sealer in the shed. I have also made a Mandolin, guitar, ukelalie and part way through a bariton guitar, you need the stuff to seal sound boards and bodies as with just normal varnish in the surface they don't "ring" properly. It dries nice and quickly at least.
Best regards
Mike
poppet valves rule!
And so we get to a bit of plastic surgery for Mikes ride.
After spending more hours than he cares to remember making body plugs for the slingshot and a visit down to Gelmonkey Towers very recently here is a continuation of Mikes project from a GRP perspective.
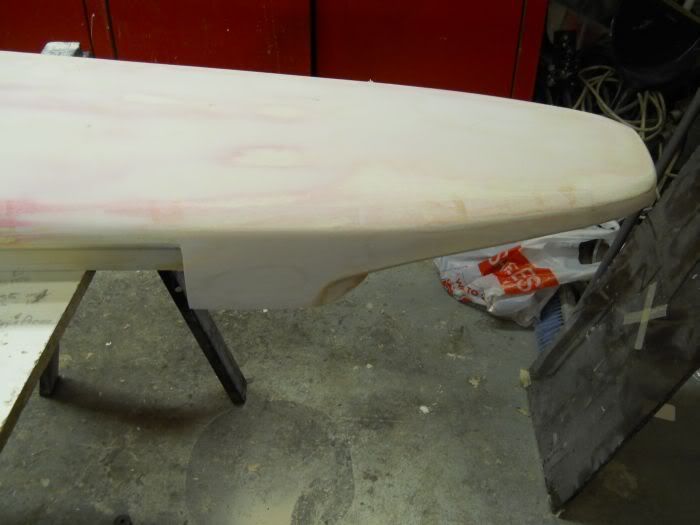
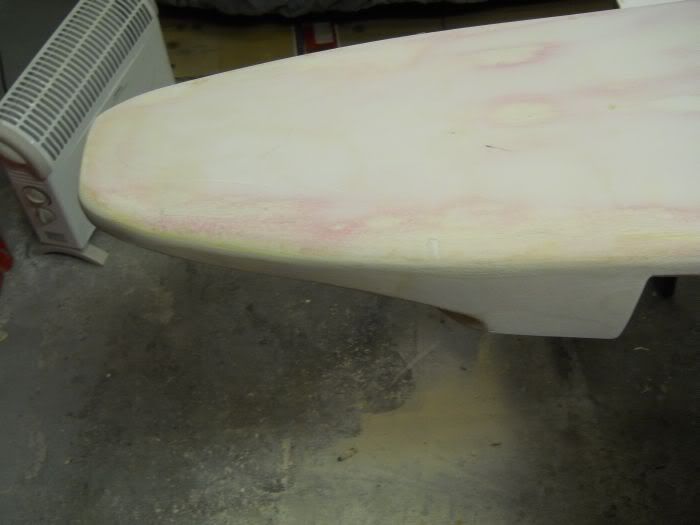
The main plug needed a bit of tweaking here and there and after a good long look at how the mould is going to be made it was decided to go for a 5 part mould so that it will all release.
The most awkward section is right at the nose and this has had to be made right for moulding.
Once that was done fences were cut and shaped to follow the contours around the nose and then coved in with Plasticine and then 8 coats of release wax were applied.
The fences have been tack welded with hot glue just to hold them in place.

Once the first coat of gel has gone on they are then fixed properly until release time.
Another 4 coats of gel have to be applied before any glass can go on.
This should be tomorrow if all goes to plan.
cheers
P
After spending more hours than he cares to remember making body plugs for the slingshot and a visit down to Gelmonkey Towers very recently here is a continuation of Mikes project from a GRP perspective.
The main plug needed a bit of tweaking here and there and after a good long look at how the mould is going to be made it was decided to go for a 5 part mould so that it will all release.
The most awkward section is right at the nose and this has had to be made right for moulding.
Once that was done fences were cut and shaped to follow the contours around the nose and then coved in with Plasticine and then 8 coats of release wax were applied.
The fences have been tack welded with hot glue just to hold them in place.
Once the first coat of gel has gone on they are then fixed properly until release time.
Another 4 coats of gel have to be applied before any glass can go on.
This should be tomorrow if all goes to plan.
cheers
P
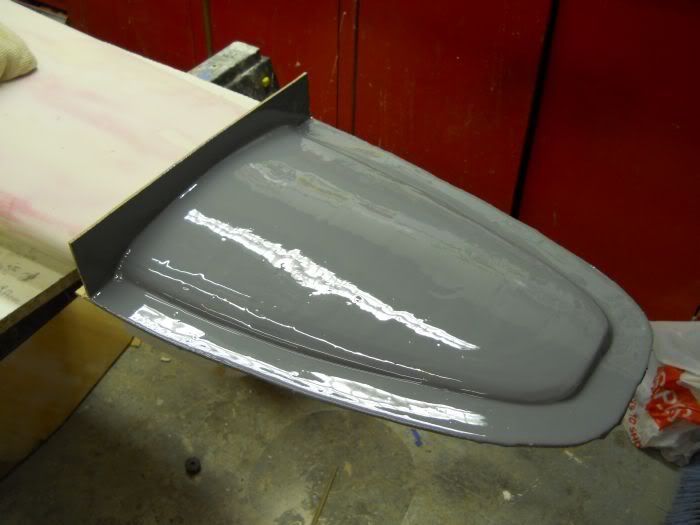
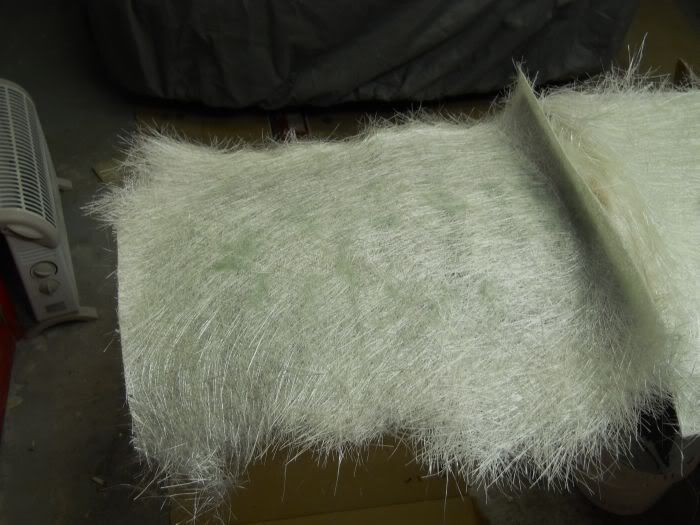
With the gel now cured and with time allowed for shrinkage it was time for some glass to go over the top.
I have used 600gms chopped strand matting for this as it is easy to use and soaks the resin through quite quickly.
The laminates were cut roughly to size and then the gel coat was painted with a fairly heavy resin and the first of 5 laminates placed on.
You can see the resin soaking through on this first photo.
That layer was wet out and then another 2 layers placed and wetted out before a good rollering session to get rid of the bubbles.
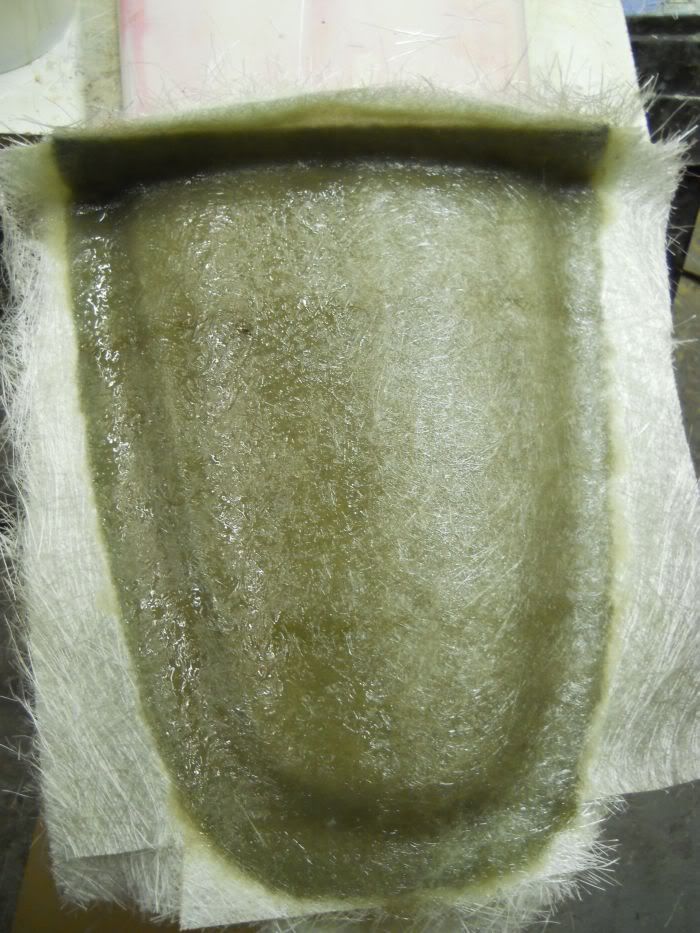
Another 2 layers were then laminated into place ,rollered and then trimmed with some laminate shears.
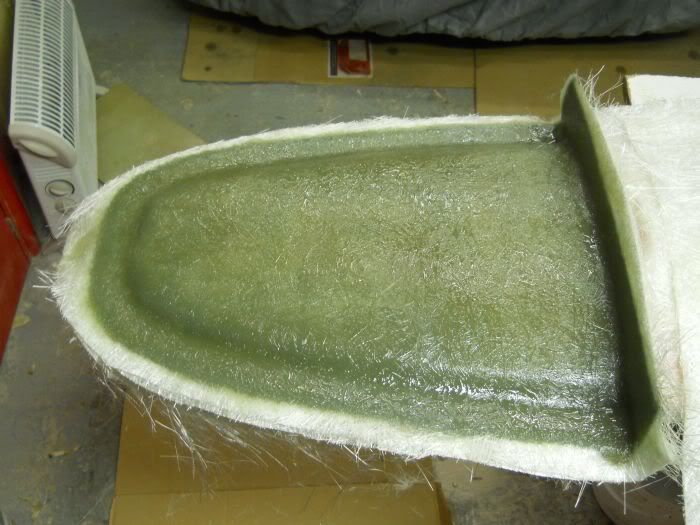
A final roller out and a final trim and we end up with the first of 5 sections of this multi part mould.
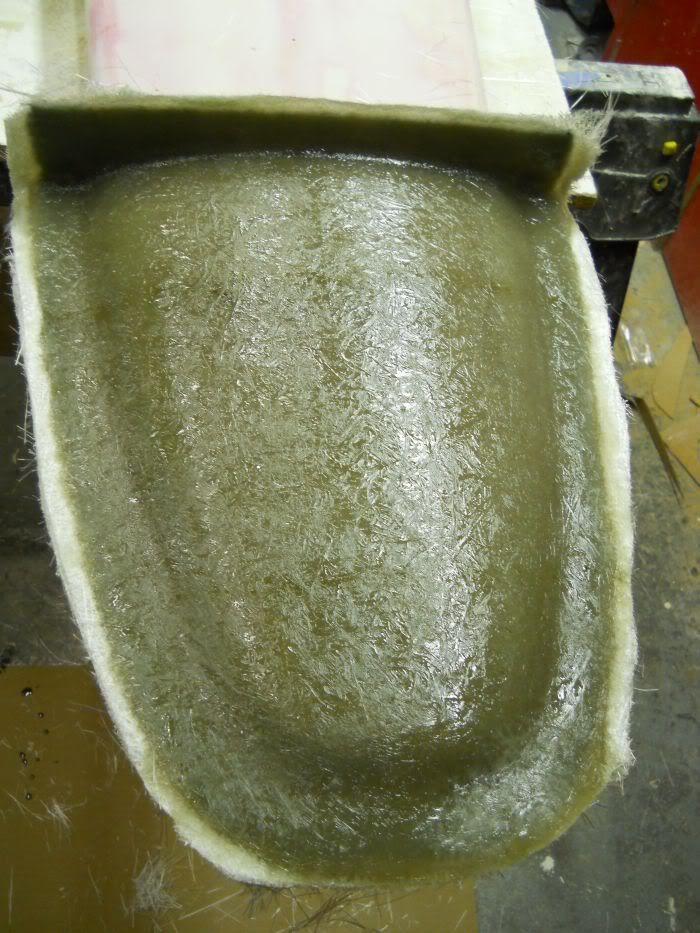
This all now has to cure for several days before I can remove the fence at the back and underneath and then start on the next section which will be the main surface so lots still to do.
cheers
P
I have used 600gms chopped strand matting for this as it is easy to use and soaks the resin through quite quickly.
The laminates were cut roughly to size and then the gel coat was painted with a fairly heavy resin and the first of 5 laminates placed on.
You can see the resin soaking through on this first photo.
That layer was wet out and then another 2 layers placed and wetted out before a good rollering session to get rid of the bubbles.
Another 2 layers were then laminated into place ,rollered and then trimmed with some laminate shears.
A final roller out and a final trim and we end up with the first of 5 sections of this multi part mould.
This all now has to cure for several days before I can remove the fence at the back and underneath and then start on the next section which will be the main surface so lots still to do.
cheers
P
-
unstable load
- Top Dog

- Posts: 1285
- Joined: Mon May 04, 2009 6:53 am
Hi John
I will leave the first section on the plug as even though it wi be cured enough for work to continue it will still want to twist out of shape if released.
Also it has to stay on for me to laminate up to and for me to create a true negative of the plug
The flanges become the parting lines for release and also for the mould bolting points.
It will become clear how it all works as things progress throughout the project.
Cheers
P
-
unstable load
- Top Dog
- Posts: 1285
- Joined: Mon May 04, 2009 6:53 am
OK, got it. So, once the mould is built up and you pop it off the plug will you need to do anything else to it or can you then proceed to manufacturing the part?
I suppose it all depends on the size of the part and the complexity of the mould whether it will need to be braced and strengthened further.
The work you do fascinates me, keep posting the pics, please.
I suppose it all depends on the size of the part and the complexity of the mould whether it will need to be braced and strengthened further.
The work you do fascinates me, keep posting the pics, please.
Cheers,
John
John
Hi John
The moud may need a bit of tweaking once it is all released but not by much.
Mike has done a pretty good job of the plug and through his own admission does not need it to be absolutely top dog.
The next section of the mould which will be started tomorrow evening is the main bulk of the mould and yes this will have 2 possibly 3 foam braces over the top to hold the shape.
I have spoken with Mike and I am going to make a full cradle for this mould so that once it is all released and then bolted back together in preparation for the true panel to be laminated it will actually sit nice and square and be quite simple to work without it rolling all over the place.
I think you followed the Splitter project that I did a while back and that mould was very simple in construction,this on the other hand is a bit more complex and having it stable when laminating will be a huge help.
I will keep the pics coming so that Mike and everyone else can see what is going on in my garage and I will try to explain each stage until I'm told to shut up
Am going to give working on it tonight a miss as I have been away all weekend modifiying and fitting some GRP wings to a Camaro and am a bit knackered to be honest.
More tomorrow though .
cheers
Paul
