
Hi Tom
Getting the fit right should not really be a problem.
Forgive me, but I dont think that that splitter looks too good on there.
It looks a bit of an after thought.
I think I would drop the back end down some and then tie the trailing edges into the wheel arches.
This would depend of course on the depth of the front valance.
It would also obviously depend on how YOU wanted the car /splitter to look and how original you wanted to keep things.
We can always bash some ideas around on here to see what other folks opinions are as well.
Whatever, I am happy to help you as much or as little as you want.
Regards
Paul
Making a front splitter from scratch.
Moderator: phpBB2 - Administrators
-
topcatcustom

- Forum Contributor

- Posts: 2965
- Joined: Sat Aug 09, 2008 11:53 am
- Location: Essex
- Contact:
I know what you mean, it looks good from the front but doesn't tie in very well from the sides. Anyway this is for another day so will stop hijacking your thread! Keep going with your good work! Can I assume that you are ready to pull the glass mould off the template and get it ready for making the actual piece now- or am I getting ahead of myself? 
TC
It bugs me when other people get their 'glass work looking so neat. Mine always seems to look like it was applied from a distance, by a blind monkey. 
Any tips how to get 'glass to fit around the outside of tight corners without bulging up? I try to keep to bigger radii, but sometimes it is just unavoidable.
Or is it best to use two pieces butted at the corner?
Any tips how to get 'glass to fit around the outside of tight corners without bulging up? I try to keep to bigger radii, but sometimes it is just unavoidable.
Or is it best to use two pieces butted at the corner?
Hi Paul
Thank you for saying my work is neat.
With regard to the issues you have had you dont say how tight the external radii are.
Going down to 10mm external should not be a problem, smaller than that and you are on a hiding to nothing if you have little expeirience.
In an ideal world you would use single sections of laminate.
Also it will depend on how heavy a laminate you are using.
Chopped strand 300grm matting should be very easy to work.
If you are using a woven roving then you are doomed........
Anyway here's Gelmonkeys Top Tips
Top tip No 1...cut small strips of laminate first and glass them onto the leading edge.
Once cured you can sand down the edges and increase the radius slightly.
Top Tip No 2...glass over the complete radiii and allow to cure and then sand back and profile as required.
Top Tip No 3....if you can't do this cut your laminates about an inch bigger than it needs to be and cut the edges about half an inch apart.Do this both sides of the radii and then laminate.
The cuts will allow the glass to bend much easier and if required you can overlap the cut edges.
Top Tip No 4...if you can't do this then glass in the normal way and then using a high quality masking tape lay the tape over the glass and secure either side of the radius.Allow the glass to cure and then remove the tape.
It will be slightly sticky underneath so allow to completely cure and then sand back to your required profile.
You need to make sure that you are using a roller where possible.
Top Tip No 5...Get a monkey with good eyesight
I hope this helps but if not send me a pm and I will give you my phone number and we can discuss further.
If you want to post pictures I can have a look and again advise
Hope this helps you.
Cheers
Paul
Hi Tom
You are a little ahead of yourself with the moulding stages.
My next step is to take the fence off the top side and then flip the whole thing over and gel and laminate the bottom section and then let this cure and shrink.
Once that is done the mould is trimmed and then 6mm holes are drilled through both sections and then bolted up.
It will all become clear I promise.
I will keep the photos coming to explain myself as I go along.
As an aside I was looking through one of my damaged Custom Car mags tonight and found a Maverick for sale at £200.00 complete.
Looked like a shed though.
Cheers
P
-
topcatcustom
- Forum Contributor
- Posts: 2965
- Joined: Sat Aug 09, 2008 11:53 am
- Location: Essex
- Contact:
Hi Guys
Tom,it was 1995 so just a bit late
Have done a little more tonight .......
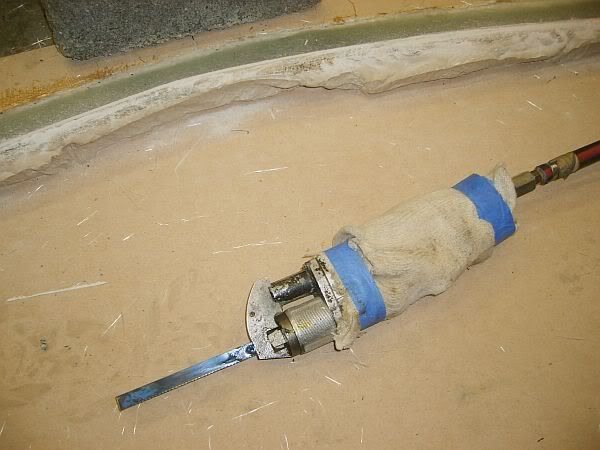
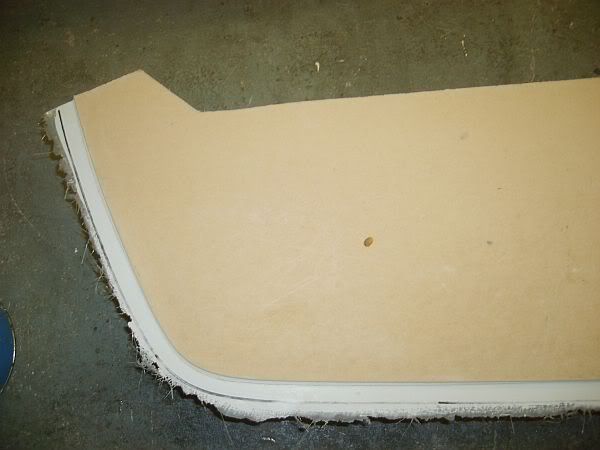
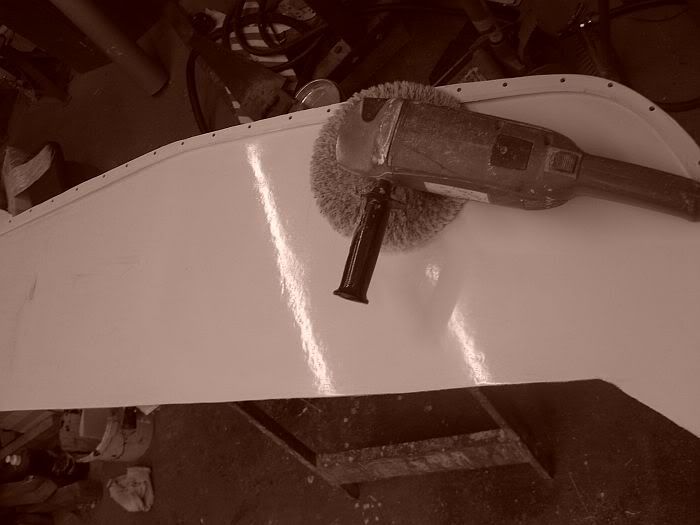
Using my favorite tool of all I trimmed the rough edges of the laminate to just above the gel and then sanded down lightly to the body filler plug.
If you look closely you can see the two colours of the gel and the filler and you must not go anymore than this.
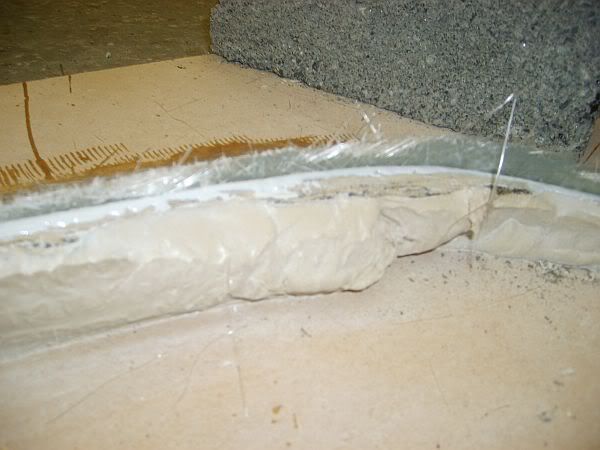
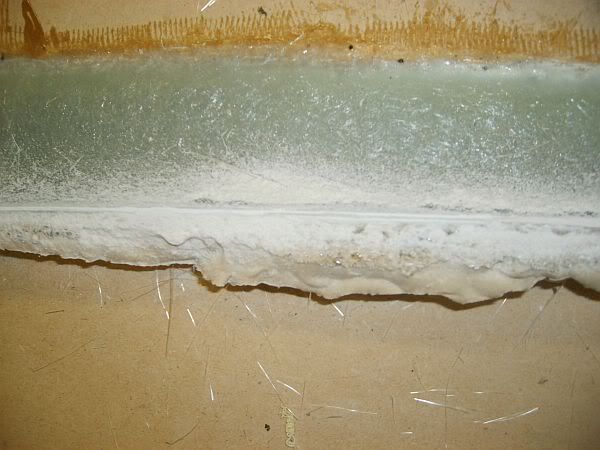
It has been SO COLD down here over the last two days that to release the fences now could cause problems witth twist and warp so everthing will stay as it is for the next couple of days so that the glass can cure and settle some more.
The problem with most GRP manufacturers is that they release the moulds far to early and then the panels, which are still curing,twist out of shape and are a pig to fit.
This then gives rise to people slagging off the quality of what they have purchased and rightly so too.
Sorry, moan over.
Thats it for now
cheers
Paul ...frozen and wind battered by day working on boats..moan moan moan....
Tom,it was 1995 so just a bit late
Have done a little more tonight .......
Using my favorite tool of all I trimmed the rough edges of the laminate to just above the gel and then sanded down lightly to the body filler plug.
If you look closely you can see the two colours of the gel and the filler and you must not go anymore than this.
It has been SO COLD down here over the last two days that to release the fences now could cause problems witth twist and warp so everthing will stay as it is for the next couple of days so that the glass can cure and settle some more.
The problem with most GRP manufacturers is that they release the moulds far to early and then the panels, which are still curing,twist out of shape and are a pig to fit.
This then gives rise to people slagging off the quality of what they have purchased and rightly so too.
Sorry, moan over.
Thats it for now
cheers
Paul ...frozen and wind battered by day working on boats..moan moan moan....
Evening All
Good evenings work again tonight on the splitter.
First job was to turn the plug upside down and check that everything was still in place.

Next was to gently tap the topside of one of the fence sections to create a release.
As it was the fence fell off with two small blows ......
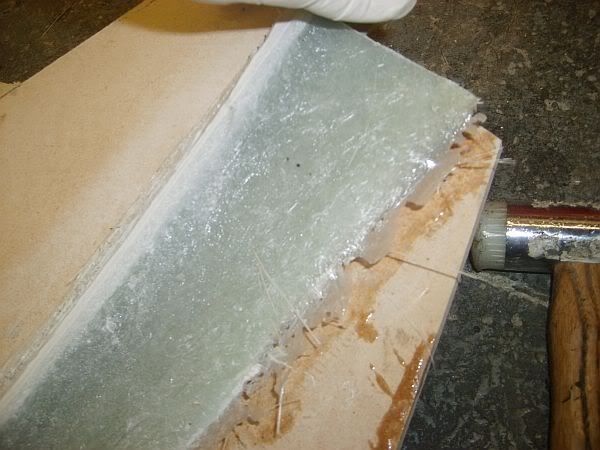
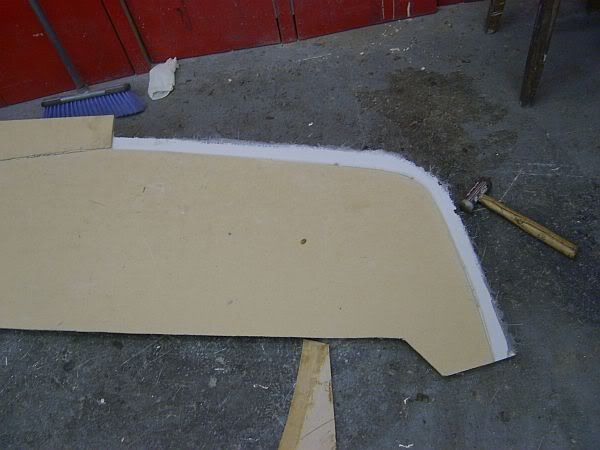
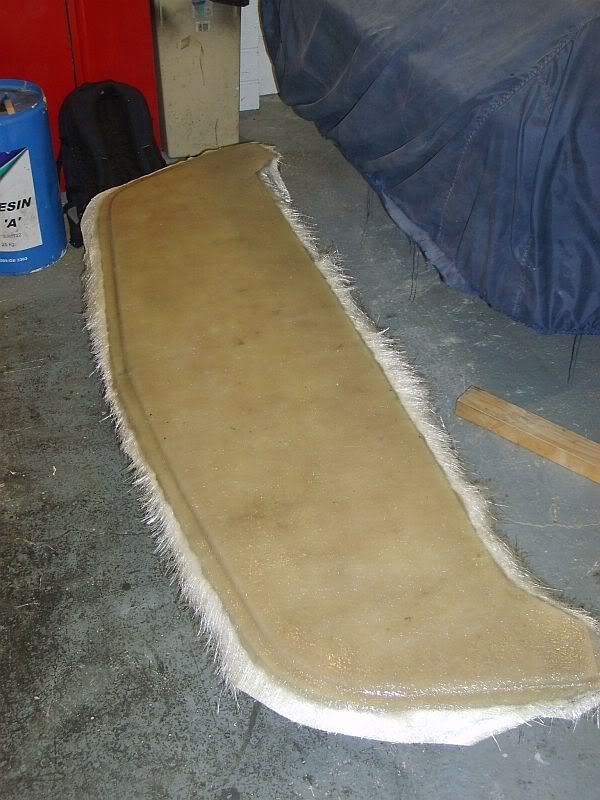
With the other side released it was then a case of marking out a rough cut line and then trimming down.
The trim line had to get rid of the loose and non gelled areas and leave a reasonable amount for me to bolt through at the end of the next stage.
With that done all that was needed was to remove the plasticine and make sure I had a nice crisp moulding edge for the next stage.
Then it was out with the release wax again and give the bottom section 6 heavy coats working it well into the radiused areas.
If the temperatures are okay tomorrow evening I will get some gel on the base.
More photos then.
Cheers
Paul
Good evenings work again tonight on the splitter.
First job was to turn the plug upside down and check that everything was still in place.
Next was to gently tap the topside of one of the fence sections to create a release.
As it was the fence fell off with two small blows ......
With the other side released it was then a case of marking out a rough cut line and then trimming down.
The trim line had to get rid of the loose and non gelled areas and leave a reasonable amount for me to bolt through at the end of the next stage.
With that done all that was needed was to remove the plasticine and make sure I had a nice crisp moulding edge for the next stage.
Then it was out with the release wax again and give the bottom section 6 heavy coats working it well into the radiused areas.
If the temperatures are okay tomorrow evening I will get some gel on the base.
More photos then.
Cheers
Paul
Hi Guys
Here we go with the next bit.
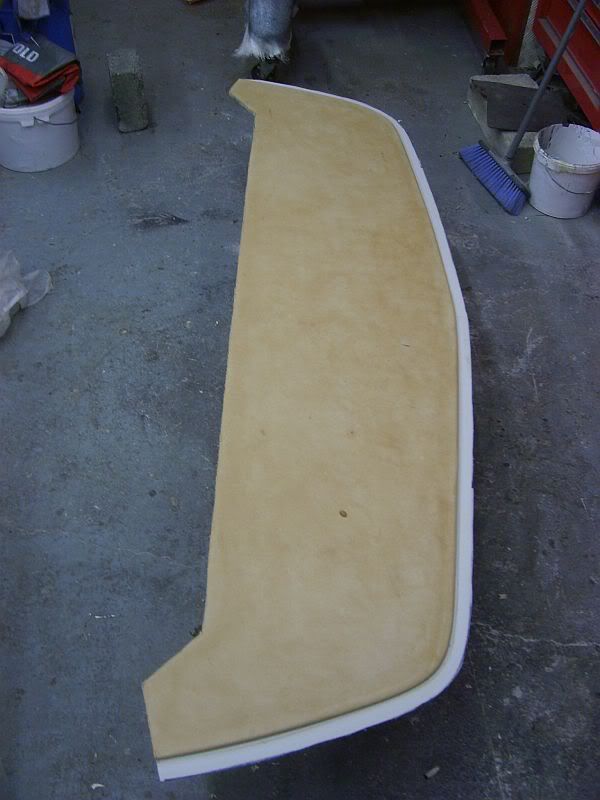
The base was good to go so I gelled the whole lot a total of 3 times and let that cure and shrink back.
Then I cut my glass out and after mixing up a bucket of resin set to wetting it all out

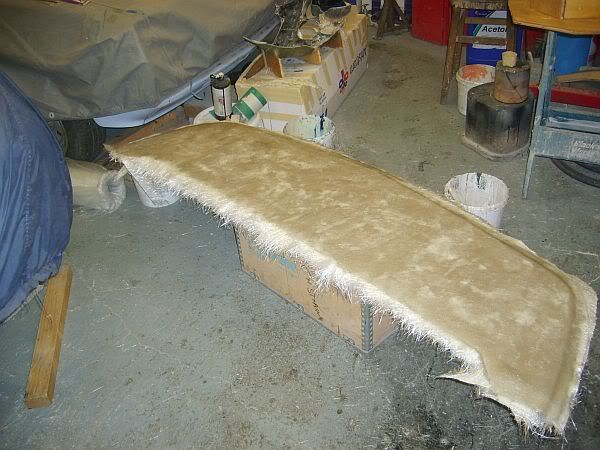
Once that was done it was a case of letting the resin soak through for 5 inutes and then just rollering it all out and the finished thing looks like this
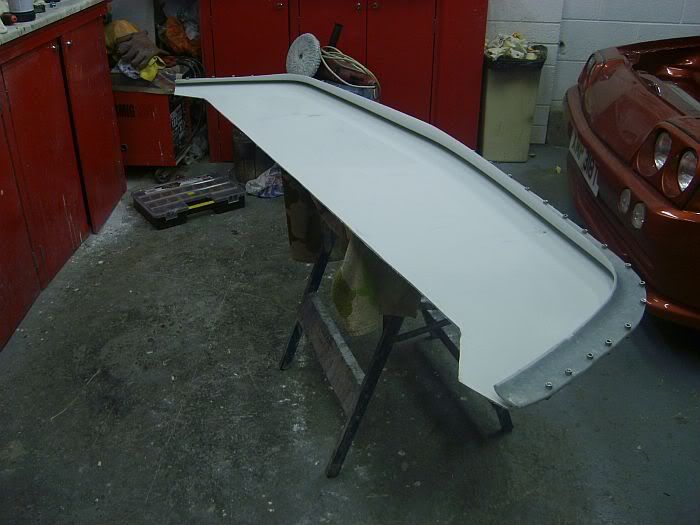
A bout of Noro virus has kept me out of the garage for the last week but today I have released the mould and all is well.
A little bit of tidying and then I can start to make the real thing and get it fitted to the car.
More pics soon
cheers
P
Here we go with the next bit.
The base was good to go so I gelled the whole lot a total of 3 times and let that cure and shrink back.
Then I cut my glass out and after mixing up a bucket of resin set to wetting it all out
Once that was done it was a case of letting the resin soak through for 5 inutes and then just rollering it all out and the finished thing looks like this
A bout of Noro virus has kept me out of the garage for the last week but today I have released the mould and all is well.
A little bit of tidying and then I can start to make the real thing and get it fitted to the car.
More pics soon
cheers
P
Hi Derek
I should be able to get going again on this really soon.
Being self employed means that when the work is there I have to make it a priority and the fun stuff just has to wait ,thankfully we are very busy at the moment and tomorrow I am going to have a meeting with some guys regarding us manufacturing Bowler Wildcat bodies and various other grp units.
It will take a short time to do the final laminating on the splitter and then I can pop it out of the mould and fit the little tinker.
Thanks for your kind words and I will keep the photos coming.
Cheers
P
Hi All
At last I have found some time to carry on with my splitter.
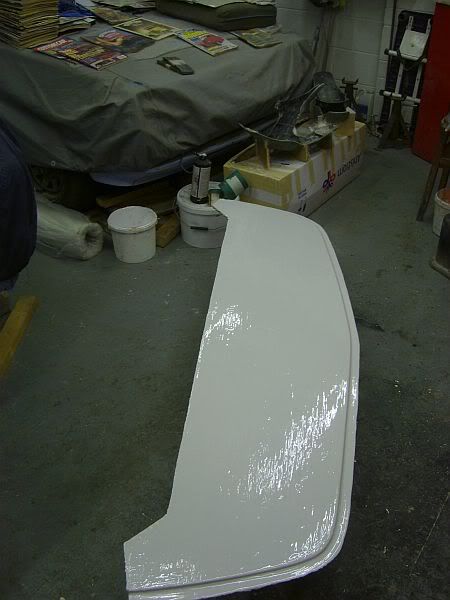
Tonight has seen the mould polished up to a high gloss.
Sorry about the quality of this one.
My daughter has been playing with my camera!
Next I polished up the top section and then bolted the whole thing together.
Bolts about 1/12 to 2" apart.
Then fixing the mould upright in my trusty work mate I brushed in the first of two coats of gel.
I have done it this way as the radius at the front is very tight and it was important to get the gel right into this area.It also makes it much easier to work and saves breaking your back.
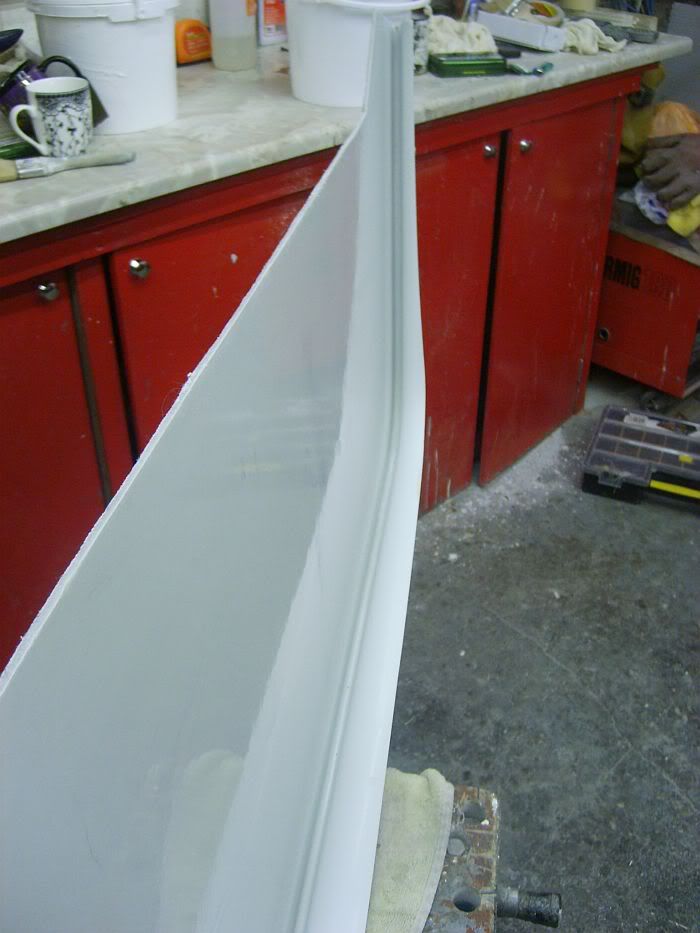

Then I lay the mould flat and carried on gelling until the whole thing was covered.

I will let this first coat cure and shrink back overnight now and hopefully before I go to work in the morning will be able to get the 2nd coat on.
This can then cure and shrink during the day and then I can carry on tomorrow evening.
cheers
Paul
At last I have found some time to carry on with my splitter.
Tonight has seen the mould polished up to a high gloss.
Sorry about the quality of this one.
My daughter has been playing with my camera!
Next I polished up the top section and then bolted the whole thing together.
Bolts about 1/12 to 2" apart.
Then fixing the mould upright in my trusty work mate I brushed in the first of two coats of gel.
I have done it this way as the radius at the front is very tight and it was important to get the gel right into this area.It also makes it much easier to work and saves breaking your back.
Then I lay the mould flat and carried on gelling until the whole thing was covered.
I will let this first coat cure and shrink back overnight now and hopefully before I go to work in the morning will be able to get the 2nd coat on.
This can then cure and shrink during the day and then I can carry on tomorrow evening.
cheers
Paul

looking good, its gonna look real good when fitted rich
Nightbreed racing, http://www.youtube.com/watch?v=NJoUTZ8UUps
Hi Guys
Thanks for your kind words again.
Derek, I am extremely lucky to have a garage of this size and yet I still find myself moaning that I have'nt got enough space!!!!
At this point I have a word with myself outside and then shut T F UP.
The garage also doubles up as a place of work for me when the weather is bad and I have customers moulds etc to work on.
If I am lucky I can get the next stage under way tonight.
All things being equal I should be complete by the middle to the end of next week.
More pics later.
Cheers
P
