New project

Please post current V8 projects IN BUILD NOW in here, Any non relavent posts will be removed,

Moderator: phpBB2 - Administrators

gelmonkey
Sergeant Monkey Face
Posts: 1307
Joined: Sat Jun 27, 2009 11:58 am
Location: plymouth

Post by gelmonkey »

Hello again from Gelmonkey HQ.
It was way to cold to work out on site today so it was decided to come back home and work on Mikes mould again.
It has been 0 degrees in the workshop all day but we knew that we could work at releasing the main body section without worrying about cure rates etc.
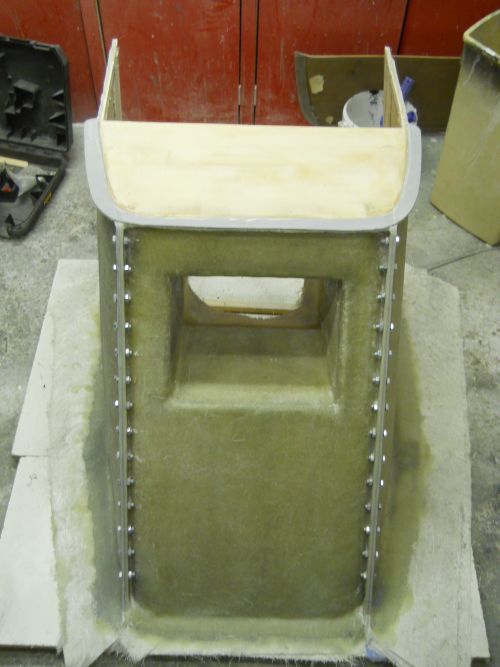
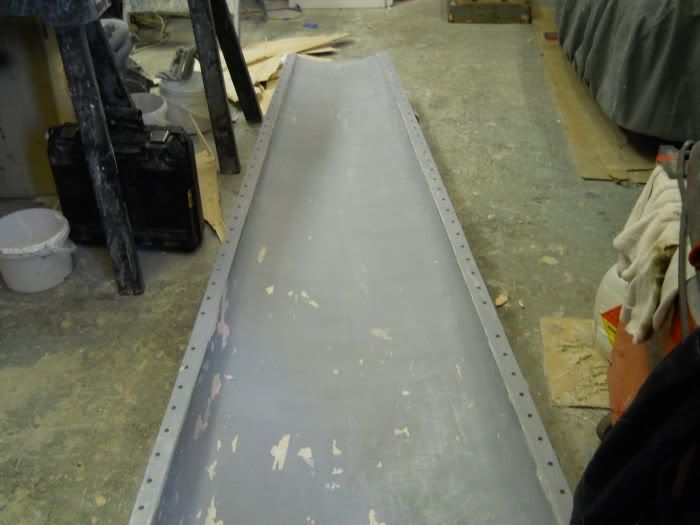
So,after drilling a few 8mm holes for the bolts to hold the mould together a bit further down the road we ended up with this.
The bolt spacing was worked out at 2" apart all the way around as this will give a very even clamp load to the fences and will combat any distortion that tries to take place during cure.

Image

Image

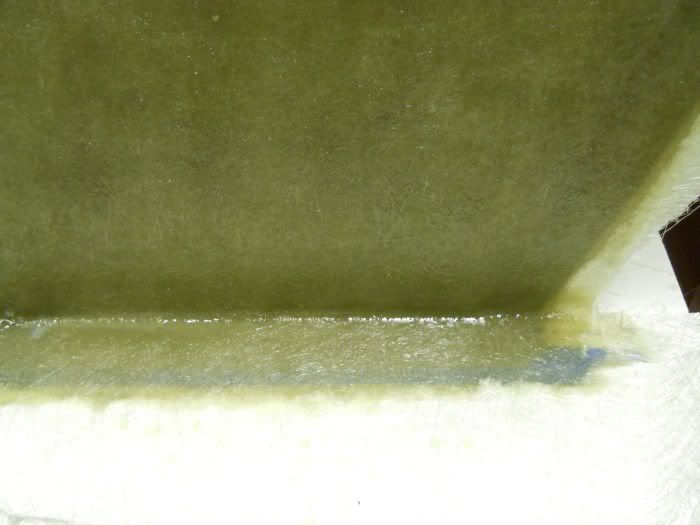
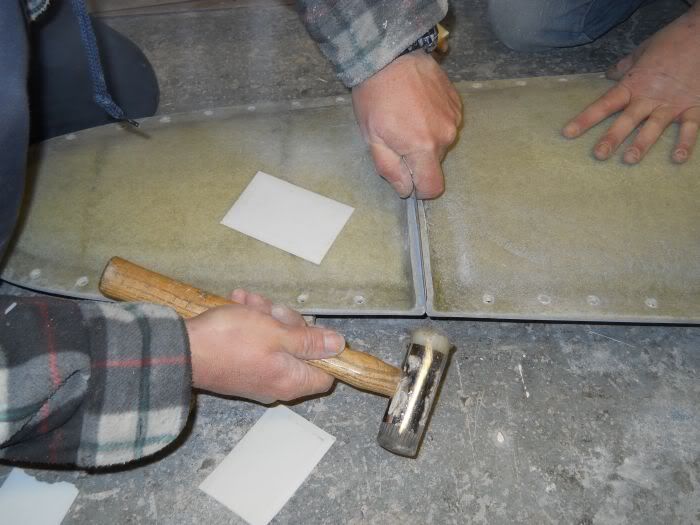
Next armed with a small scraper and a whole pile of filler spreaders it was on to releasing or not as the case may be.
Slip the scraper and then the speaders in,pull through and if we are lucky a section will come of!

Image

Image

Image

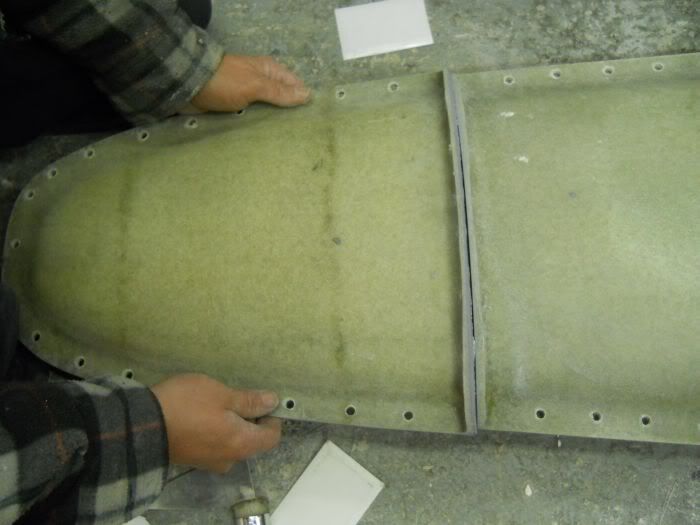
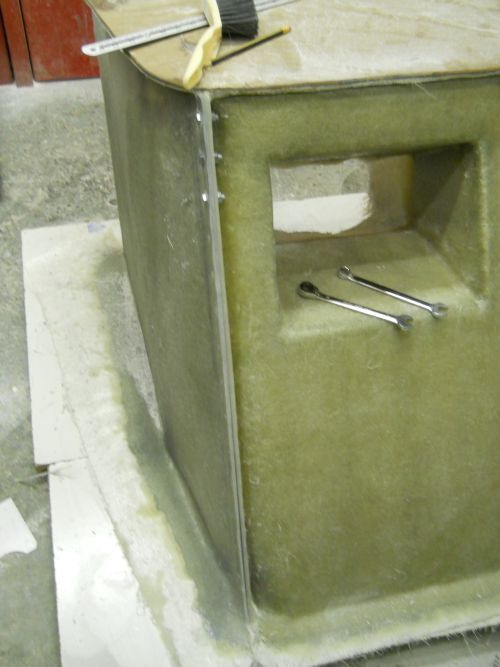
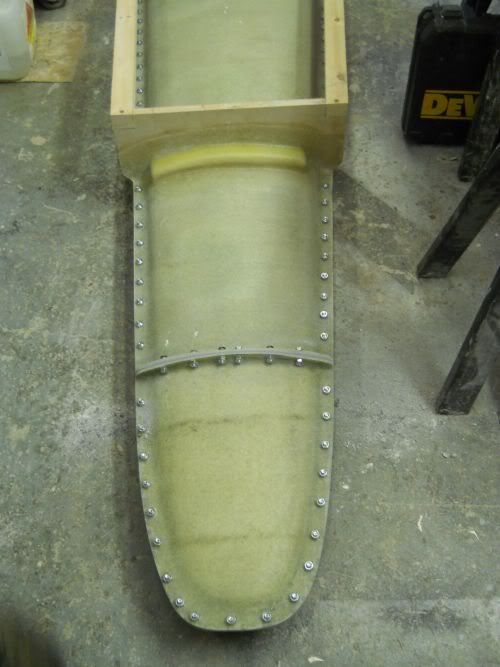
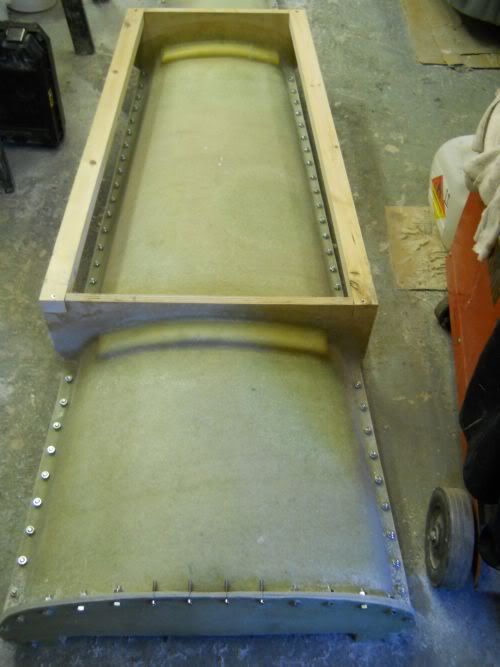
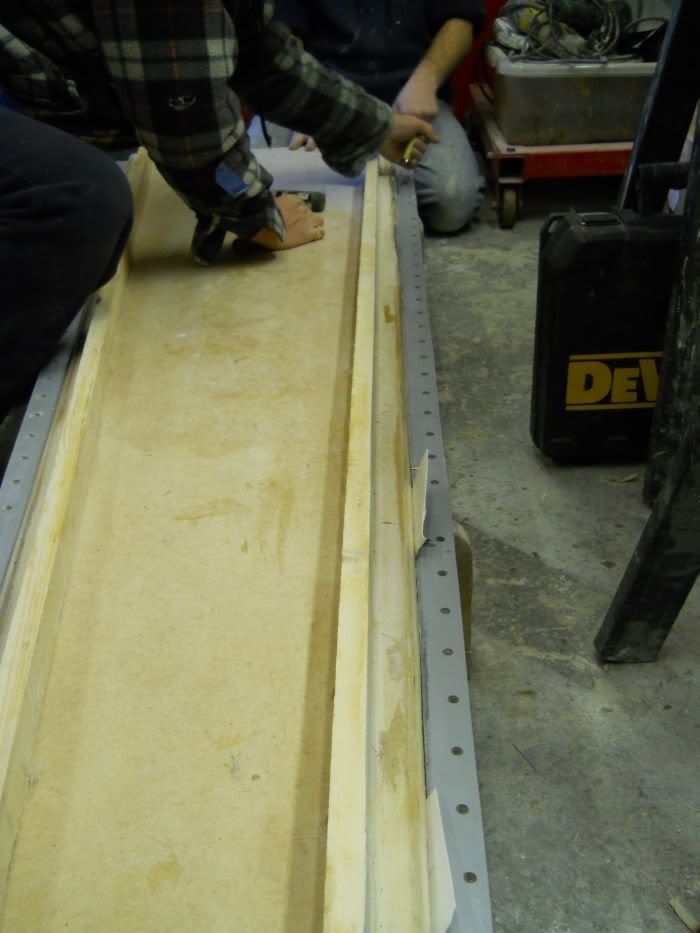
Ok that bit done the next thing to do was the side rails and the remainder of the nose cone.
Fingers crossed

Image

Image

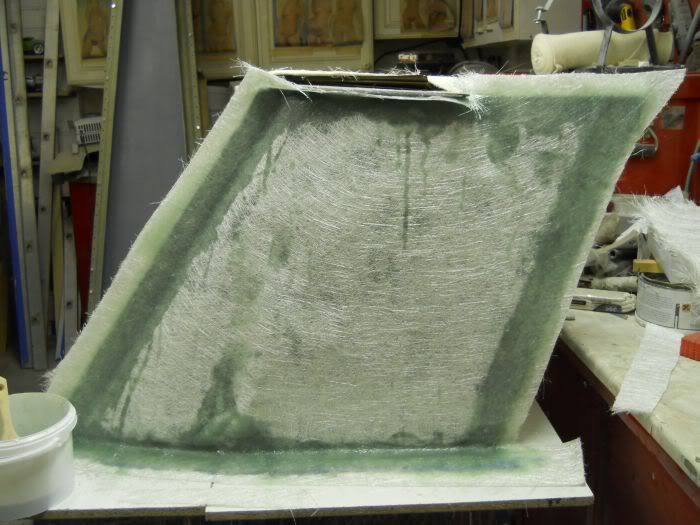
All going well so far and reasonably happy with the release we came to the main section.
For those of you who have followed along with this project you may remember a point about curing and shrinkage when glssing a while back and this was going to be a major factor as we were going to find out.
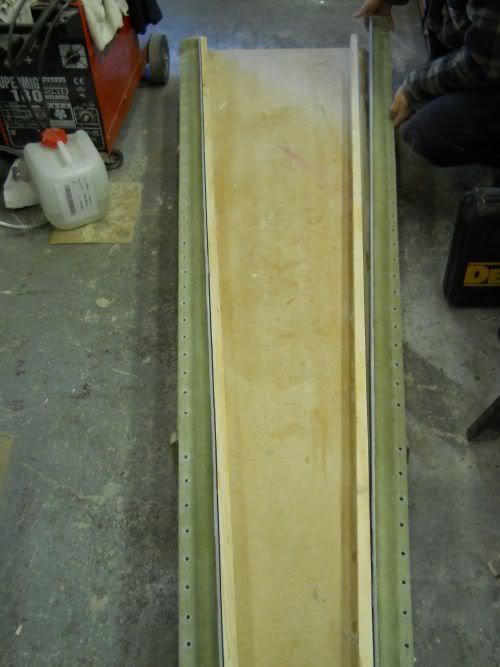
Mike made his plug with balsa wood,MDF and some lengths of 2x1 timber and covered it all with a shellack based sealer.
Balsa is soft as we know and as the gel and glass had cured it pulled in really tight to the form.
Add to that the quite cold conditions in the workshop and we were faced with a bit of a challenge as the mould had shrunk a little as well.
Spreaders pushed in and pulled through and maybe the odd naughty word here and there the main section put up a fight.

Image

Image

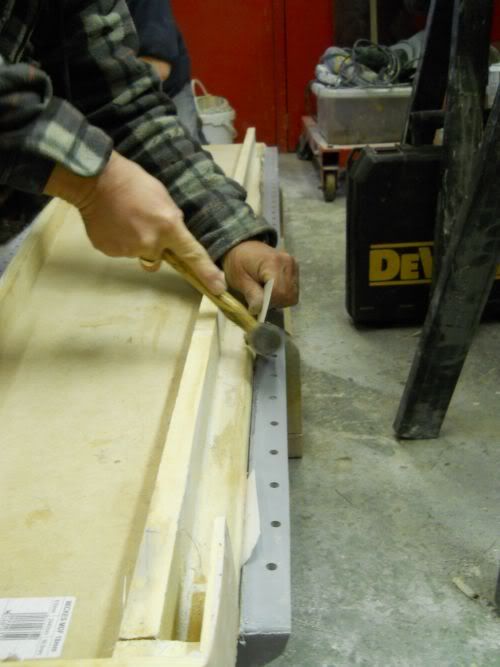
We could hear the sides releasing but the main bulk would not 'pop'.
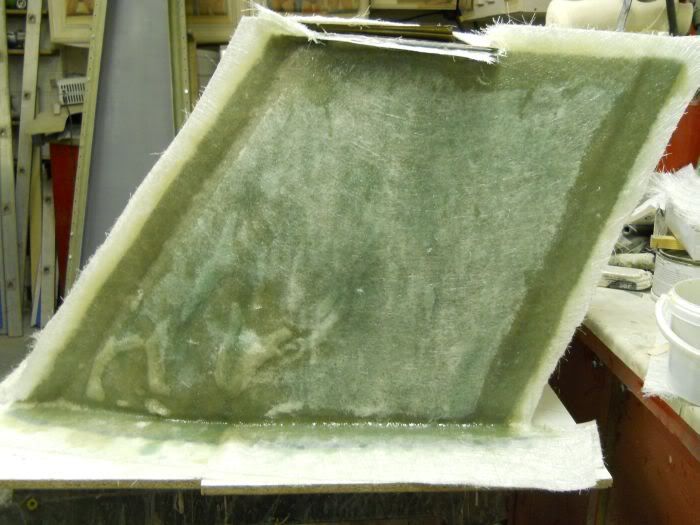
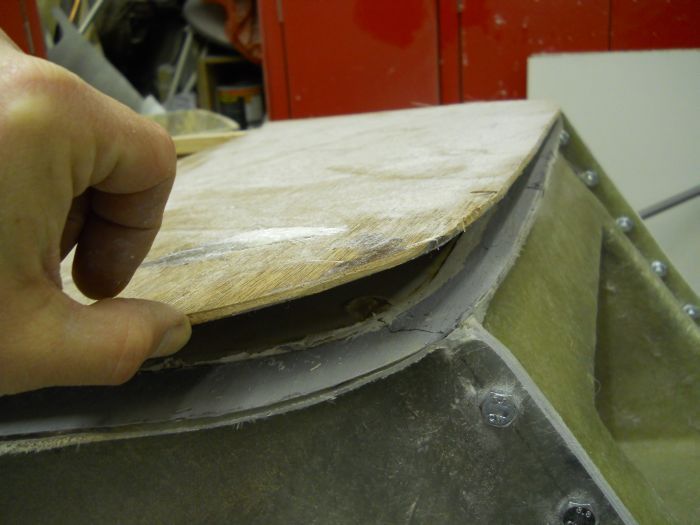
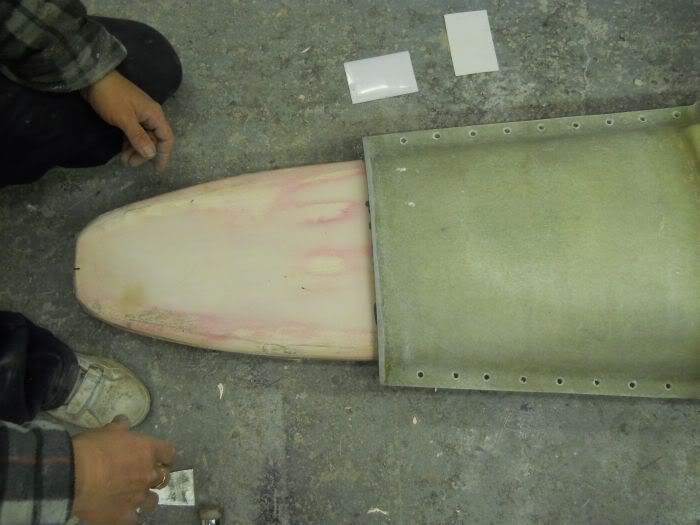
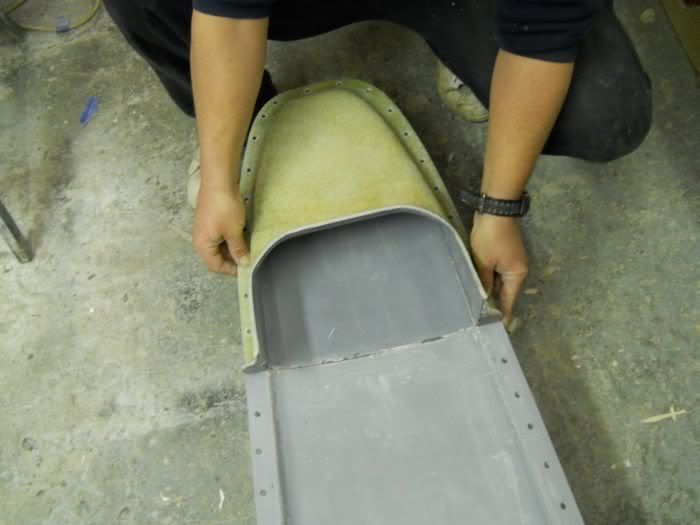
More spreaders and a bit more 'oomph' and finally we had the pop but it was'nt the pop of the mould releasing it was the curved skin of the plug coming away from the body and you can see this clearly in the next pic.

Image

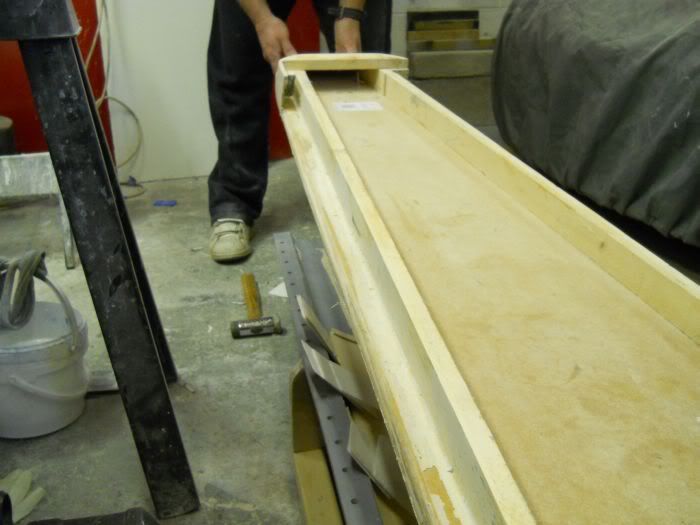
Sorry Mike but you wont be using that for anything again.
We got the curved skin out fairly quickly once the main bulk of the plug was removed.
It was just a case of the glue that bonded the plug together was not quite strong enough to take the loads that we were placing on it.
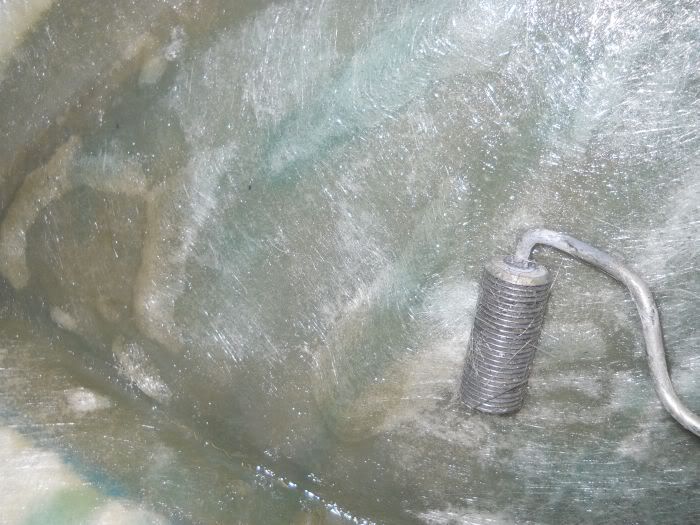
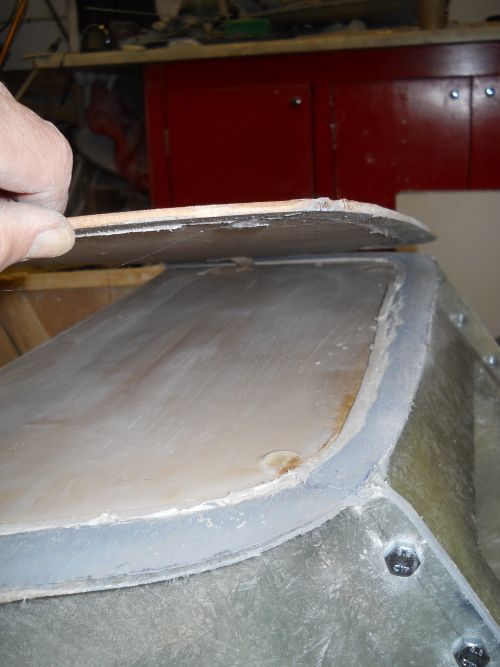
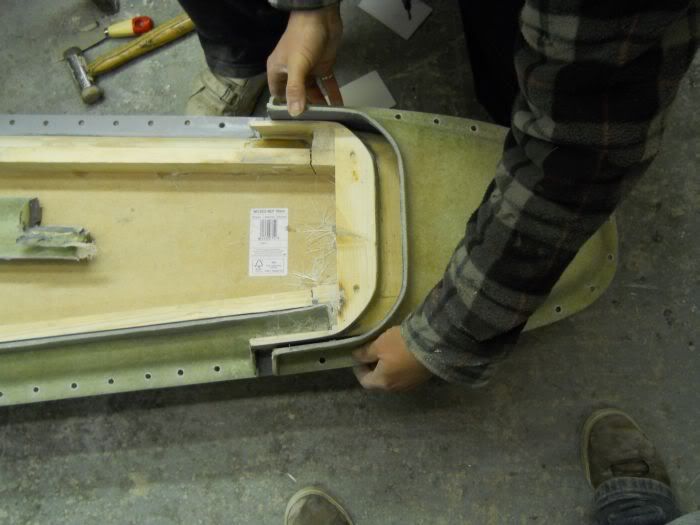
The next few pics show that even after taking the 'skin' out small bits still stayed in the mould.

Image

Image

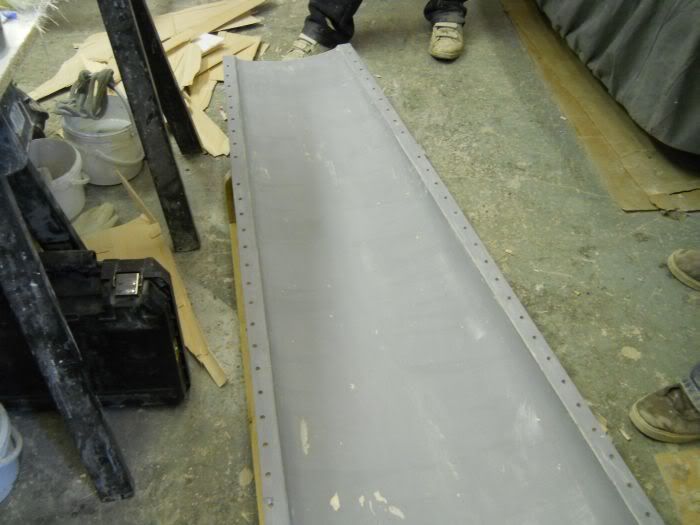
Not too much of a bother but it would have been nice for it to come away as one.
If the plug had been a little more substantial then I feel that it would have come out without the cussing and the fight.
This is NOT a reflection of Mikes work by any means and nor is it a criticsm but merely an observation from a moulding point of veiw.

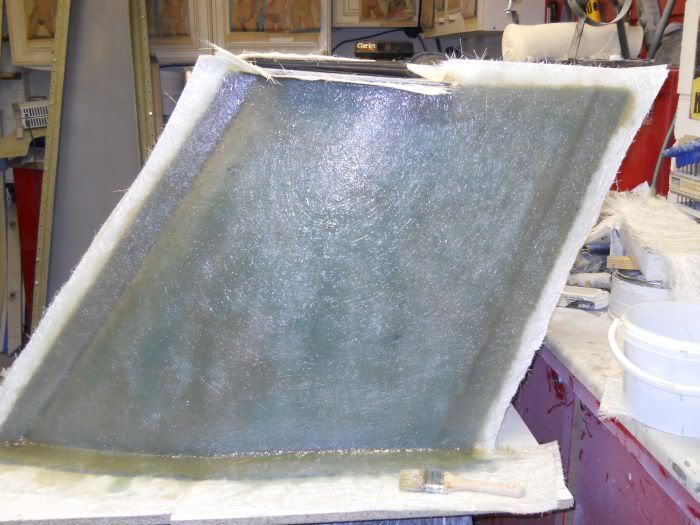
Offering up the nose sections of the mould you can see that it is going to be fun working that area when the time comes.

Image

Image

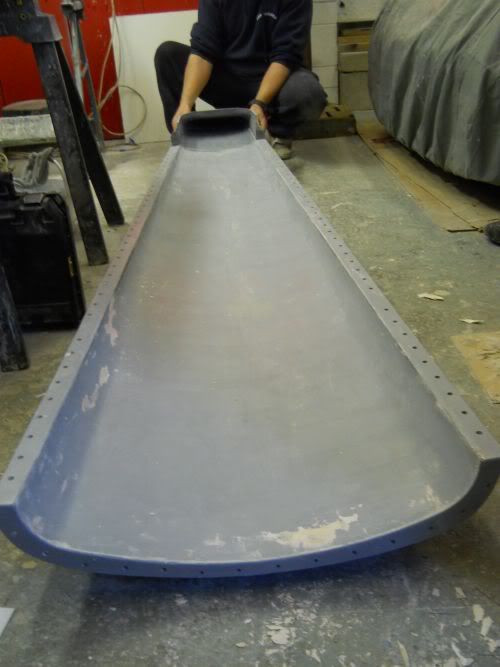
The mould has suffered a few little damaged areas and these will be dealt with simply after a full degrease and sand down.
The temperatures are set to come back up soon so progress will be quicker now over the coming days.
This will then be a good time to explain split lines and why they go where they go.

Cheers for now
P


User avatar
Ian Anderson
Forum Contributor
Forum Contributor
Posts: 2448
Joined: Sun Nov 19, 2006 9:46 pm
Location: Edinburgh

Post by Ian Anderson »

Paul

Many thanks for such a great blow by blow account. I find the whole process fascinating!

Ian
Last edited by Ian Anderson on Sat Feb 04, 2012 10:57 am, edited 1 time in total.
Owner of an "On the Road" GT40 Replica by DAX powered by 3.9Hotwre Efi, worked over by DJ Motors. EFi Working but still does some kangaroo at low revs (Damn the speed limits) In to paint shop 18/03/08.
User avatar
ChrisJC
Top Dog
Top Dog
Posts: 5077
Joined: Mon Nov 20, 2006 1:13 pm
Location: Northants / Cambs
Contact:

Post by ChrisJC »

:whs :nw :boss

Chris.
--
Series IIA 4.6 V8
R/R P38 4.6 V8
R/R L405 4.4 SDV8
gelmonkey
Sergeant Monkey Face
Posts: 1307
Joined: Sat Jun 27, 2009 11:58 am
Location: plymouth

Post by gelmonkey »

Thank you.

P
unstable load
Top Dog
Top Dog
Posts: 1279
Joined: Mon May 04, 2009 6:53 am

Post by unstable load »

As always, nicely done, Paul.
Cheers,
John
kiwicar
Forum Contributor
Forum Contributor
Posts: 5461
Joined: Sat Nov 18, 2006 5:00 pm
Location: Milton Keynes

Post by kiwicar »

Hi Paul
it is all comming on a treat, though I am obviously gutted to see the demise of that carefully crafted plug :lol: :lol: :lol: I was going to stick it on the wall of the garage to admire it (not).
The rest of the car is comming together, I now have the front axel assembled, I can't actually put it on the chassis as I would have to cut a hole in the wall to fit the steering arms! :oops:. Peddle assemblies are now done, last of the floors in the rear of the car are drawn up, I will cut them out when the snow clears and I can get my guilotine out the garage to work on big bits of sheet metal.
I am trying to work out where to put 4 coil packs, I think they will go behind the engine but in front of the engine plate There looks like being room. Steering is mearly done, but my Tig welder packed up yesterday and I need it to weld in the frame that holds the steering column and to do all the little jobs like steering stops, bits to support the steering shaft etc. I will get some more photos together mext weekend.
Best regards
Mike
poppet valves rule!
gelmonkey
Sergeant Monkey Face
Posts: 1307
Joined: Sat Jun 27, 2009 11:58 am
Location: plymouth

Post by gelmonkey »

Hi Mike
I'm so sorry about the top skin coming off as I know you were going to mount it on the wall :lol:
You did a cracking job of ther frame work underneath the skin.
I will glass the sides of the tub tomorrow evening and get some pics of that up.
Good to hear that you are getting things fixed to the car and if all goes to plan you will be racing soon :D
With regard to the snow we have not had a bit down here but there has been a little up on the moors.
Put on an extra jumper and get back out there mate.
The mould has come out not too bad as you can see from the pics and I will work on that this coming week as well.
Might be able to start laying up early next week but we are very very busy with boats at the ,moment and making KVA radar pods so I will have to see how we go.

Take care

cheers
P
kiwicar
Forum Contributor
Forum Contributor
Posts: 5461
Joined: Sat Nov 18, 2006 5:00 pm
Location: Milton Keynes

Post by kiwicar »

Hi Paul
It looks like ae excellent job on the mould, it is comming on a treat. It is good to know business is going well, your core work must take priority. I have a long way to go before I will be at a point on the chassis where I will be chasing you. . . Also I don't fancy driving a transit down to you if there is the slightest chance of snow on the M5, that would be miserable!
I look forward to the next installment all the same.
Best regards
Mike
poppet valves rule!
gelmonkey
Sergeant Monkey Face
Posts: 1307
Joined: Sat Jun 27, 2009 11:58 am
Location: plymouth

Post by gelmonkey »

Hi again guys.
Glassing up the sides then.
5 layers again but if YOU are going to do something like this then it might be best if you did a couple of layers and then left it overnight before putting on the next ones as glass when wet is heavy and the last thing you want is for it all to slump.
Cure rates are important as I'm sure you will have already gathered but glassing over a couple of days will not cause you any major problems as long as the temperatures are reasonable.
I do the 5 in one hit not to show off but more to show that it can be done with a little bit of expierience.
Because the side panels are quite large and obviously upright a different approach is needed when glassing.

First wet out the edges as this will hold the glass in place.

Image

Then work the rest of it being really quite liberal with the resin.
Don't worry about the rucks and bubbles that this will cause, it is not a problem.

Image

Image

Get the roller on it and work the glass gently pushing the bubbles to the nearest edge.

Image

Image

Keep going and DONT PANIC,you end up with this.

Image

Final finish the bottom edge and there you have it one side complete.

Image

Note the blue tape showing through the glass and the overlay.

I have only done one side so far as I have had to do some other glassing tonight.
There is no point showing the other side as the process will be exactly the same.
This will then need to cure so it will be back to the main mould and how to go about prepping it prior to lay up.

Cheers
P
gelmonkey
Sergeant Monkey Face
Posts: 1307
Joined: Sat Jun 27, 2009 11:58 am
Location: plymouth

Post by gelmonkey »

AH HA
There you are.
Here's a quick update for you and some more pics.

Got the second side all glassed up and left to cure for the normal couple of days and as before with the body section it started to release itself.
Now this is partly down to good prep work but also shows how much the glass wants to pull itself out of shape as it cures even though the temperatures have been not too bad to deal with.

Image

You can see in the pic above that some bolts had already been put in and this was done to hold the fence's together as it was drilled through.
By drilling them all through and not bolting as you go can easily build twist into the mould and you end up with it out of shape.
As it has been stated before all of this is quite simple but it is worth thinking about things and planning a few steps ahead so you dont waste a huge amount of time and materials.

With all of the bolts done up snug it was time to pop the top off.

Image

Image

Happy with that a quick trim around the top of the flange and we end up with this.

Image

Only two bits left to go on the tub now and should have that done by early next week.
Then we can get on with the fun stuff of actually making Mike a sling shot body.

cheers
P
unstable load
Top Dog
Top Dog
Posts: 1279
Joined: Mon May 04, 2009 6:53 am

Post by unstable load »

Man, that is some skill you have!!
I like it lots.
Cheers,
John
User avatar
Ian Anderson
Forum Contributor
Forum Contributor
Posts: 2448
Joined: Sun Nov 19, 2006 9:46 pm
Location: Edinburgh

Post by Ian Anderson »

Paul

This is really fascinating stuff and amazing how much work is going into getting a mould ready.

I presume Mike is also getting you to make the final body?

If that is the case how long do you have to let the mould stand before you can pull out the first body?

Hopefuly if you are soing the body you will also give us on lookers a blow by blow account of the process.

Thanks again

Ian
Owner of an "On the Road" GT40 Replica by DAX powered by 3.9Hotwre Efi, worked over by DJ Motors. EFi Working but still does some kangaroo at low revs (Damn the speed limits) In to paint shop 18/03/08.
User avatar
Ian Anderson
Forum Contributor
Forum Contributor
Posts: 2448
Joined: Sun Nov 19, 2006 9:46 pm
Location: Edinburgh

Post by Ian Anderson »

Also if you cannot get Mike to look like a sling shot body how easy is it to modify to allow for a few extra inches around his middle?

IAn
Owner of an "On the Road" GT40 Replica by DAX powered by 3.9Hotwre Efi, worked over by DJ Motors. EFi Working but still does some kangaroo at low revs (Damn the speed limits) In to paint shop 18/03/08.
kiwicar
Forum Contributor
Forum Contributor
Posts: 5461
Joined: Sat Nov 18, 2006 5:00 pm
Location: Milton Keynes

Post by kiwicar »

Ian Anderson wrote:Also if you cannot get Mike to look like a sling shot body how easy is it to modify to allow for a few extra inches around his middle?

IAn
Oi Ian
Are you casting aspersions on my svelte and gazelle like physique
Best regards
Mike
poppet valves rule!
gelmonkey
Sergeant Monkey Face
Posts: 1307
Joined: Sat Jun 27, 2009 11:58 am
Location: plymouth

Post by gelmonkey »

John
Thank you

Ian, you are correct in thinking that I will make the body and the tub for Mike.
As you and anyone else reading this part of Mikes build will have no doubt gathered there is a lot more to making a mould than most realise and the time it takes considerable but if the right procedures are followed then it should all come out alright.
Been bloody lucky so far,I normally work at Tesco's !
Once the moulds have been laminated everything will be left to rest for a couple of weeks for curing and shrinkage (What else :lol: )
Then once the panels are 'pulled' there will be some final tidying up to do and then a good machine polish to bring the gel right up to a high gloss. I will show how all of this is done in detail as making the panels is somewhat different to making the moulds.

With regard to modifying the moulds if Mikes racing snake physique will not fit within the confines of the tub, I am planning to make some GRP pry bars to fit and extract him.
The hate mail will begin now you watch :D
Maybe some more pics a bit later as there is some work to do tonight.

Cheers
P
Post Reply

Return to “Your Garage Scene”