
Nothing to show you tonight guys.
Have made a few fences and got them on and got the waxing done.
Pics tomorrow though.
cheers
P
New project
Moderator: phpBB2 - Administrators
Afternoon chaps.
The weather was not good for outside work today so what to do?
Yep legged it out to the garage for the next session of Mikes build.
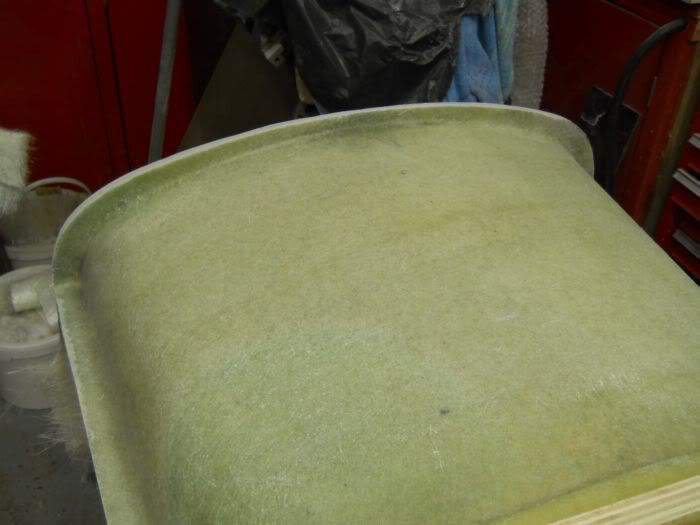
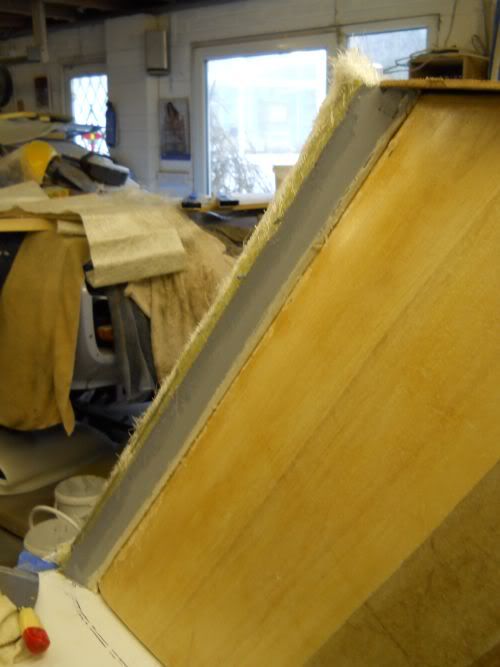
Even though Mikes plug has been really easy to work there were a few places that needed a bit of a tweak and you can see this in the first shot.
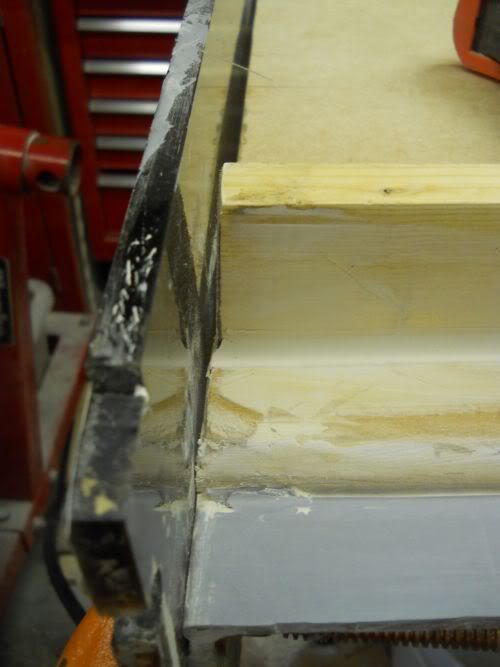
This gap and one a bit smaller on the other side was just bogged up with a bit of body filler and then sanded back to profile and then the fence was clamped back into place.
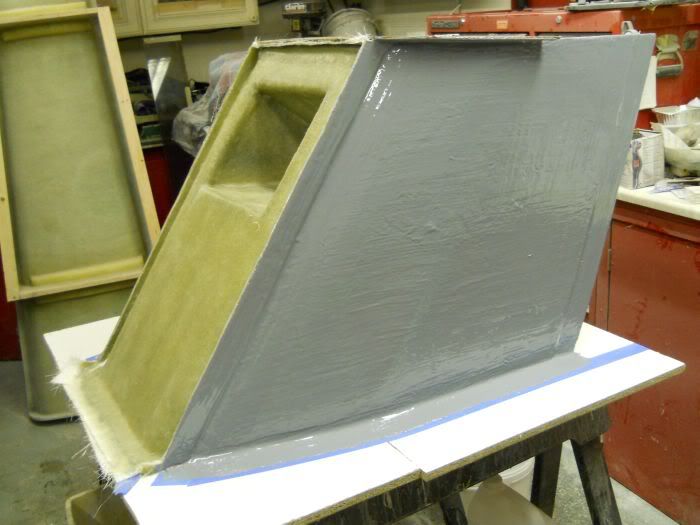
Next up was the gelling and the usual 3 coats went on easy.
Now I have cheated a bit today and used an IR lamp to flash things off and the reason behind this is that the air is damp and this can cause a slower than normal cure which delays progress.
With the lamp set above the mould it prevents any moisture from settling on the gel and thats all we needed to get the cure rate correct.
With the lamp going the laminates were cut and after about 2hrs the laminating could begin.
It should be noted that the lamp warms the the mould/plug to a very workable temperature and also helps to shrink the gel back enabling work to carry on in a relatively short space of time.
This kind of work is quite repetitive so keeping things short,wet out and bung the glass on(this is of course a professional term ) roll out and then bung some more on.
Note the laminates pre rolled and right to hand at the top of the picture.
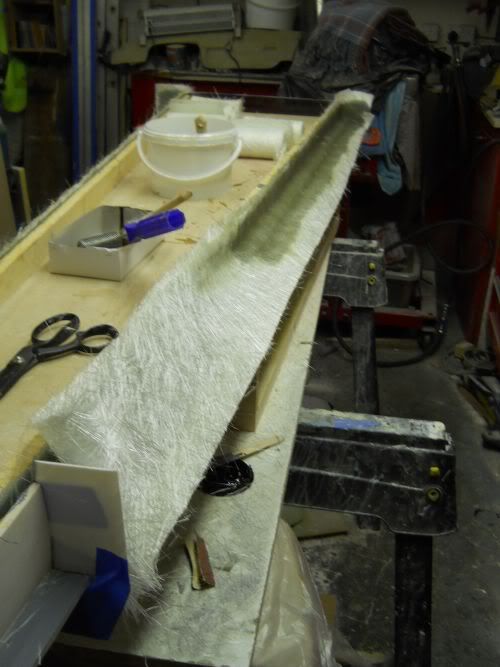
As with the rest of the mould 5 layers have been used and care was taken to get the laminates right into the corners and finished nicely.
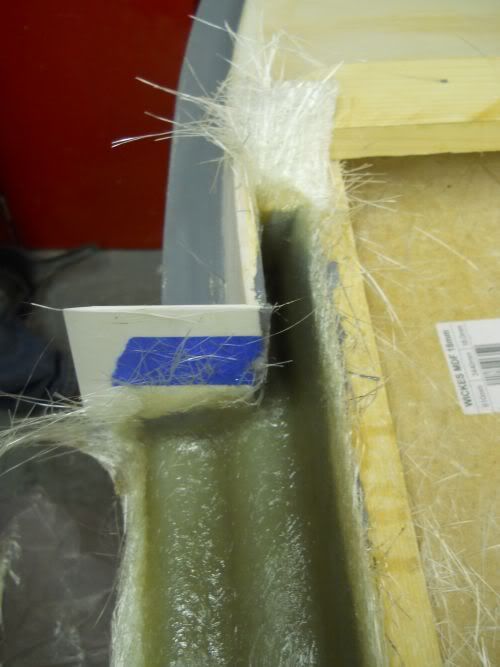
With No1 son on one side and Gelmonkey on the other all 5 layers were on,rollered and tidied in 45minutes.
Job's a good un.
The lamp is now back on and tonight will see the side rails trimmed,fences off and the front section waxed and gelled possibly glassed as well.
Cheers
P
The weather was not good for outside work today so what to do?
Yep legged it out to the garage for the next session of Mikes build.
Even though Mikes plug has been really easy to work there were a few places that needed a bit of a tweak and you can see this in the first shot.
This gap and one a bit smaller on the other side was just bogged up with a bit of body filler and then sanded back to profile and then the fence was clamped back into place.
Next up was the gelling and the usual 3 coats went on easy.
Now I have cheated a bit today and used an IR lamp to flash things off and the reason behind this is that the air is damp and this can cause a slower than normal cure which delays progress.
With the lamp set above the mould it prevents any moisture from settling on the gel and thats all we needed to get the cure rate correct.
With the lamp going the laminates were cut and after about 2hrs the laminating could begin.
It should be noted that the lamp warms the the mould/plug to a very workable temperature and also helps to shrink the gel back enabling work to carry on in a relatively short space of time.
This kind of work is quite repetitive so keeping things short,wet out and bung the glass on(this is of course a professional term
Note the laminates pre rolled and right to hand at the top of the picture.
As with the rest of the mould 5 layers have been used and care was taken to get the laminates right into the corners and finished nicely.
With No1 son on one side and Gelmonkey on the other all 5 layers were on,rollered and tidied in 45minutes.
Job's a good un.
The lamp is now back on and tonight will see the side rails trimmed,fences off and the front section waxed and gelled possibly glassed as well.
Cheers
P
-
unstable load
- Top Dog

- Posts: 1285
- Joined: Mon May 04, 2009 6:53 am
Hi Chaps
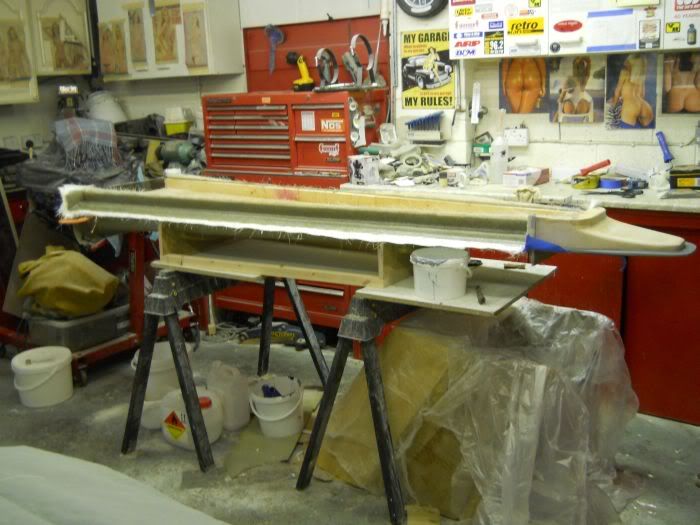
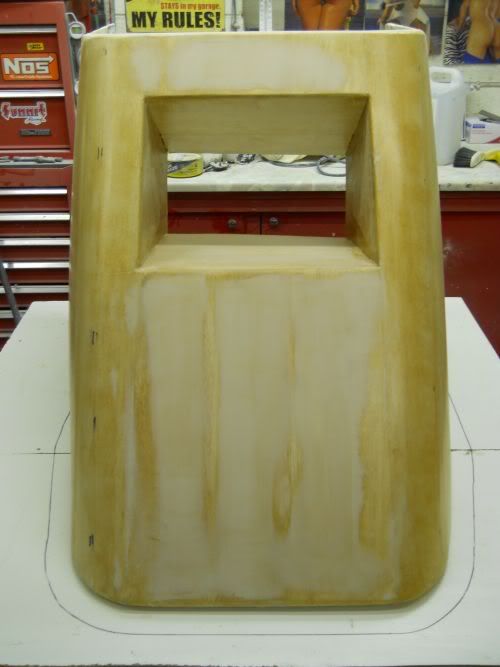
The last bit of this moulding project then.
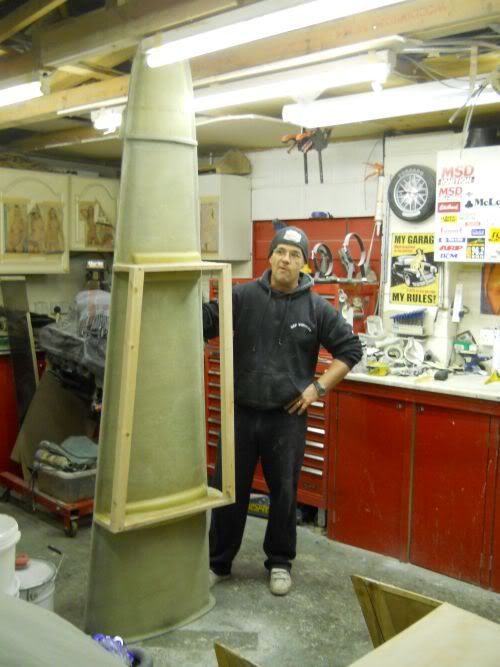
Final laminates were glassed on to the back end and allowed to cure and shrink back,the flanges ground back and radiused and a couple of last pics to show just how big this thing is.
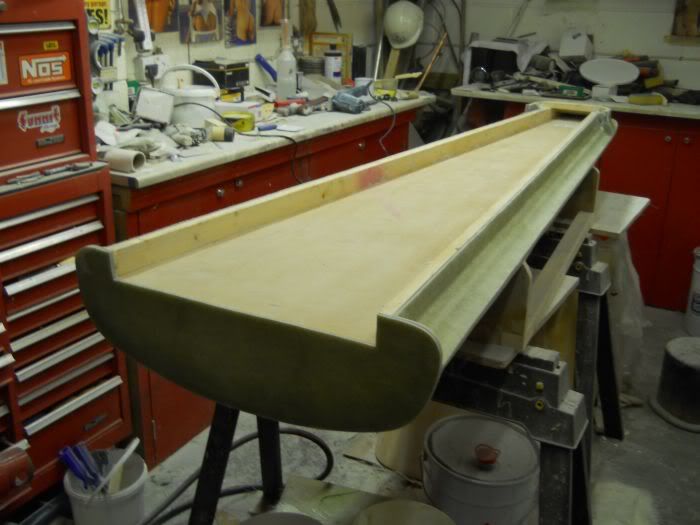

In places the flanges have already started to show signs of release and this is why the mould is now left for at least 10 days to fully cure ,if it was split and used straight away the true panel would come out twisted because the mould itself has not settled into its relaxed state.
All that is left to do is work out the spacing for the bolts and then drill the holes.
By doing this the mould will stay fully' locked' when being worked on.
The next bit of Mikes work is to mould off the tub.
Now as those of you following this have seen how a mould is made I feel that to subject you all to the tub moulding process would be very boring and have you all reaching for the Dignitas phone number.
What I will do though is post some pics of how it is coming together but without the drivel.
Thanks to Mike for an excellent plug to work from and to those who have made kind comments.
Cheers for now.
P
The last bit of this moulding project then.
Final laminates were glassed on to the back end and allowed to cure and shrink back,the flanges ground back and radiused and a couple of last pics to show just how big this thing is.
In places the flanges have already started to show signs of release and this is why the mould is now left for at least 10 days to fully cure ,if it was split and used straight away the true panel would come out twisted because the mould itself has not settled into its relaxed state.
All that is left to do is work out the spacing for the bolts and then drill the holes.
By doing this the mould will stay fully' locked' when being worked on.
The next bit of Mikes work is to mould off the tub.
Now as those of you following this have seen how a mould is made I feel that to subject you all to the tub moulding process would be very boring and have you all reaching for the Dignitas phone number.
What I will do though is post some pics of how it is coming together but without the drivel.
Thanks to Mike for an excellent plug to work from and to those who have made kind comments.
Cheers for now.
P

Not at all!, I am well impressed by it. Nearly as pornographic as the photos you've got hanging up at the back of your workshop!gelmonkey wrote: Now as those of you following this have seen how a mould is made I feel that to subject you all to the tub moulding process would be very boring
Chris.
--
Series IIA 4.6 V8
R/R P38 4.6 V8
R/R L405 4.4 SDV8
Series IIA 4.6 V8
R/R P38 4.6 V8
R/R L405 4.4 SDV8
-
unstable load
- Top Dog
- Posts: 1285
- Joined: Mon May 04, 2009 6:53 am
Hi All
Folllowing some very kind comments this morning and obvious interest on the public side of the forum I will cover the tub mould.
What can be explained is how to decide where to create the split lines and the importance of coving but not in the plasticine sense.
John
I'm sorry but I never asked you if you could send me some pics of the bike fairing that you would like to make.If you would like to pm me I will give you my E mail address and then if I can answer any questions or get some kit sent out to you then I will be more than happy to do so.
Now there won't be anything until early next week as I managed to cut the tip of one of my fingers right off late last night and it is a bit uncomfortable just now.
Getting acetone or anything like that in there might not be the smartest thing to do so for now thank you for all of the kind comments and will catch up with you later
Cheers
P
Hi Paul
that is a very impressive job but I'm sure it could double as a surf board. I must confess I am fascinated to know how how you are going to decide where you will put the split lines in the rear body mould I did feel a bit guilty as I built the plug, but you know someone else's problem

Many thanks
Mike
that is a very impressive job but I'm sure it could double as a surf board. I must confess I am fascinated to know how how you are going to decide where you will put the split lines in the rear body mould I did feel a bit guilty as I built the plug, but you know someone else's problem
Many thanks
Mike
poppet valves rule!
Hi All
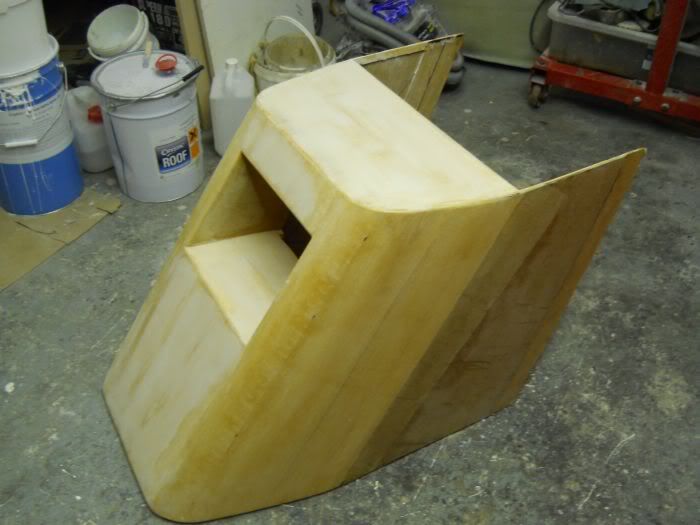
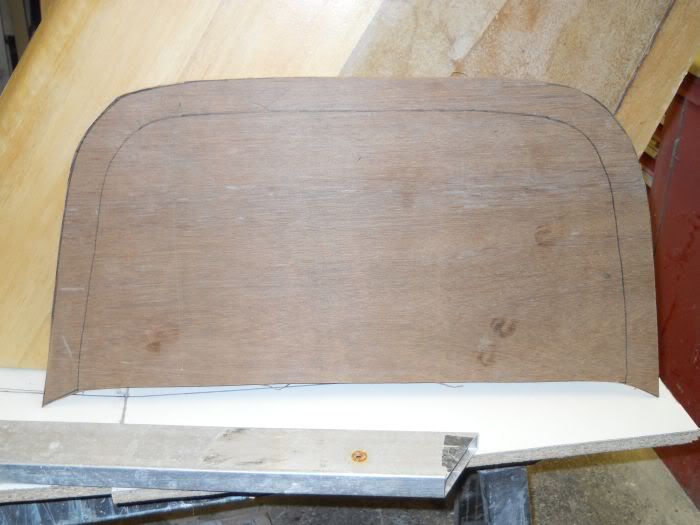
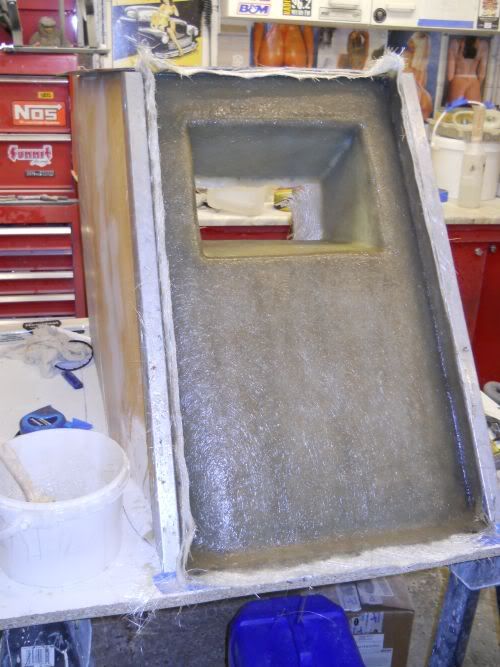
So here we go with the tub section then.
After sorting out a suitable work base the tub was scribed around and then bogged into position with a bit of batten and some car body filler.
By doing this you can prevent the plug from moving around as you work on it.
Just three small blobs of filler do the job quite nicely.One in each corner and one at the top end.
Next it was cut the top fence and roughly shape that.
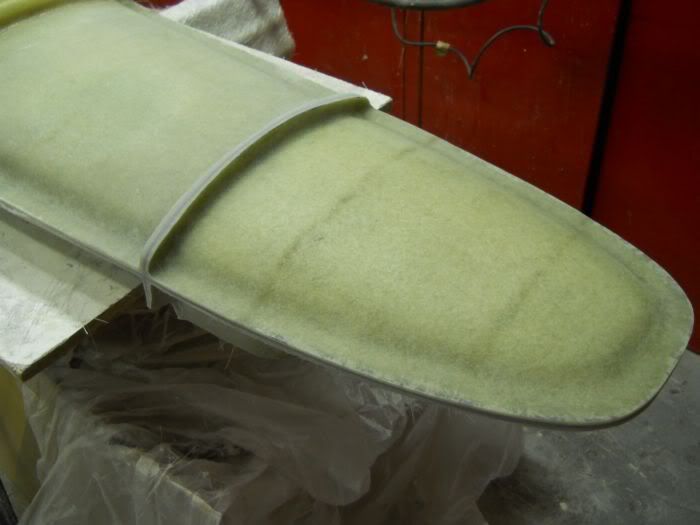
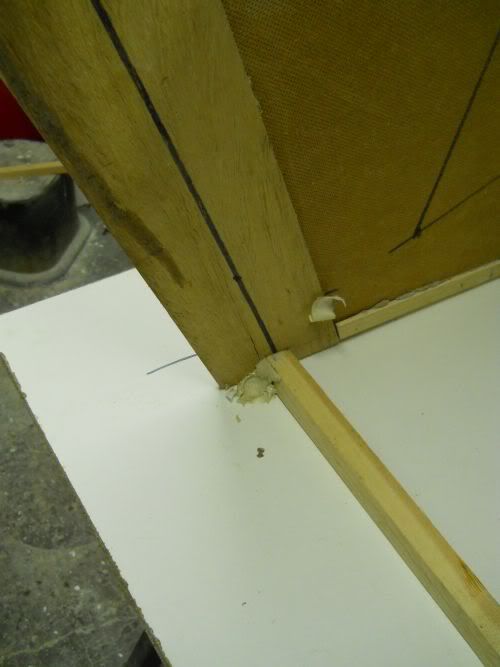
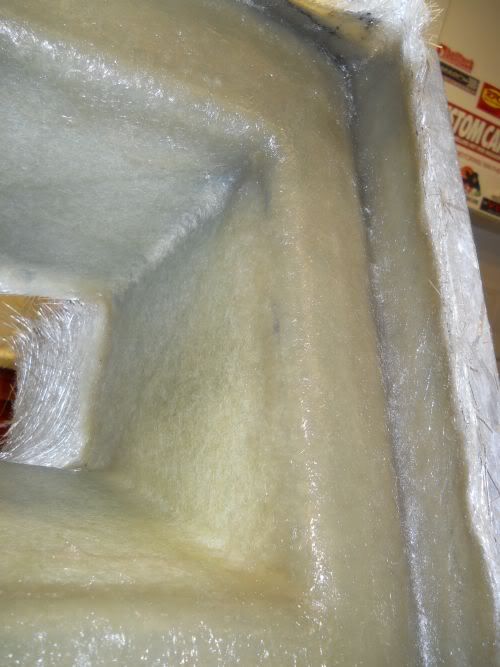
With the corners of the open box section and their very square edges in mind it was decided to cove these in but not with plasticine but with filler.
The reason behind this desicion is simple.
The plug is made from balsa and is quite thin so to try and cove in with with anything but filler would mean that considerable pressure would have to be applied and this could lead to breaking the plug which is a no no.
Mix a bit of filler up and just run that up the corners with very little pressure and the job is done in seconds and not half an hour.
It also adds a small amount of strength to the corners as well.
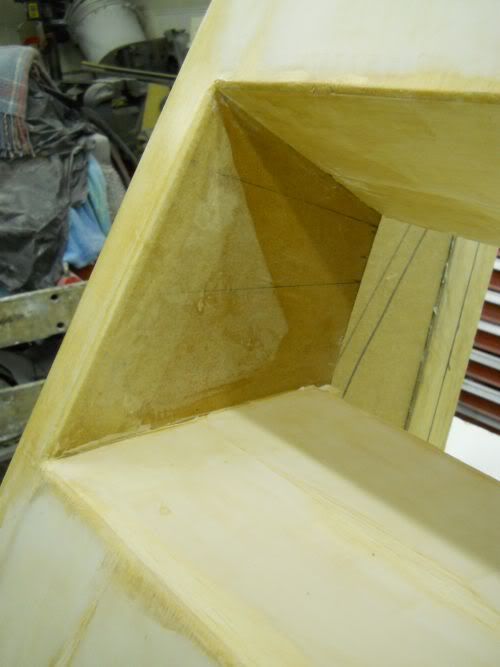
You can see the coved edges clearly in this photo.
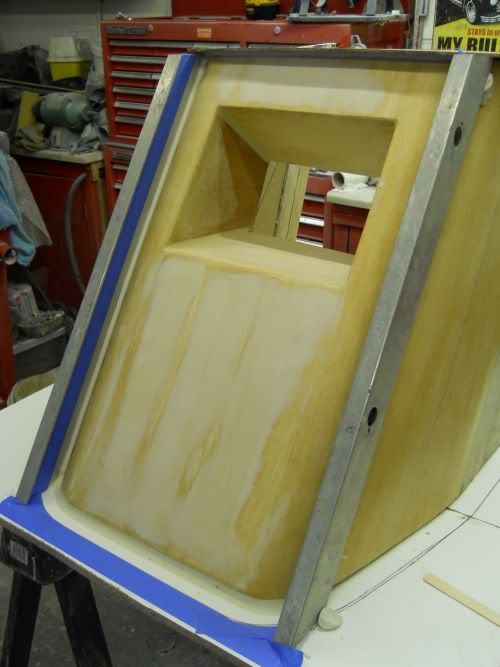
Fences cut and bonded into position,fence corners coved with plasticine and our blue tape all go next and then a good wax up.
Mix the gel and get it on.
By doing this middle section first the problems with mould distortion are greatly reduced as there will be vitually no 'pull' in any one direction on the plug.
The laminates will be the usual 5 layers of 600gsm matt around the outer edges but only 3 will go in the box area.
This makes releasing a bit easier as there is more give in the laminates in that particular area of the mould.
If the box was completely closed off then a PCL air line coupler would be fitted to the back side of the box and then when it comes to release time you just connect up an air line and 'blow release' the section.
The design of the plug is such that when it comes to release time there is plenty of room to get to the back of the box and ease it off that way.
The positioning of fences and why will be detailed later as it will be much much easier to show at that time.
That's it for now
cheers
P
So here we go with the tub section then.
After sorting out a suitable work base the tub was scribed around and then bogged into position with a bit of batten and some car body filler.
By doing this you can prevent the plug from moving around as you work on it.
Just three small blobs of filler do the job quite nicely.One in each corner and one at the top end.
Next it was cut the top fence and roughly shape that.
With the corners of the open box section and their very square edges in mind it was decided to cove these in but not with plasticine but with filler.
The reason behind this desicion is simple.
The plug is made from balsa and is quite thin so to try and cove in with with anything but filler would mean that considerable pressure would have to be applied and this could lead to breaking the plug which is a no no.
Mix a bit of filler up and just run that up the corners with very little pressure and the job is done in seconds and not half an hour.
It also adds a small amount of strength to the corners as well.
You can see the coved edges clearly in this photo.
Fences cut and bonded into position,fence corners coved with plasticine and our blue tape all go next and then a good wax up.
Mix the gel and get it on.
By doing this middle section first the problems with mould distortion are greatly reduced as there will be vitually no 'pull' in any one direction on the plug.
The laminates will be the usual 5 layers of 600gsm matt around the outer edges but only 3 will go in the box area.
This makes releasing a bit easier as there is more give in the laminates in that particular area of the mould.
If the box was completely closed off then a PCL air line coupler would be fitted to the back side of the box and then when it comes to release time you just connect up an air line and 'blow release' the section.
The design of the plug is such that when it comes to release time there is plenty of room to get to the back of the box and ease it off that way.
The positioning of fences and why will be detailed later as it will be much much easier to show at that time.
That's it for now
cheers
P
-
unstable load
- Top Dog
- Posts: 1285
- Joined: Mon May 04, 2009 6:53 am
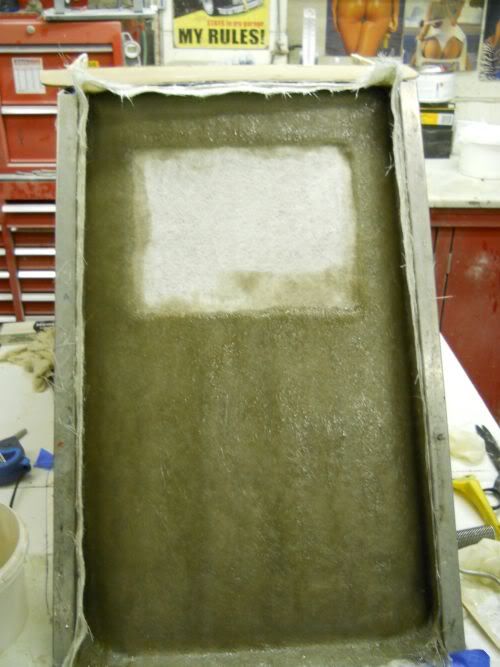
Hi all
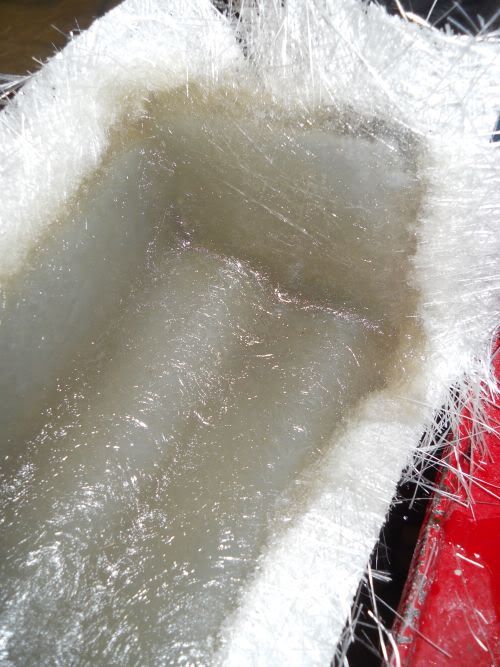
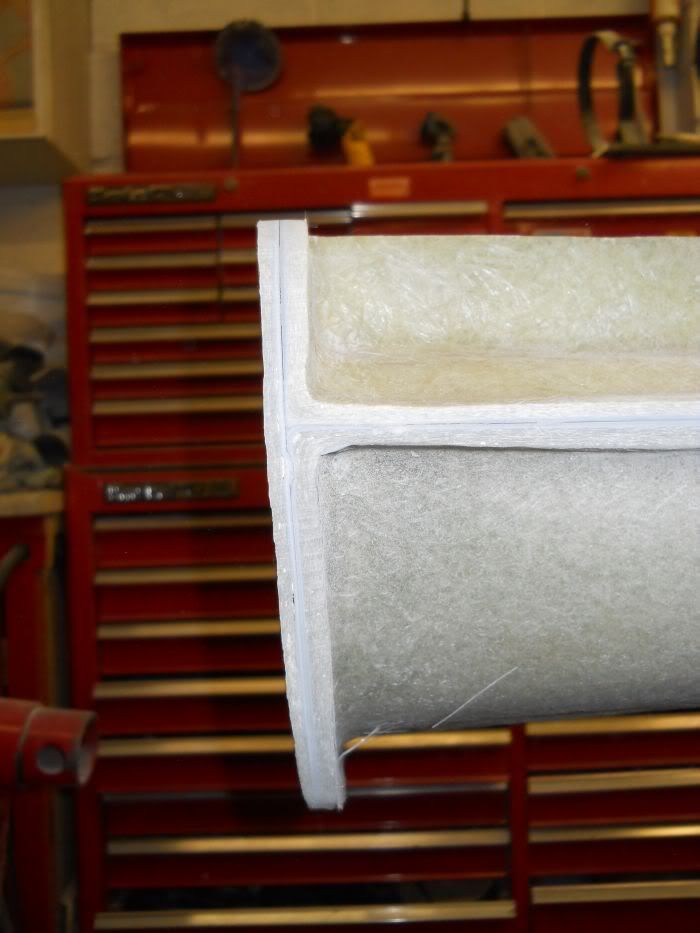
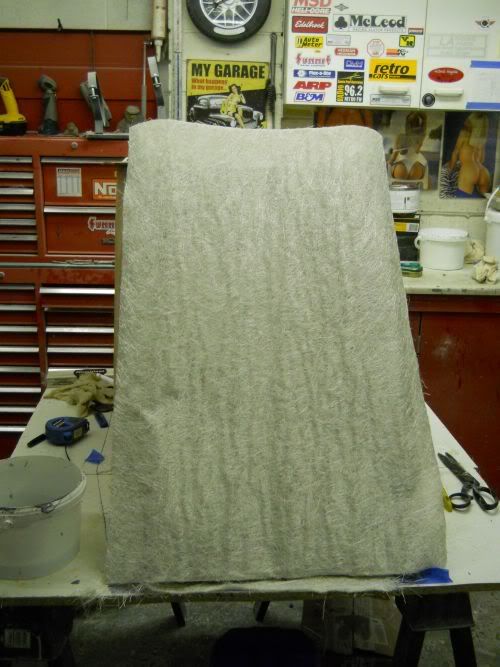
Next bit then, glassing and upside down glassing, WOO HOO my favourite.
Got the first two layers on and let that cure for a while as glass when it is heavy has a tendency to sag and this is a pain when glassing as it drops down and gets in the way.
So with that in mind glass prep is all important and dealing with the corners first it goes something like this.
Place your full sheet into position.
And then tear the corners like this
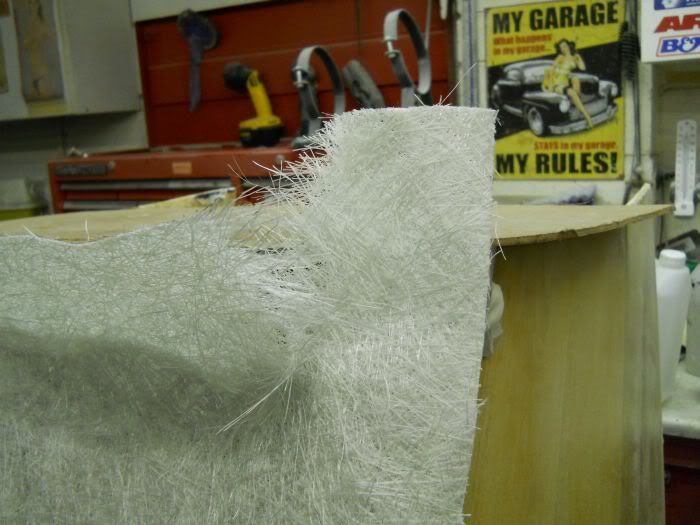
Ease the glass into place with your fingers
Then make it neat
I like to wet the corners first as this holds the glass in place and you end up with this
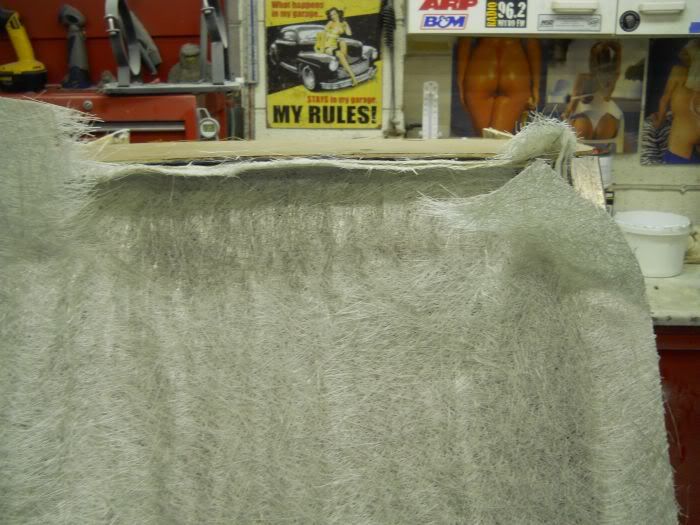
Work the rest of the glass wetting out as you go but not wetting out the box area as we dont need that section because it has already been done.
The edges all around the box rebate are wet so laminate shears are gently pushed through and then the glass is cut all around the opening.
That completed all that is needed is to roll out the edges again.
Get the other two layers on and that's this bit done.
As always it needs to cure now for a couple of days and then the sides can be started.
cheers
P
Next bit then, glassing and upside down glassing, WOO HOO my favourite.
Got the first two layers on and let that cure for a while as glass when it is heavy has a tendency to sag and this is a pain when glassing as it drops down and gets in the way.
So with that in mind glass prep is all important and dealing with the corners first it goes something like this.
Place your full sheet into position.
And then tear the corners like this
Ease the glass into place with your fingers
Then make it neat
I like to wet the corners first as this holds the glass in place and you end up with this
Work the rest of the glass wetting out as you go but not wetting out the box area as we dont need that section because it has already been done.
The edges all around the box rebate are wet so laminate shears are gently pushed through and then the glass is cut all around the opening.
That completed all that is needed is to roll out the edges again.
Get the other two layers on and that's this bit done.
As always it needs to cure now for a couple of days and then the sides can be started.
cheers
P
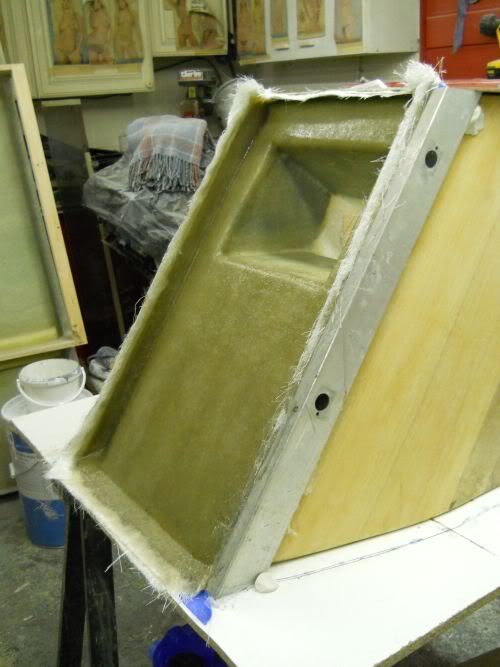
Hi Again chaps.
Raining all day today so got right back on the case.
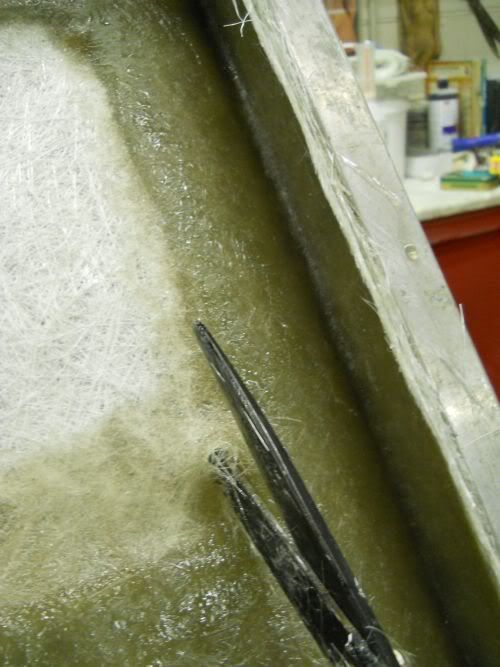
First off was to remove the fences on the sides.
A quick tip for you, if you use hot glue to hold anything in place and then need to remove it in one hit.
Soak the glue with acetone,it goes hard and brittle and then just about falls off leaving no residue behind.
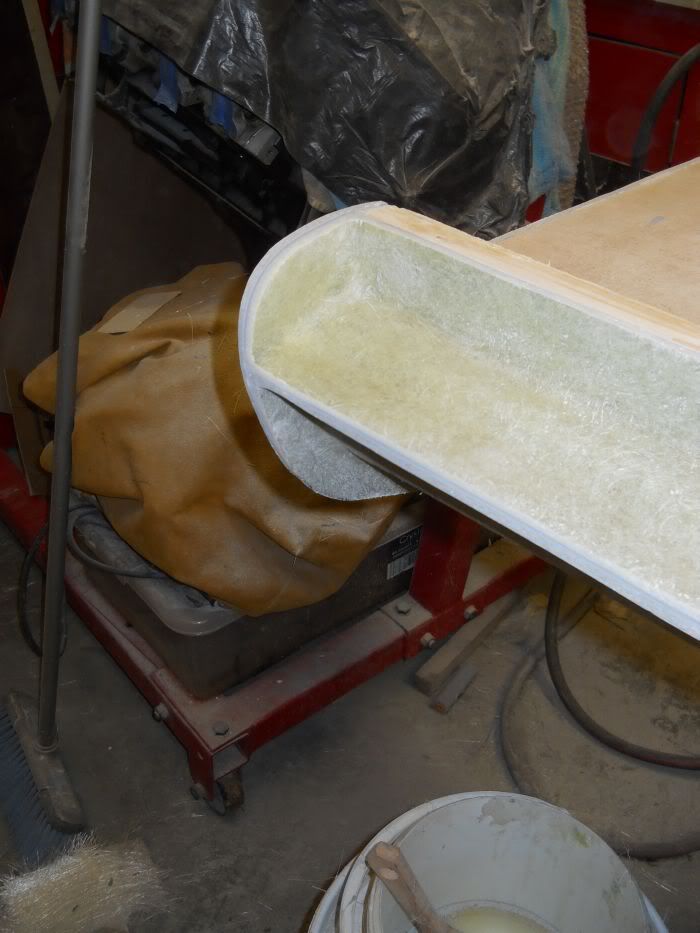
You can see all of the glue on the back side in this first shot.
Mike stay out of Karen's handbag ya hear.
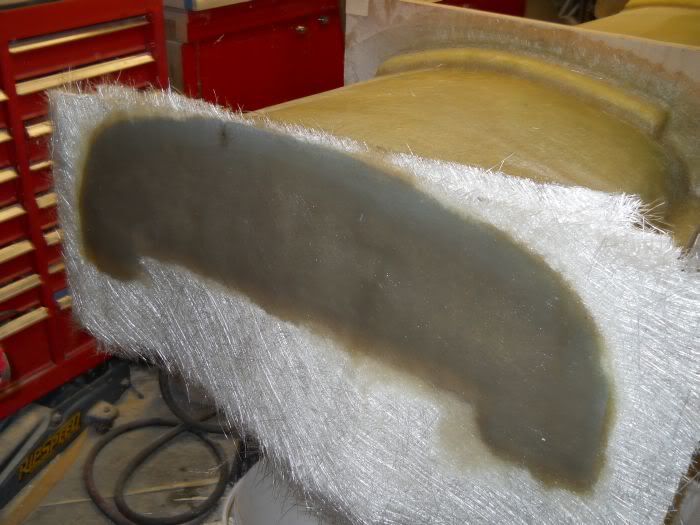
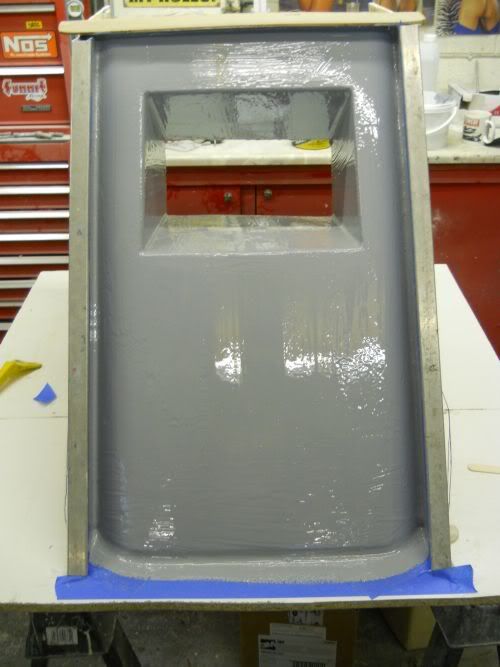
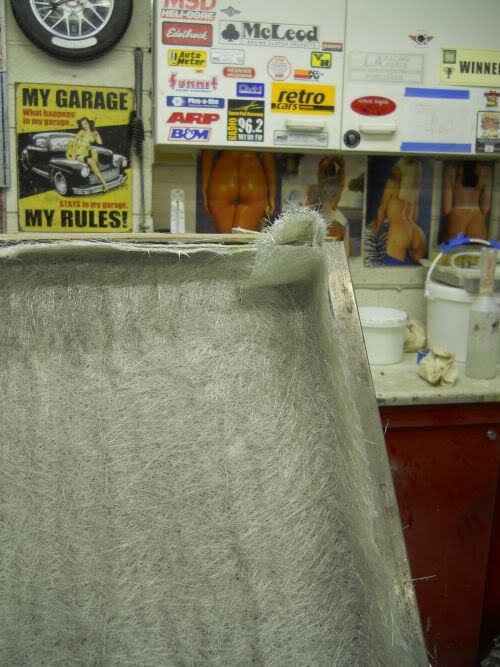
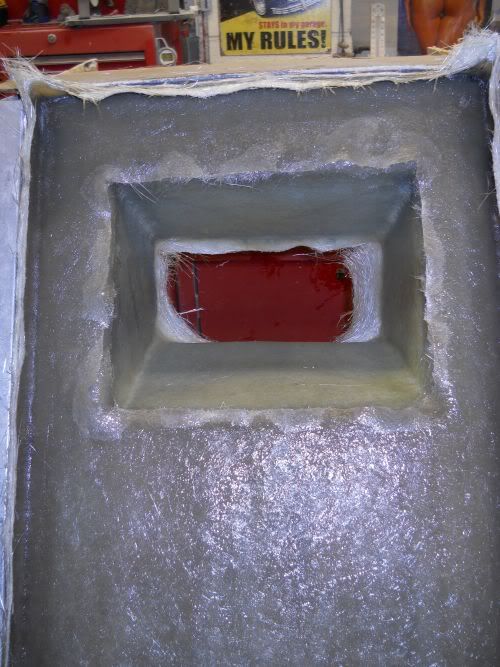
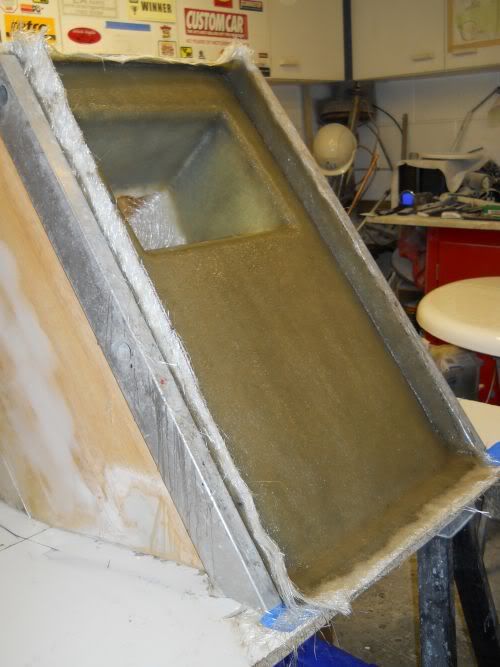
After trimming the rough edges and more waxing on the sides get the gel on.
You can see from this next shot that the gel flows really nice into the grp fence corners and edges and this will make the split lines so small when it comes to release time thus making it much easier to tidy up when it comes to make the true panel.

Now the next couple of evenings might be a bit tricky for laminating as the temperatures are set to drop below what could be considered okay for this type of work but all of the laminates can be prepared in the meantime.
It is okay to leave the gel exposed like this for up to about a week but after that the styrene content of the gel starts to go off and it is worth wiping over the gel with acetone to reactivate the styrene.
Styrene is the chemical key in polyester resins and gelcoats that makes you think it has'nt gone off when you touch it(but it has)
Polyester resin is very good to use with this type of moulding as it it relatively cheap compared to epoxy resin.
Epoxy is a much stronger resin (but far more expensive) and uses a greater chemical reaction to bond things together as oppossed to poly resins which rely more on mechanical bonding plus a bit of chemical shinanegans.
The main body mould has settled well over the last week or so and it may be that we jump back onto that one for a while until the temperatures sort themselves out again.
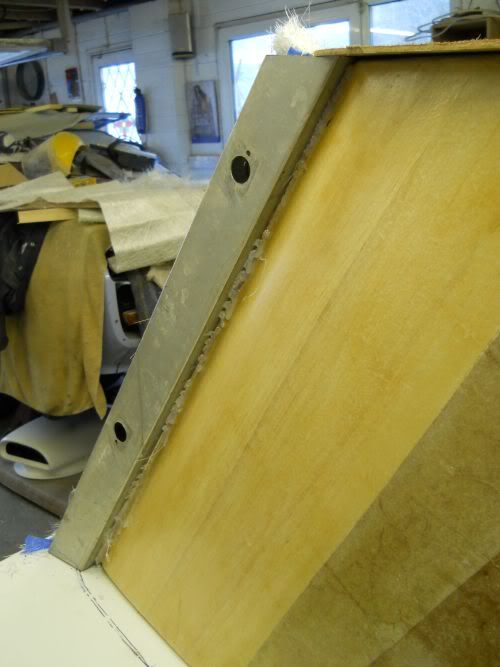
The side rails are about ready to come away as it the nose cone so it will be fun to pop that little lot off.
For those of you still following along with this project .. thank you and watch this space.
cheers
P
Raining all day today so got right back on the case.
First off was to remove the fences on the sides.
A quick tip for you, if you use hot glue to hold anything in place and then need to remove it in one hit.
Soak the glue with acetone,it goes hard and brittle and then just about falls off leaving no residue behind.
You can see all of the glue on the back side in this first shot.
Mike stay out of Karen's handbag ya hear.
After trimming the rough edges and more waxing on the sides get the gel on.
You can see from this next shot that the gel flows really nice into the grp fence corners and edges and this will make the split lines so small when it comes to release time thus making it much easier to tidy up when it comes to make the true panel.
Now the next couple of evenings might be a bit tricky for laminating as the temperatures are set to drop below what could be considered okay for this type of work but all of the laminates can be prepared in the meantime.
It is okay to leave the gel exposed like this for up to about a week but after that the styrene content of the gel starts to go off and it is worth wiping over the gel with acetone to reactivate the styrene.
Styrene is the chemical key in polyester resins and gelcoats that makes you think it has'nt gone off when you touch it(but it has)
Polyester resin is very good to use with this type of moulding as it it relatively cheap compared to epoxy resin.
Epoxy is a much stronger resin (but far more expensive) and uses a greater chemical reaction to bond things together as oppossed to poly resins which rely more on mechanical bonding plus a bit of chemical shinanegans.
The main body mould has settled well over the last week or so and it may be that we jump back onto that one for a while until the temperatures sort themselves out again.
The side rails are about ready to come away as it the nose cone so it will be fun to pop that little lot off.
For those of you still following along with this project .. thank you and watch this space.
cheers
P
