
New project
Moderator: phpBB2 - Administrators
Hi Tom
Yes there is a lot of work involved and I just hope that Mike is pleased with what he ends up with.
Without exception everyone has said kind things about the work that I'm doing and I still get a buzz from messing about with this stuff after very nearly 30yrs now.
Thanks to you and all the others.
cheers
P
Evening All
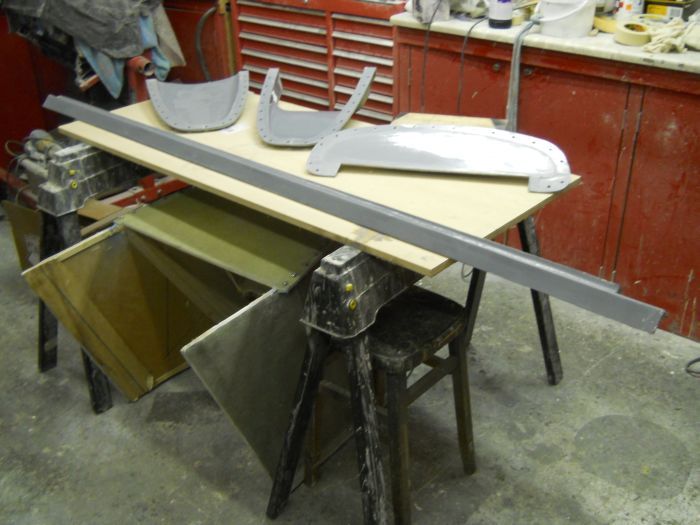
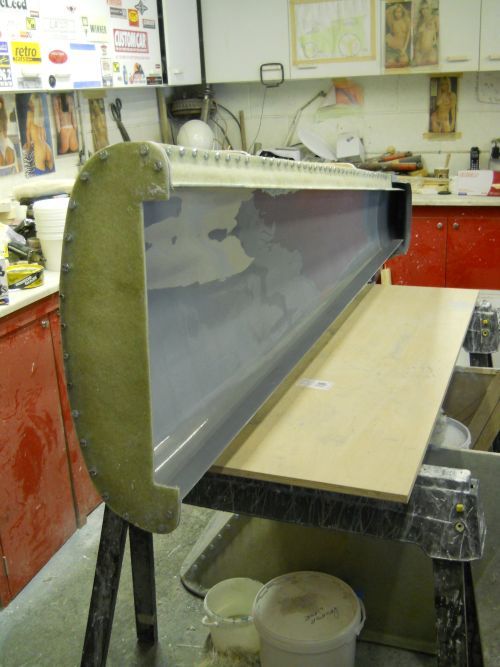
Not an awful lot to show you tonight but at least it's still going forward.
The sanding and polishing eats up time like you would not believe but to get a good finish it's worth it.
I have only one section of the mould left now to sand and then polish so I think early next we can get going properly.
Polished and ready to bolt up.
Cheers
P
Afternoon Chaps
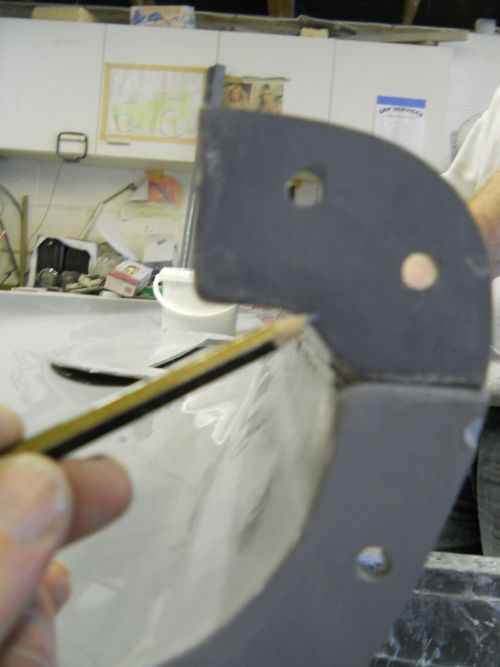
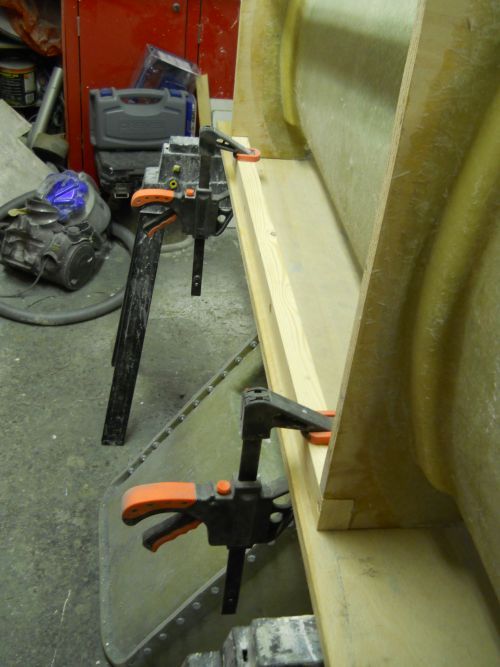
Crap weather means working in the garage and here are todays efforts and an explanation of where to make your split points.
So with everything polished up we can start to bolt things together to make the mould back up.
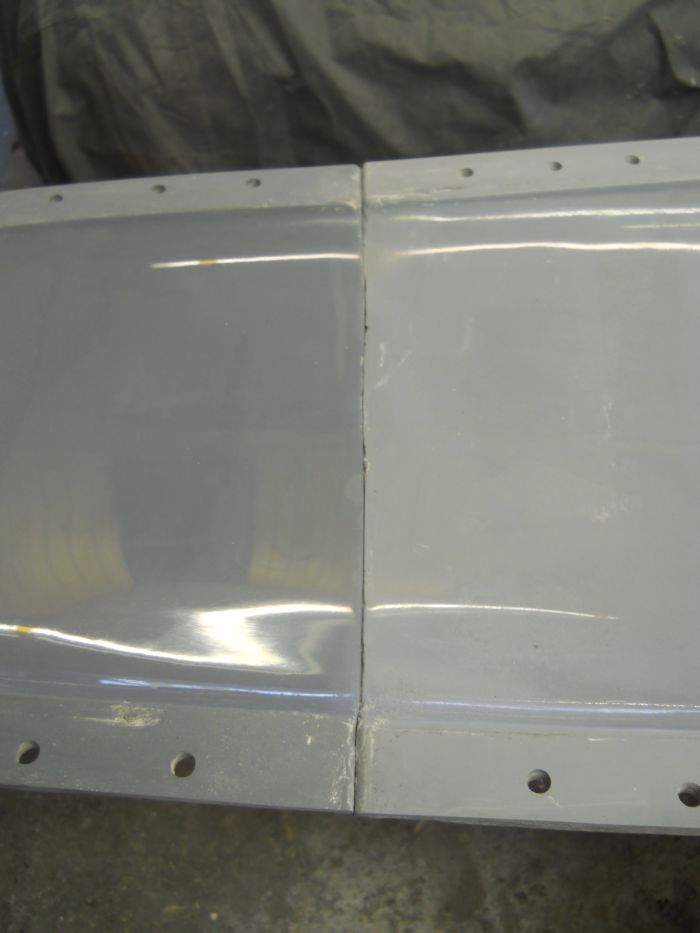
Now the split lines are so important because what we need to avoid at all costs is to make our panel or our plug mould bound.
By looking at the plug/former we have to make sure that there are release points and we have to make sure that we are not too close to an edge which will cause problems with the laminate not adhereing when it is wet out.
This first shot shows clearly why we put the line where we did and the second shot shows that if we went aa little further over with the line then we would create mould lock.
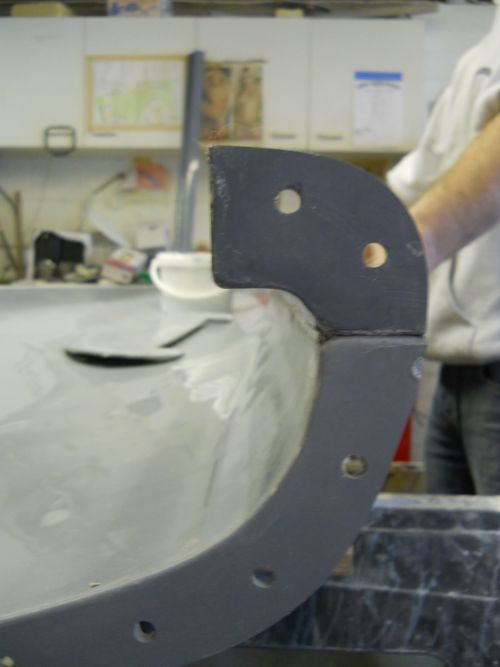
The end panel shows this even better.
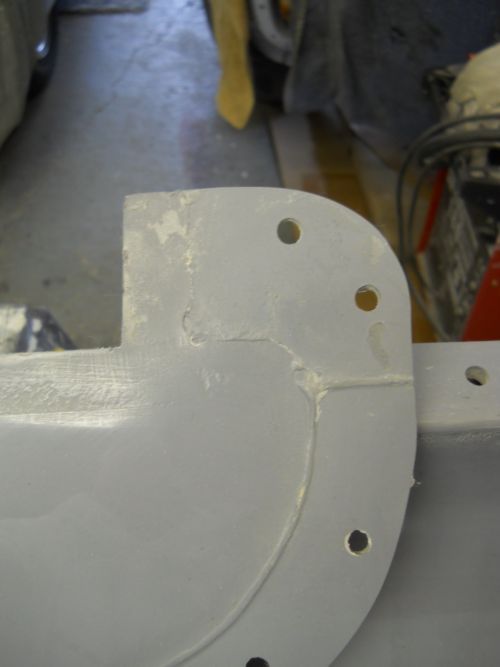
At the front of the mould it is very clear that without the split lines we would be in a whole world of trouble.
This would be impossible to release if it were all one section.
This front section is going to be VERY difficult to do and it has been discussed this afternoon that we might instigate a Fatua upon Mike if it gets messy when laminating
Always remember to look at what you are planning to make and then adjust your plug accordingly if needed.
The last thing you want is to spend hours making something and then find out it cant be moulded from.
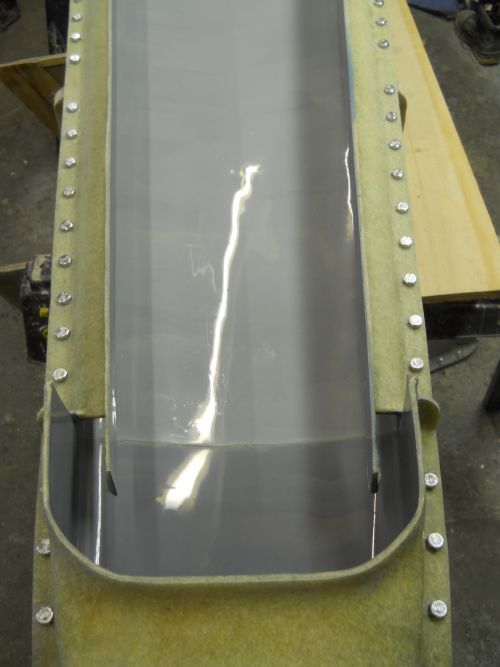
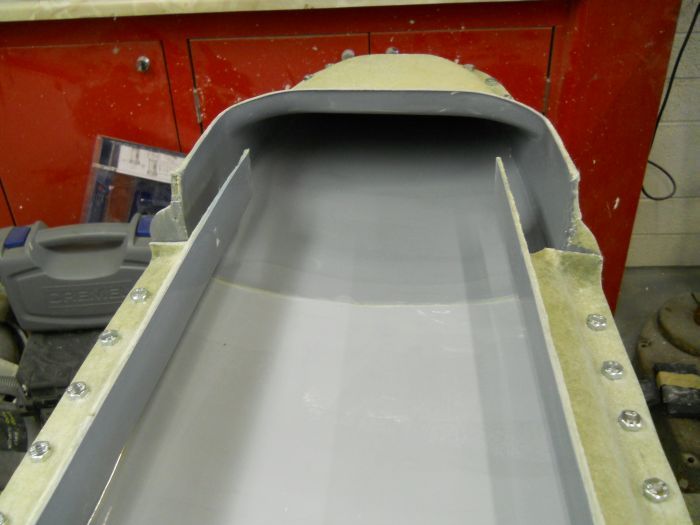
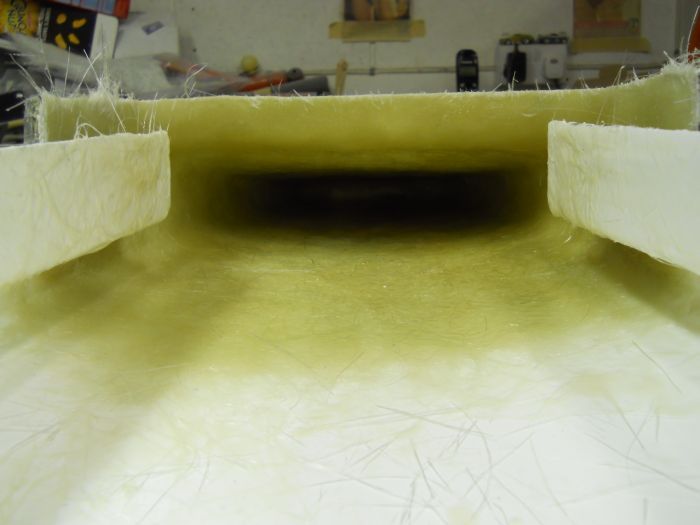
So with everything bolted up we arrive at this.
We have turned the mould on its side at this point and clamped it from the back so that we can gel the awkward bits with greater access.
With the gel mixed it was a case of getting it on and then spreading it out as evenly as possible.
Three coats will be put on and I hope to have all of the gelling done before the end of play tonight.
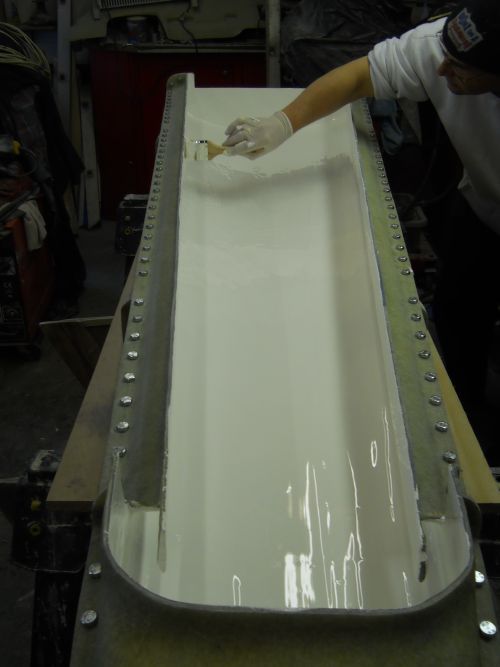
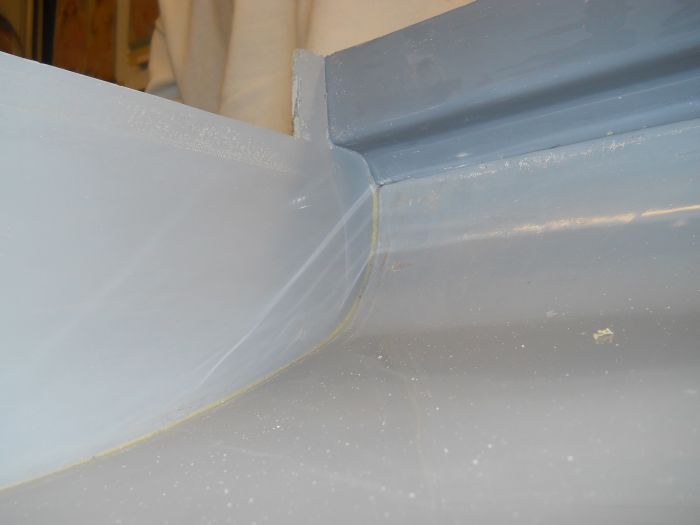
The first complete coat looks like this.
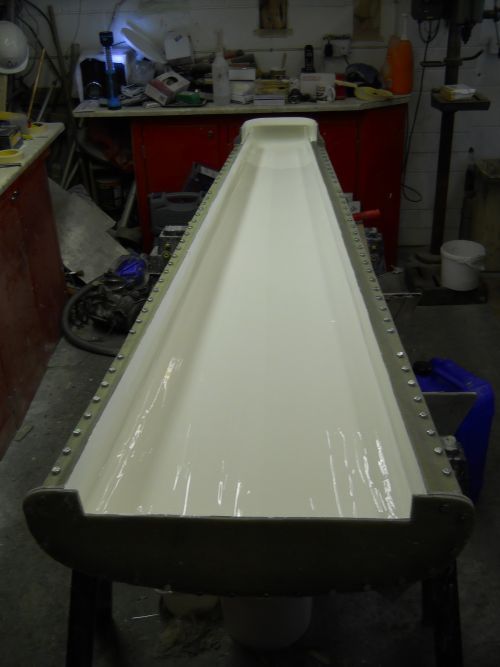
With regard to waxing the mould only three coats have been put on because the mould is shiney from the machine polishing.
We could not possibly have polished the plug when all this first started and that is the reason behind putting on so many coats at that time.
Once we come to release time the mould sections will come away easily and the body will (with luck) more or less fall out.
Bit of glassing tomorrow evening and we should start to have something looking quite good.
cheers
P
Crap weather means working in the garage and here are todays efforts and an explanation of where to make your split points.
So with everything polished up we can start to bolt things together to make the mould back up.
Now the split lines are so important because what we need to avoid at all costs is to make our panel or our plug mould bound.
By looking at the plug/former we have to make sure that there are release points and we have to make sure that we are not too close to an edge which will cause problems with the laminate not adhereing when it is wet out.
This first shot shows clearly why we put the line where we did and the second shot shows that if we went aa little further over with the line then we would create mould lock.
The end panel shows this even better.
At the front of the mould it is very clear that without the split lines we would be in a whole world of trouble.
This would be impossible to release if it were all one section.
This front section is going to be VERY difficult to do and it has been discussed this afternoon that we might instigate a Fatua upon Mike if it gets messy when laminating
Always remember to look at what you are planning to make and then adjust your plug accordingly if needed.
The last thing you want is to spend hours making something and then find out it cant be moulded from.
So with everything bolted up we arrive at this.
We have turned the mould on its side at this point and clamped it from the back so that we can gel the awkward bits with greater access.
With the gel mixed it was a case of getting it on and then spreading it out as evenly as possible.
Three coats will be put on and I hope to have all of the gelling done before the end of play tonight.
The first complete coat looks like this.
With regard to waxing the mould only three coats have been put on because the mould is shiney from the machine polishing.
We could not possibly have polished the plug when all this first started and that is the reason behind putting on so many coats at that time.
Once we come to release time the mould sections will come away easily and the body will (with luck) more or less fall out.
Bit of glassing tomorrow evening and we should start to have something looking quite good.
cheers
P
Having followed this fascinating build and to now see the first coats of gel for the final body going in I'm actually so excited, and it's not even my project!
Mike must be a happy boy today I'm guessing. As ever, top class and informative work Monkey
J
Mike must be a happy boy today I'm guessing. As ever, top class and informative work Monkey
J
I wish I had a pound for every time some one told me "My Dad had one of those!"
'78 Cavalier Coupe GLS 2000
'78 Cavalier Coupe GLS 2000

Hi Paul
seeing the finished mould all pollished up . . . looked good enough to go for a black gell coat good job you got on and gell coated it in white today before you posted up the pictures .
Looking at it in gell I am very glad you did the white looks excelent and it leaves alot of scope for the future though It may well stay bright shiney white . . . maybe with a few teeth on front around the axel area and an eye on either side
Best regards
Mike
seeing the finished mould all pollished up . . . looked good enough to go for a black gell coat
Looking at it in gell I am very glad you did the white looks excelent and it leaves alot of scope for the future though It may well stay bright shiney white . . . maybe with a few teeth on front around the axel area and an eye on either side
Best regards
Mike
poppet valves rule!
Hi Guys
Mike,absolutely NO disrespect but if we had gone with the black then things would look a lot different to the way they will be when release time comes around.
The mould has a fair few uneven areas and this would show up something chronic when it is all polished up at the very end.
The nose cone is going to be a challenge to say the least but I will get it right for you.
Maybe you want to go into hiding now ?
Chris
The blue lamp is actually an LED telescopic item that I was using to illuminate the end of the nose cone whiilst gelling up and not a bug lamp.
The bugs are as stupid as mud down here and we do get a few in the gel at times but this particular time around there is not a one of the little buggers so that is good.
The whole thing is now fully gelled and curing so tomorrow will see the start of the glassing and I am going to tackle that front bit first just to get it out of the way.
cheers
P
-
Ian Anderson

- Forum Contributor

- Posts: 2396
- Joined: Sun Nov 19, 2006 9:46 pm
- Location: Edinburgh
Sire Monkey
As always I find these posts an incredible work of art and proves to me that if / when I break the GT40 I know where to send it for some TLC!
Could you explain to us lesser mortals how to tell the difference between chopped mat and the layered mat that you used in the mould processes? Which is better stronger etc?
I heard one is a lot faster to do and is done with something like a big spraygun and it is just blown on.
Thanks
Ian
Last edited by Ian Anderson on Tue Feb 28, 2012 6:32 pm, edited 1 time in total.
Owner of an "On the Road" GT40 Replica by DAX powered by 3.9Hotwre Efi, worked over by DJ Motors. EFi Working but still does some kangaroo at low revs (Damn the speed limits) In to paint shop 18/03/08.
-
Ian Anderson
- Forum Contributor
- Posts: 2396
- Joined: Sun Nov 19, 2006 9:46 pm
- Location: Edinburgh
Paul is gonna look like he's had a fight in a candy floss machine when he's done with this next bit 
Perry Stephenson
MGB GT + Rover V8
9.62 @ 137.37mph
Now looking for 8 seconds with a SBC engine
-
Ian Anderson
- Forum Contributor
- Posts: 2396
- Joined: Sun Nov 19, 2006 9:46 pm
- Location: Edinburgh
Hi All
Here is tonight's progress report.
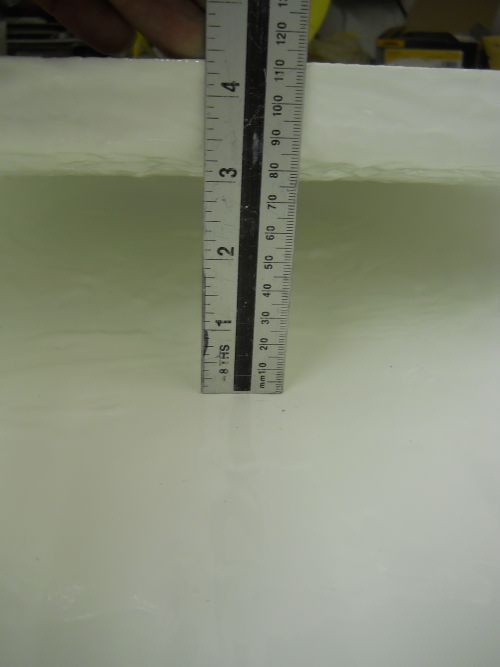
With only 3"of height to play with at the front of the mould and not a lot of width a different approach was needed to laminate this area.
First two sections of laminate were torn into a rough shape and then trial fitted.
Knowing that it would be impossible to laminate in the normal way what I did was this...
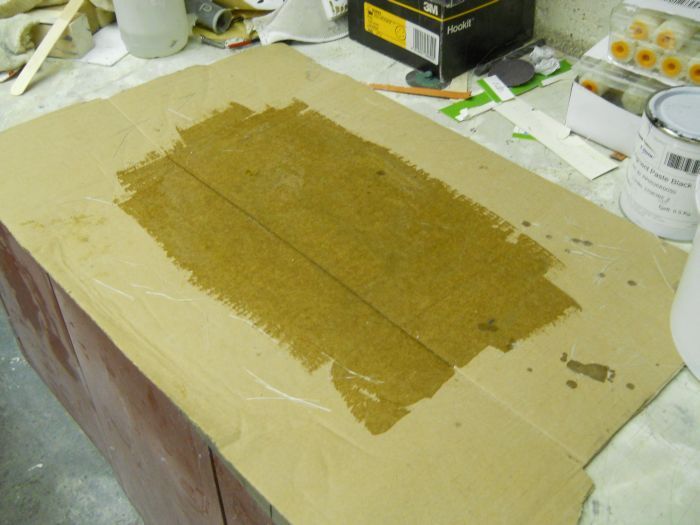
Take a section of cardboard and wet that out with resin and then place the laminates on top of that and soak them right through.
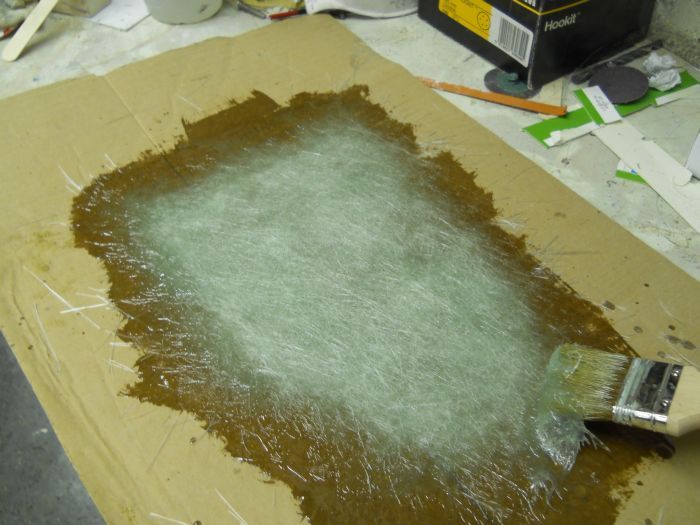
Once that was done the laminates are teased off the cardboard and very carefully slid up into place by hand.
I could not take a shot of this bit beacause I had resin up my arms and would have ruined the camera so you will just have to trust me on this one ok.
With the glass roughly in position I then final finished with a resin brush making sure that it was not dropping down or folding in on itself.
The same was done on the bottom section of the nose cone and then smaller sections of glass were laminated into place on the return and the canardesque flaps on the back edge.
Once that was completed small strips were torn and then eased into place at the very front to tie everything together.
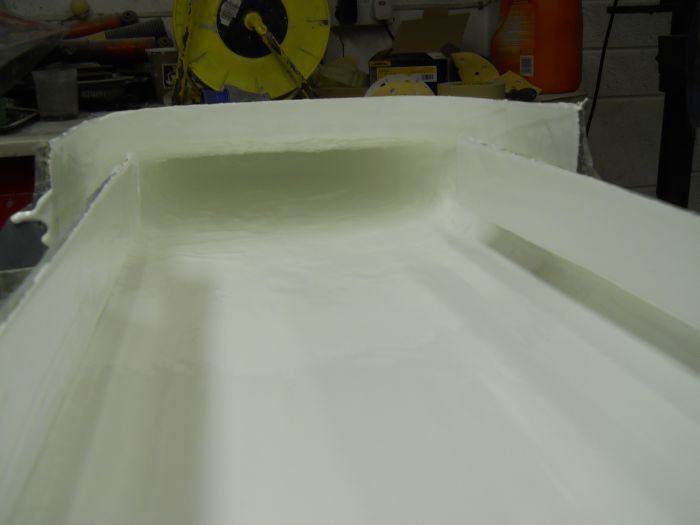
Eventually we end up with this.
Tomorrow evening will see the rest of the mould laminated but with only two layers as we are going to do something a bit different after that to make this whole thing very strong but lightweight.
Question and answer time now for Ian
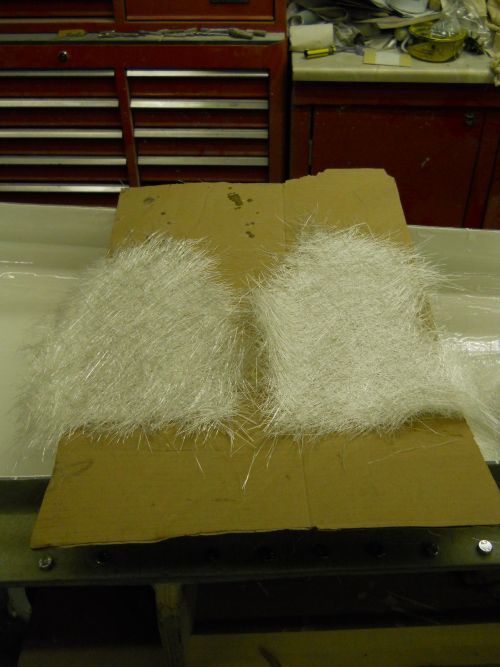
The laminates being used are known as chopped strand matting.
This comes in varying weights ie 300gsm,450gsm,600 and so on.
This equates to the weight of a square meter and obviously the heavier the laminate the thicker it is.
600gsm is what is being used here.
With regard to layers in previous posts it has all been CSM but you can get a multitude of different laminates depending on what you want to make and how strong it needs to be.
You can get.....
CSM
Woven roving.
Combi mats..csm and woven
Bi axial
Tri axial
Diagonap
Powder coat
Square weave also known as a 290
and so on.
Spray laminating is done using a glass ribbon which is fed through a powered (usually air fed) multi bladed spinning cutter that chops the ribbon as it passes through a feed tube.
This is then fired onto the mould whilst a nozzle also attached to the 'gun'sprays catalised resin on at the same time which allows for thick or thin applications of laminate around the mould.
It is a brilliant way of laminating at speed but you have to have a good operator and a fast co worker to roll out large areas and requires total concentration plus a substantial knowledge of how much you can load areas.
Too much and you will create an exothermic hot spot which can then cause severe distortion and cracking.
To have a set up like this at home would be the ultimate but it is very expensive and requires controlled conditions which are not possible in a workshop like mine.
My cars would also have to be moved out and then I would have nowhere to play in the evenings.
I will take some pics of the different laminates I have here at home and post them up tomorrow for you.
I will also try to explain what is used for what as well at that time
Hope this will help.
That's all for tonight gents.
Cheers
P
Here is tonight's progress report.
With only 3"of height to play with at the front of the mould and not a lot of width a different approach was needed to laminate this area.
First two sections of laminate were torn into a rough shape and then trial fitted.
Knowing that it would be impossible to laminate in the normal way what I did was this...
Take a section of cardboard and wet that out with resin and then place the laminates on top of that and soak them right through.
Once that was done the laminates are teased off the cardboard and very carefully slid up into place by hand.
I could not take a shot of this bit beacause I had resin up my arms and would have ruined the camera so you will just have to trust me on this one ok.
With the glass roughly in position I then final finished with a resin brush making sure that it was not dropping down or folding in on itself.
The same was done on the bottom section of the nose cone and then smaller sections of glass were laminated into place on the return and the canardesque flaps on the back edge.
Once that was completed small strips were torn and then eased into place at the very front to tie everything together.
Eventually we end up with this.
Tomorrow evening will see the rest of the mould laminated but with only two layers as we are going to do something a bit different after that to make this whole thing very strong but lightweight.
Question and answer time now for Ian
The laminates being used are known as chopped strand matting.
This comes in varying weights ie 300gsm,450gsm,600 and so on.
This equates to the weight of a square meter and obviously the heavier the laminate the thicker it is.
600gsm is what is being used here.
With regard to layers in previous posts it has all been CSM but you can get a multitude of different laminates depending on what you want to make and how strong it needs to be.
You can get.....
CSM
Woven roving.
Combi mats..csm and woven
Bi axial
Tri axial
Diagonap
Powder coat
Square weave also known as a 290
and so on.
Spray laminating is done using a glass ribbon which is fed through a powered (usually air fed) multi bladed spinning cutter that chops the ribbon as it passes through a feed tube.
This is then fired onto the mould whilst a nozzle also attached to the 'gun'sprays catalised resin on at the same time which allows for thick or thin applications of laminate around the mould.
It is a brilliant way of laminating at speed but you have to have a good operator and a fast co worker to roll out large areas and requires total concentration plus a substantial knowledge of how much you can load areas.
Too much and you will create an exothermic hot spot which can then cause severe distortion and cracking.
To have a set up like this at home would be the ultimate but it is very expensive and requires controlled conditions which are not possible in a workshop like mine.
My cars would also have to be moved out and then I would have nowhere to play in the evenings.
I will take some pics of the different laminates I have here at home and post them up tomorrow for you.
I will also try to explain what is used for what as well at that time
Hope this will help.
That's all for tonight gents.
Cheers
P
