
Look I have calculated that I can't possably loose any of this fine physique, it is necessary to ensure that there is enough load on the back wheels for them to grip properly. You all are just missing the point here it is ballast for the back end and with my experience so far, ballast is the correct term.
Best regards
Mike
New project
Moderator: phpBB2 - Administrators
Mikekiwicar wrote:Look I have calculated that I can't possably loose any of this fine physique, it is necessary to ensure that there is enough load on the back wheels for them to grip properly. You all are just missing the point here it is ballast for the back end and with my experience so far, ballast is the correct term.
Best regards
Mike
Ballast my arse.
Personally I was going to split the tub mould down and add a few feet in the middle section
BUT if that's how you want to run with this then you crack on mate and we won't tell a soul.
Yes I know I should not be in here messing about when I could be working but I am waiting for gel to cure ok (and to have a cup of tea
cheers
P
Ok
Here's a little bit from tonight.
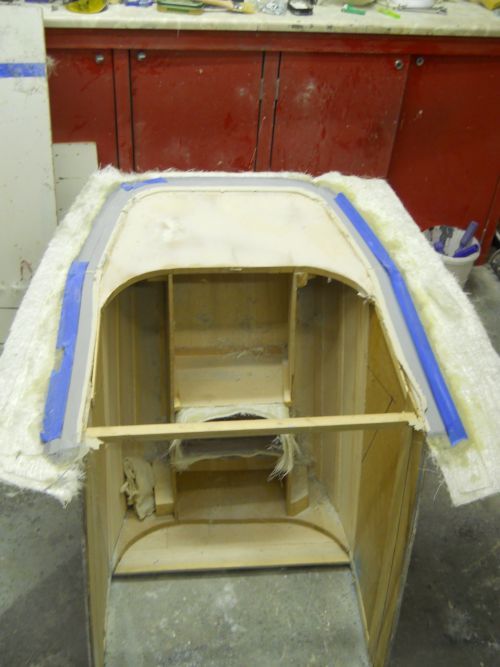
When the top came off yesterday evening a few small areas were damaged,nothing much but enough to warrant a bit of filler in places so thats what happened.
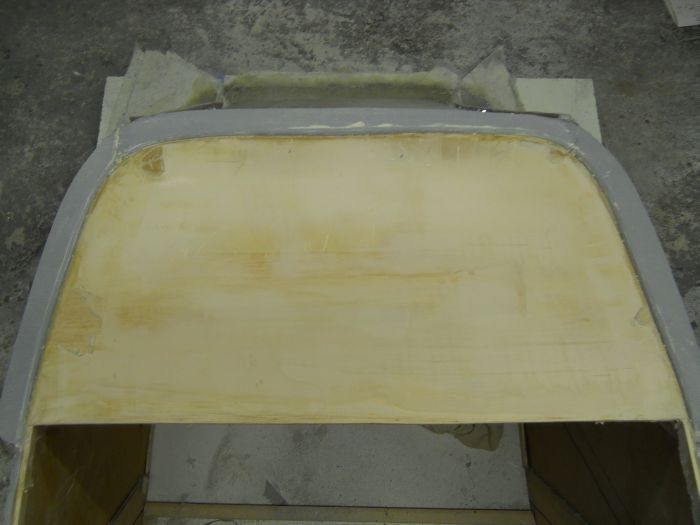
Sand back once hard and then a waxing session.
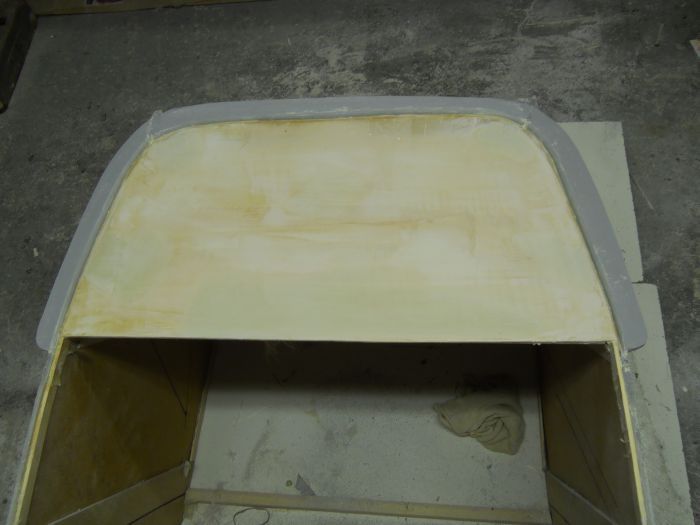
Now the sharp eyed amongst you will notice that the top is a completely different colour and there is a good reason for this.
I ran out of black pigment what a pillock,I thought I had another tin of that.
It will not cause any problems though as it is just the mould and not the final panel.
It will in fact make it easier to see the split lines when we come to release.
I will do the other end the same colour just to keep things looking equal.
I'm now going to go and sit in the corner with the dunces's cap on.
Later
P
Here's a little bit from tonight.
When the top came off yesterday evening a few small areas were damaged,nothing much but enough to warrant a bit of filler in places so thats what happened.
Sand back once hard and then a waxing session.
Now the sharp eyed amongst you will notice that the top is a completely different colour and there is a good reason for this.
I ran out of black pigment
It will not cause any problems though as it is just the mould and not the final panel.
It will in fact make it easier to see the split lines when we come to release.
I will do the other end the same colour just to keep things looking equal.
I'm now going to go and sit in the corner with the dunces's cap on.
Later
P
Hi All
Here we go again then.
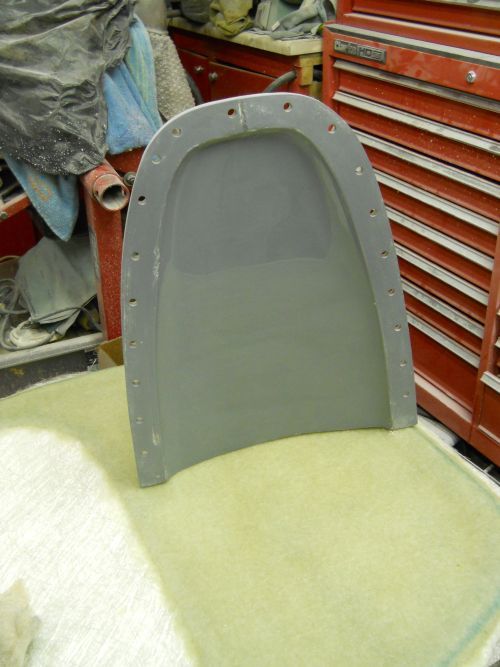
Finished up the lower section of the mould and got it all bolted together.
These moulds are going to weigh a ton with all of the hardware on them.
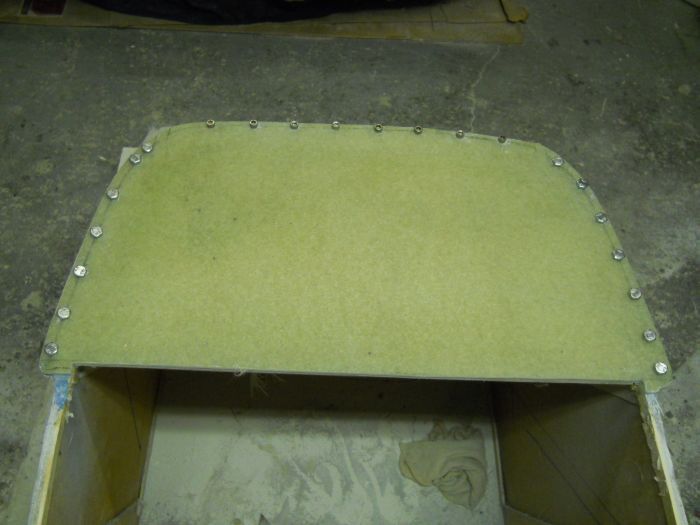
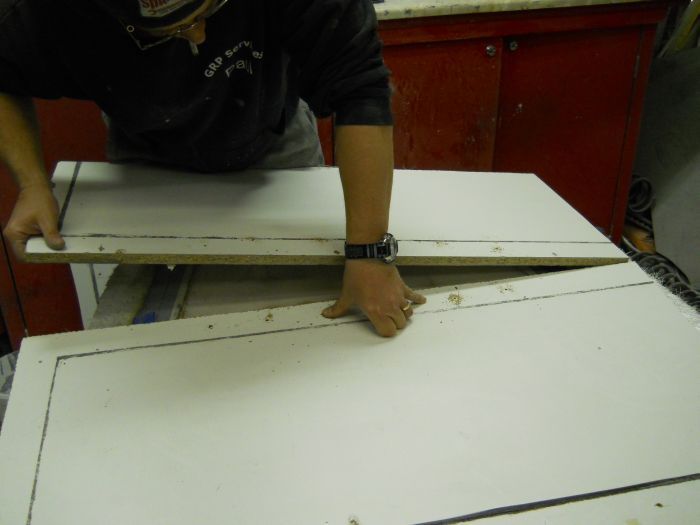
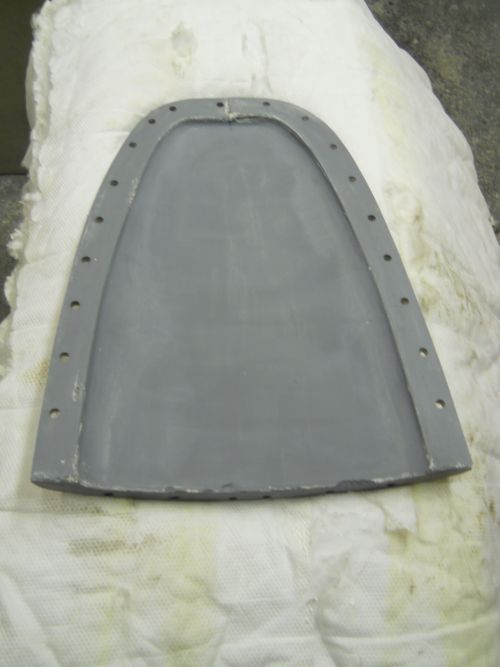
If you look closely at the forward section of the mould you can see different fixings.
The reason behind this is simple.
Making the fence/flange any bigger would cause problems when laminating especially upside down so what I have done is to drill and tap the laminates and then used 6mm Allen bolts to bring the two flanges together.
This is perfectly acceptable as the flanges have little load placed on them so the bolts will not pull through when you do them up.
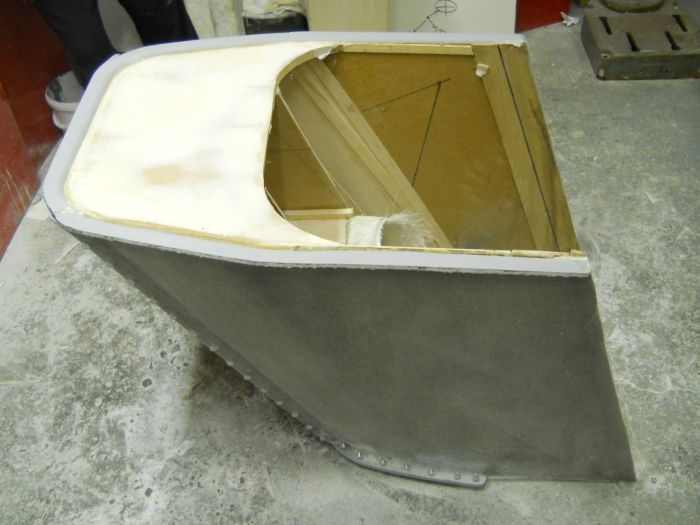
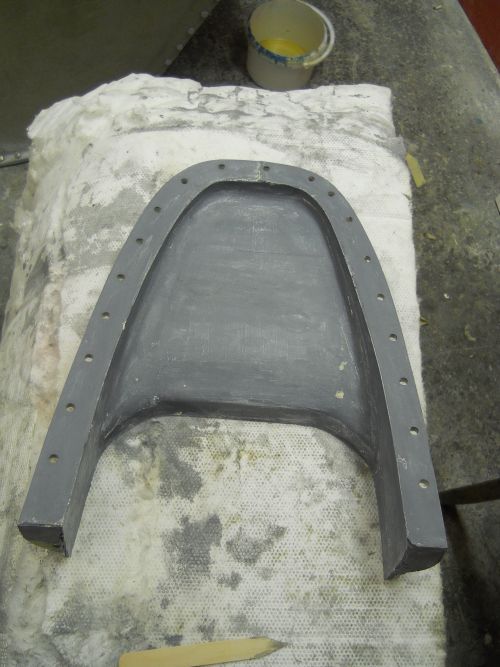
Next the whole thing was turned upside down so that the base could be released.
You can see how nice a job Mike made of the tub in this shot.
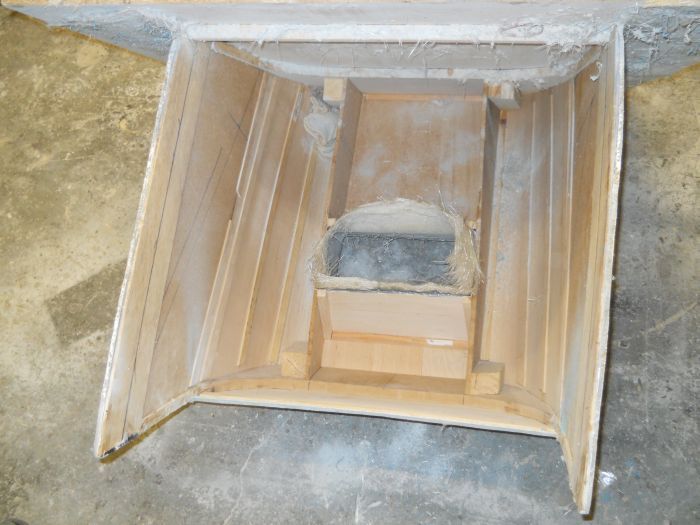
Tapping around the base firmly with a rubber mallet and then a bit of a wiggle and the first section of base came away quite easily.
The back section came no problems either.
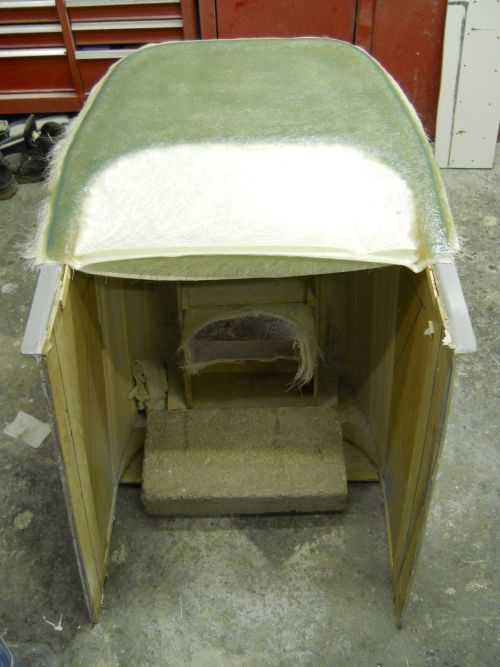
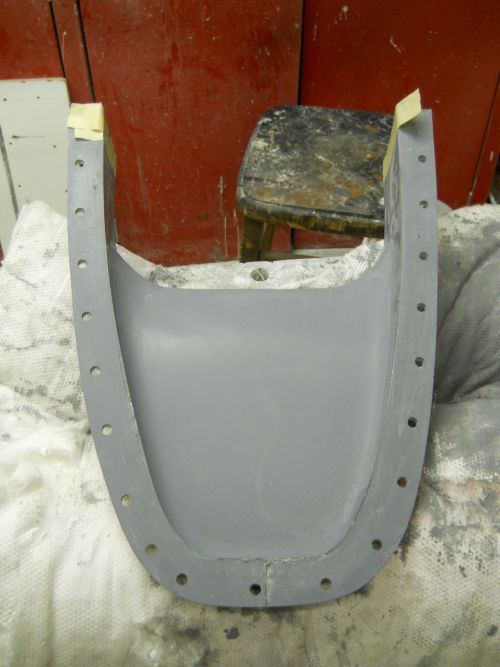
You can see the importance of the coving and of course the predetermined cut lines in these next pics.
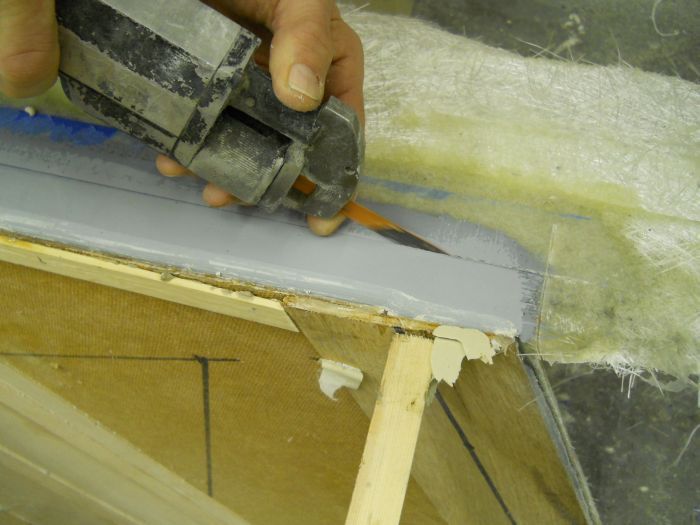
A quick blast with the wazzer around the cut lines and we end up with this.
All that is needed now is to lay up the last section and we are well on our way.
cheers
P
Here we go again then.
Finished up the lower section of the mould and got it all bolted together.
These moulds are going to weigh a ton with all of the hardware on them.
If you look closely at the forward section of the mould you can see different fixings.
The reason behind this is simple.
Making the fence/flange any bigger would cause problems when laminating especially upside down so what I have done is to drill and tap the laminates and then used 6mm Allen bolts to bring the two flanges together.
This is perfectly acceptable as the flanges have little load placed on them so the bolts will not pull through when you do them up.
Next the whole thing was turned upside down so that the base could be released.
You can see how nice a job Mike made of the tub in this shot.
Tapping around the base firmly with a rubber mallet and then a bit of a wiggle and the first section of base came away quite easily.
The back section came no problems either.
You can see the importance of the coving and of course the predetermined cut lines in these next pics.
A quick blast with the wazzer around the cut lines and we end up with this.
All that is needed now is to lay up the last section and we are well on our way.
cheers
P
Hi All
Lots of pics, some a bit fuzzy coz its difficult to work and photograph at the same time,a party trick and for all those who have small chips and dings in their own GRP cars (GT 40 boys are you watching?) the way to make them good again.
Finished the last section of laminating on the tub WOO HOO.
Next it was back to the main body sections of the mould and the prep work that these bits now need.
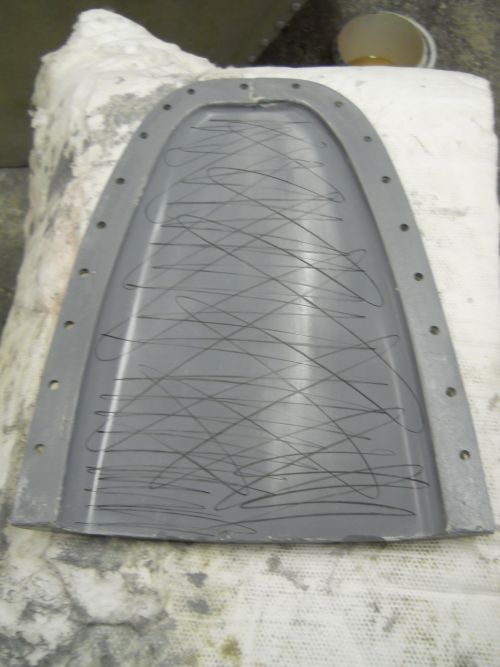
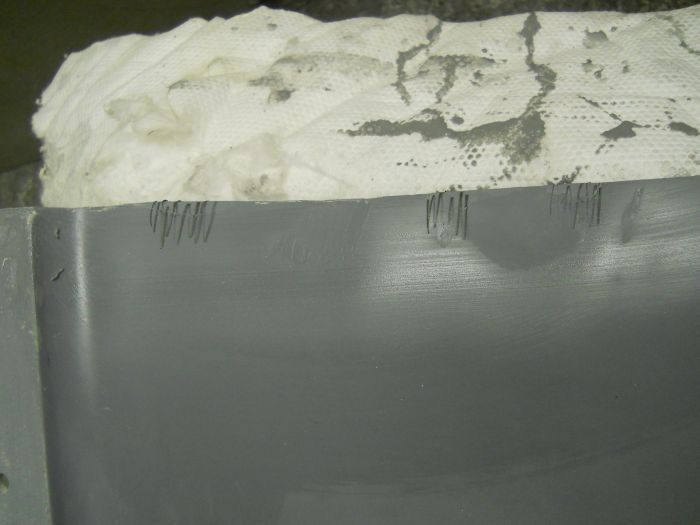
After degreasing with acetone the whole mould section but not the fence area is marked up with a chinagraph pencil.
This acts as a guide coat for rubbing down.
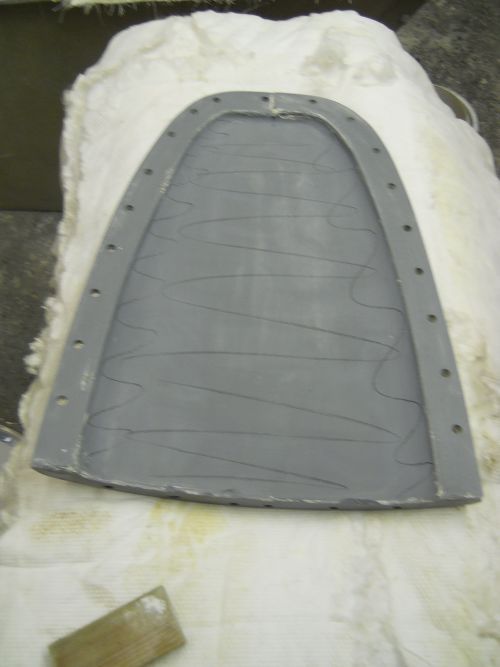
This is then rubbed down with a block and 400grit wet n dry paper until all of the black marks are removed and then the whole thing is done twice more and then dried off.
Then we mark the thing up again and flat back with 1200 w/d.
This is also done 3 times.
We do this so that when the mould is machine polished a high gloss can be obtained and this helps tremendously with releasing.
Using a block is so important as even though the gel is hard if you just use your fingers you WILL rub tram lines in and that is a no no.
Every mark in the mould will be transferred to the final piece and you want to end up with as little work as possible once everything is released.
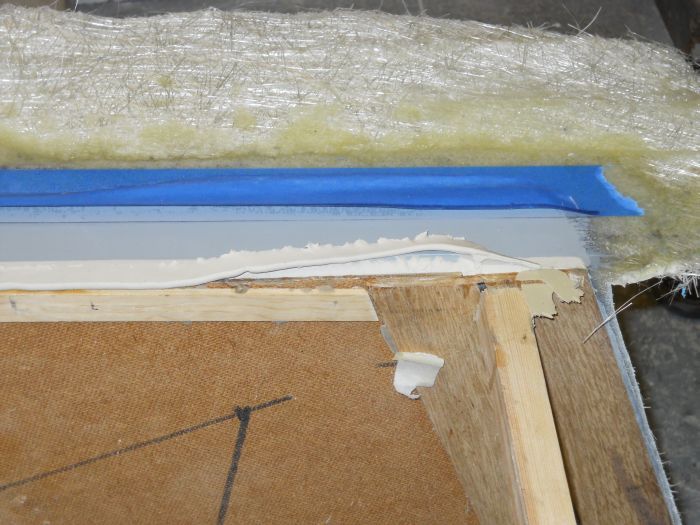
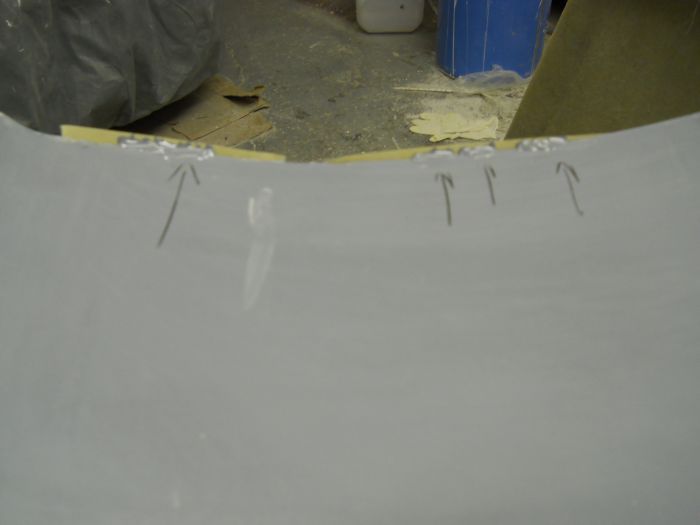
Okay so the sharp eyed will have seen some small areas of damage to the back edge of the mould and we need to repair these with gel coat.
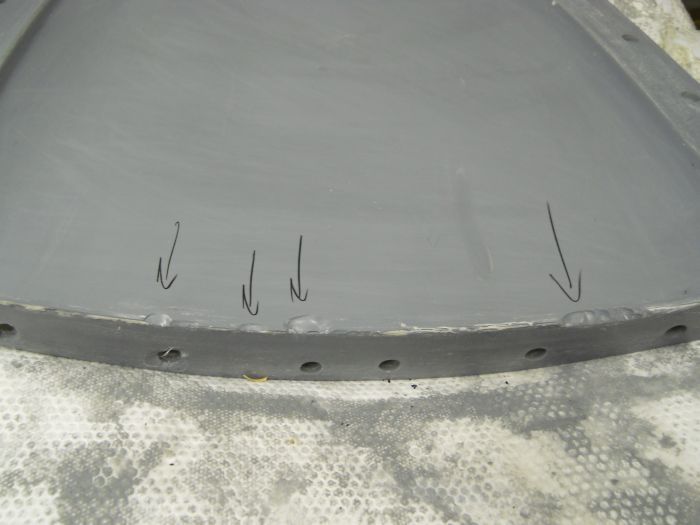
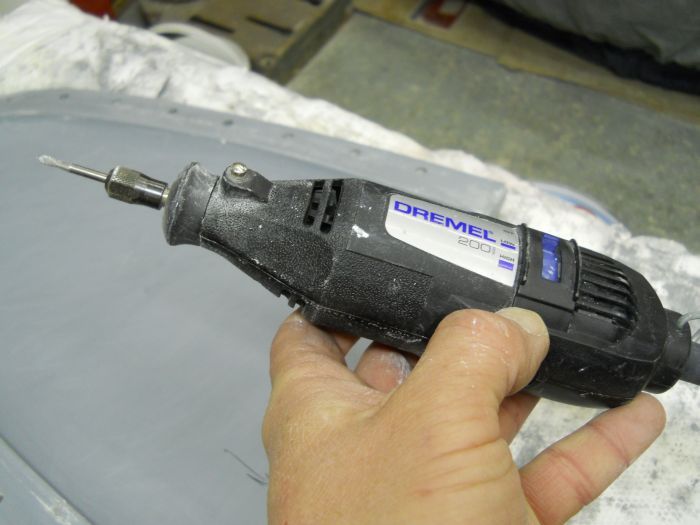
Using a Dremel with a 3mm tungsten burr lightly key the repair sites and clean with acetone.
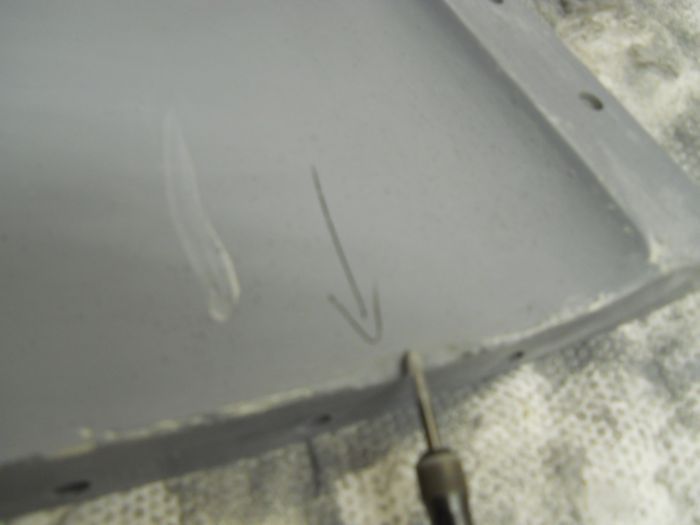
Gel is a thick liquid which will easily fall out of damaged areas so use masking tape across the backs of the repairs to hold it in place whilst it cures.
Now gel will melt polystyrene and even some plastics so we need something that is clean,small as we dont want to waste much material and very much to hand for mixing up in but what to use?
A small lid maybe but you dont have any so how about this...
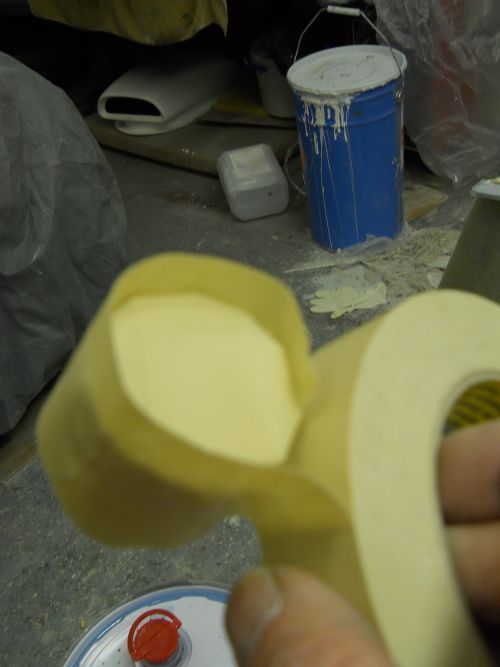
Take a roll of good quality masking tape.
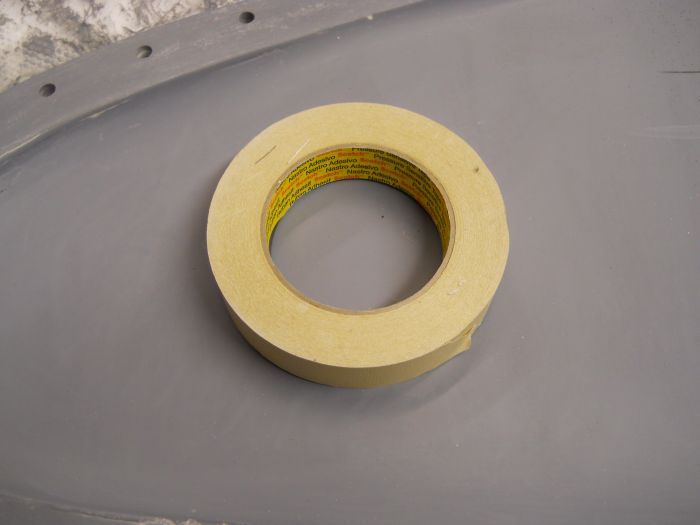
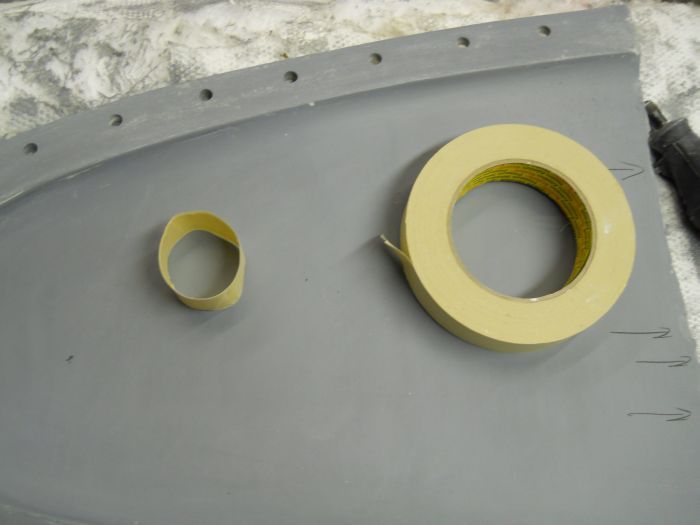
Make a loop out of it making sure the sticky side is out.
Once you have done that run some more tape around the outside this time sticky side in.
Then tear small strips and cover one end in a star shaped pattern.
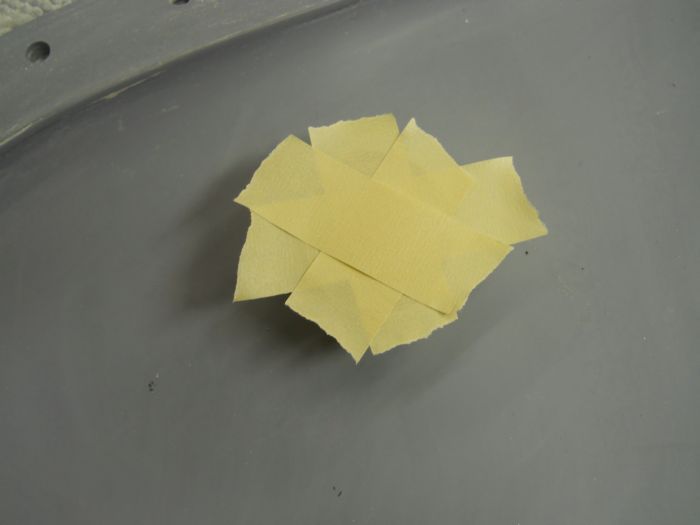
Fold the edges over.

Then sticky side in run around the bottom edge coming up about 10mm.
Tear off once you have gone all the way around and fold over onto the bottom.

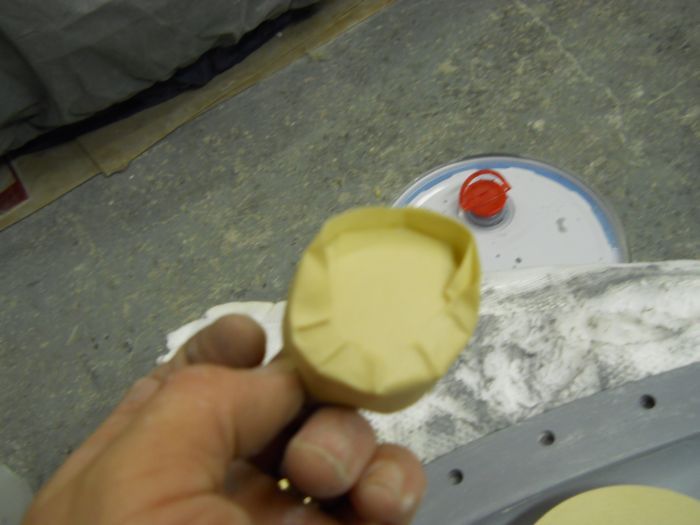
Round it off and there you have a small clean ready to use pot.
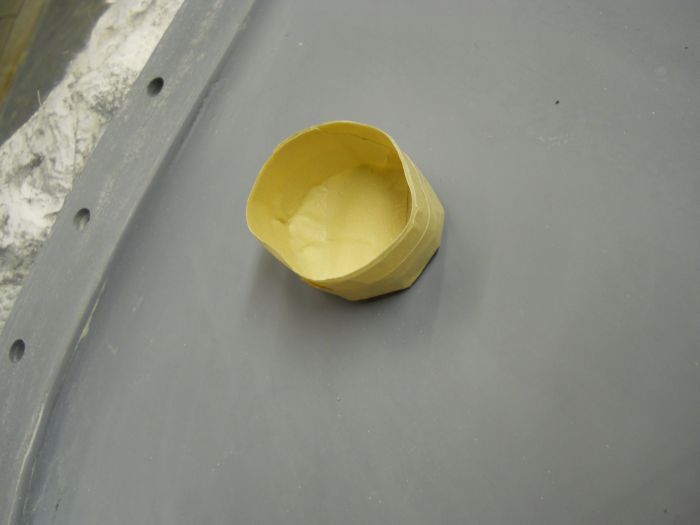
Mix up a small amount of gel and then simply let it into the repair sites allowing it to come just slightly proud of the surface.
I like to use wooden bats shaped down to a point for this job.
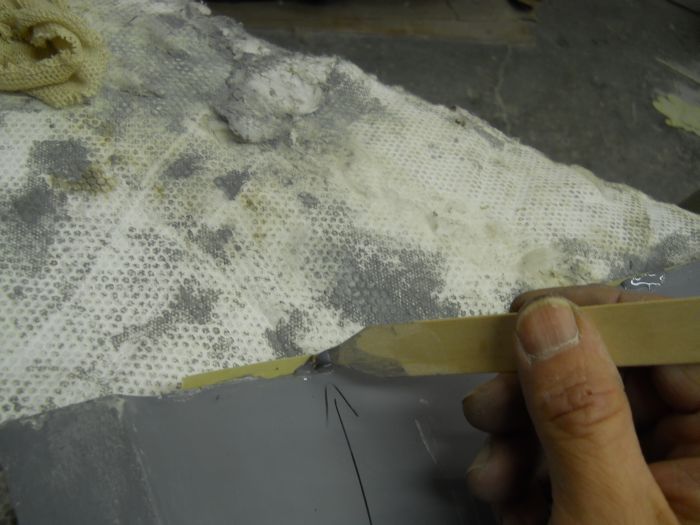
Once this is done it is left to cure and shrink and then we flat back tomorrow.
If you have a repair that is on a vertical surface then cut a bit of tape about an 11/2" bigger than the hole or dig and then lay it right over the top.
Peel back enough to reveal the repair and then let the gel in.
As it starts to fall out slowly roll the tape up until it pushes the gel back into the repair and top up if needed finally bring the tape completely over the repair and allow to cure.
Once cured you have a small neat button repair to flat back and because you have used tape it is almost exactly the right profile already.
I dont like to use filler or gel paste as it shrinks way too much and is generally poor quality stuff anyway.
Do it right with the proper kit and you will not be sorry.
The sections of the mould need to be sanded back and polished so if anyone needs a bank job doing give me a call at the end of the week because I will have no finger prints left by then.
Right thats it I'm knackered and I'm outta here.
cheers
P
Lots of pics, some a bit fuzzy coz its difficult to work and photograph at the same time,a party trick and for all those who have small chips and dings in their own GRP cars (GT 40 boys are you watching?) the way to make them good again.
Finished the last section of laminating on the tub WOO HOO.
Next it was back to the main body sections of the mould and the prep work that these bits now need.
After degreasing with acetone the whole mould section but not the fence area is marked up with a chinagraph pencil.
This acts as a guide coat for rubbing down.
This is then rubbed down with a block and 400grit wet n dry paper until all of the black marks are removed and then the whole thing is done twice more and then dried off.
Then we mark the thing up again and flat back with 1200 w/d.
This is also done 3 times.
We do this so that when the mould is machine polished a high gloss can be obtained and this helps tremendously with releasing.
Using a block is so important as even though the gel is hard if you just use your fingers you WILL rub tram lines in and that is a no no.
Every mark in the mould will be transferred to the final piece and you want to end up with as little work as possible once everything is released.
Okay so the sharp eyed will have seen some small areas of damage to the back edge of the mould and we need to repair these with gel coat.
Using a Dremel with a 3mm tungsten burr lightly key the repair sites and clean with acetone.
Gel is a thick liquid which will easily fall out of damaged areas so use masking tape across the backs of the repairs to hold it in place whilst it cures.
Now gel will melt polystyrene and even some plastics so we need something that is clean,small as we dont want to waste much material and very much to hand for mixing up in but what to use?
A small lid maybe but you dont have any so how about this...
Take a roll of good quality masking tape.
Make a loop out of it making sure the sticky side is out.
Once you have done that run some more tape around the outside this time sticky side in.
Then tear small strips and cover one end in a star shaped pattern.
Fold the edges over.
Then sticky side in run around the bottom edge coming up about 10mm.
Tear off once you have gone all the way around and fold over onto the bottom.
Round it off and there you have a small clean ready to use pot.
Mix up a small amount of gel and then simply let it into the repair sites allowing it to come just slightly proud of the surface.
I like to use wooden bats shaped down to a point for this job.
Once this is done it is left to cure and shrink and then we flat back tomorrow.
If you have a repair that is on a vertical surface then cut a bit of tape about an 11/2" bigger than the hole or dig and then lay it right over the top.
Peel back enough to reveal the repair and then let the gel in.
As it starts to fall out slowly roll the tape up until it pushes the gel back into the repair and top up if needed finally bring the tape completely over the repair and allow to cure.
Once cured you have a small neat button repair to flat back and because you have used tape it is almost exactly the right profile already.
I dont like to use filler or gel paste as it shrinks way too much and is generally poor quality stuff anyway.
Do it right with the proper kit and you will not be sorry.
The sections of the mould need to be sanded back and polished so if anyone needs a bank job doing give me a call at the end of the week because I will have no finger prints left by then.
Right thats it I'm knackered and I'm outta here.
cheers
P
-
Ian Anderson

- Forum Contributor

- Posts: 2396
- Joined: Sun Nov 19, 2006 9:46 pm
- Location: Edinburgh
Fascinating stuff as always. I do like the small pot idea as I can never find a jamjar when needed.
Ian
Ian
Owner of an "On the Road" GT40 Replica by DAX powered by 3.9Hotwre Efi, worked over by DJ Motors. EFi Working but still does some kangaroo at low revs (Damn the speed limits) In to paint shop 18/03/08.
-
kev_the_mole
- Forum Contributor
- Posts: 1022
- Joined: Sat Nov 18, 2006 9:41 pm
- Location: Las Islas Purbequias
Dear Mr. Monkey and Mr. Car
As always in awe of your skills and vision but I feel a small revision of your matchless prose is in order
I speak as someone who knows because the side tubes of my old race seat needed to be hydraulically 'adjusted' somewhat to allow my own 'ballast' to squeeze in
As always in awe of your skills and vision but I feel a small revision of your matchless prose is in order
Ballast = his arseBallast my arse
I speak as someone who knows because the side tubes of my old race seat needed to be hydraulically 'adjusted' somewhat to allow my own 'ballast' to squeeze in
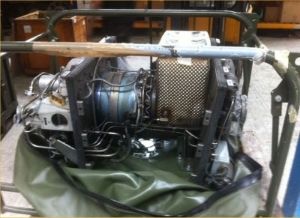
It's an engine Jim.....but not as we know it
Hello Mr Mole,
May I point out that the sling shot dragster is a superior design for a lard arse like myself. The seat is the same width as the distance between the fraim rails, make it wide enough for my butt (22" between the rails) and there is space in the area for the engine bay to later fit a Big block chevy with ease (just after I win the lottery that is! ! ! ! ! ! ) and you don't bash you knuckles when you work on the thing
Best regards
Mike
May I point out that the sling shot dragster is a superior design for a lard arse like myself. The seat is the same width as the distance between the fraim rails, make it wide enough for my butt (22" between the rails) and there is space in the area for the engine bay to later fit a Big block chevy with ease (just after I win the lottery that is! ! ! ! ! ! )
Best regards
Mike
poppet valves rule!
Right c'mon guys this getting out of hand now with the slagging about Mike being a WALKING ECLIPSE.
I think that you should stop and give the man a chance.
Strangely though I measured up the box for the 'parachute' housing and found it to be exactly the same size as a 900watt microwave and wondered whether the 'Ballast' would be a little too much for hard launches and if the expected ET's were not reached then a warm pie could be consumed whilst travelling down the strip.
P
-
Ian Anderson
- Forum Contributor
- Posts: 2396
- Joined: Sun Nov 19, 2006 9:46 pm
- Location: Edinburgh
I like your thinking! Adjust the car is easier than a dietkev_the_mole wrote:Dear Mr. Monkey and Mr. Car
As always in awe of your skills and vision but I feel a small revision of your matchless prose is in order
Ballast = his arseBallast my arse
I speak as someone who knows because the side tubes of my old race seat needed to be hydraulically 'adjusted' somewhat to allow my own 'ballast' to squeeze in
Ian
Owner of an "On the Road" GT40 Replica by DAX powered by 3.9Hotwre Efi, worked over by DJ Motors. EFi Working but still does some kangaroo at low revs (Damn the speed limits) In to paint shop 18/03/08.
Tonight's efforts then.
Having left the small repairs late yesterday evening they were ready to flat back tonight.
Pull the tape off and we have this.
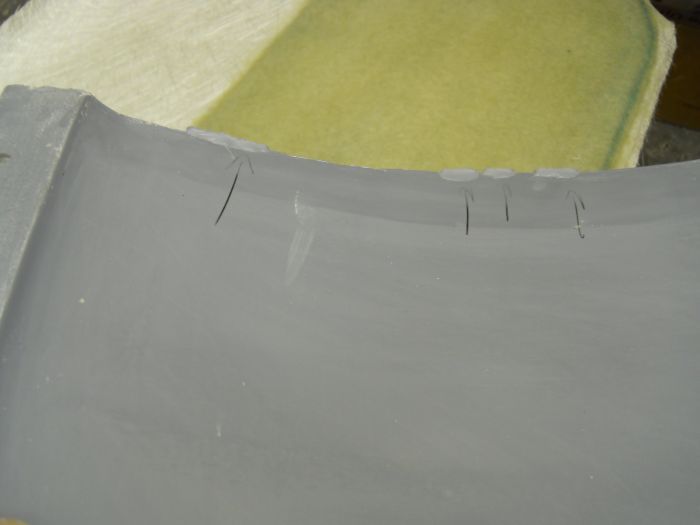
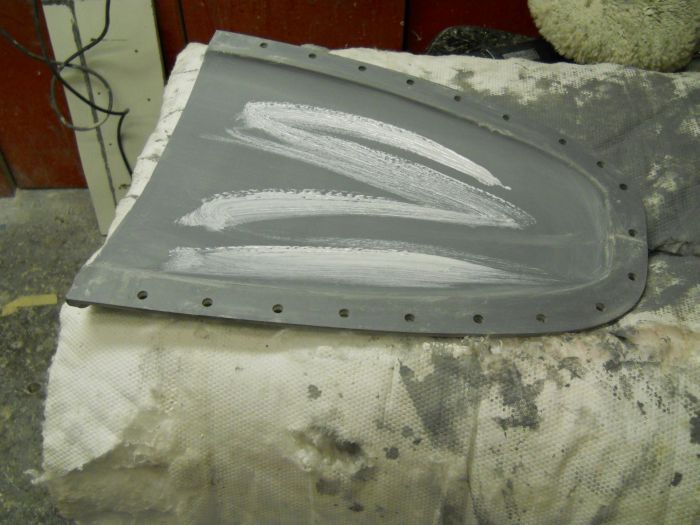
Flat them back to almost flush with 400 and then scribble a chinagraph over the last bits,this shows how much you have left to go down.
Flat back with your 1200 and you should end up with something like this.
Dry the mould off and then lightly spread some decent cutting compound on with a brush but please dont use T crap or should that be cut?
The stuff we use is a 3M compound which is really expensive but it does the job properly first time every time.
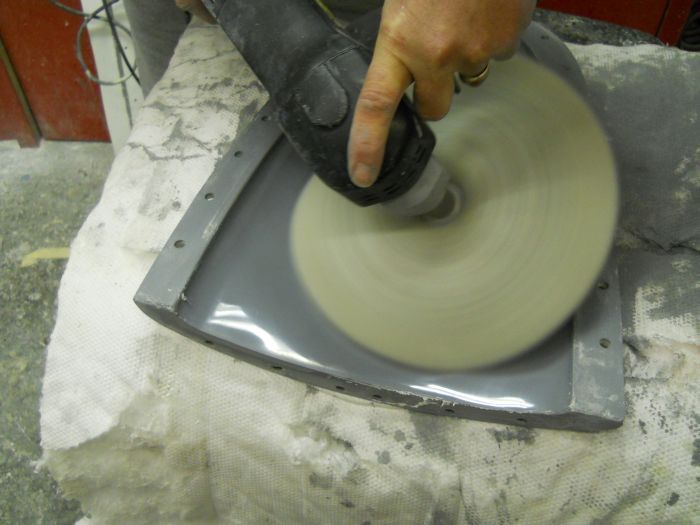
Break out the machine polisher and give it a good blat.
A point maybe of interest here is the direction of rotation is always clockwise with a buffer and if you work backwards against the DOR you get a much better cut as you work the compound against itself.
This gives far better results and you use less compound because you are not firing it away from the polishing head as it spins.
Thus you use all of the material and get a superb finish.
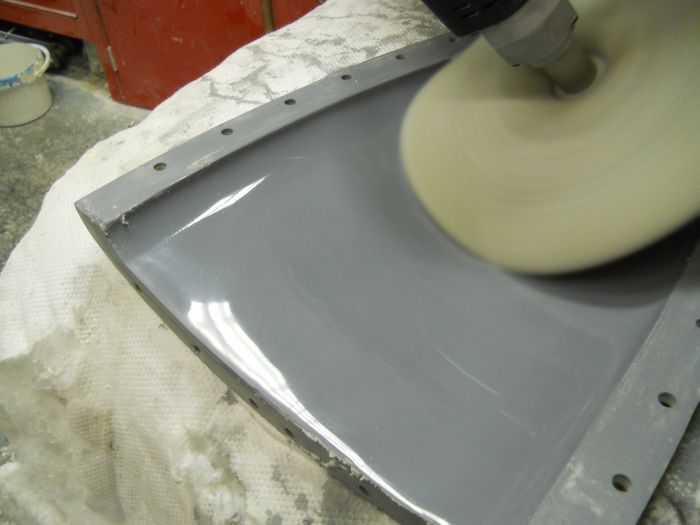
Mmmm shiney.
Put that bit to one side and start on the next section
You can see that there are a few more repairs to do on this part and the process is exactly the same as before.
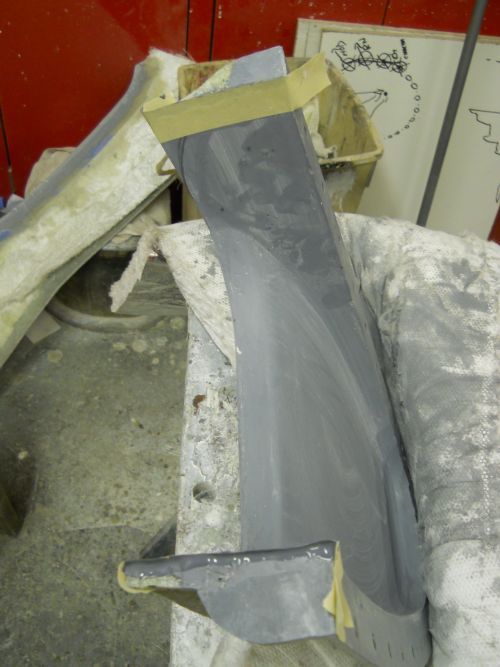
The weather is supposed to be poor tomorrow afternoon so No1 son and I are planning to hit the biggest section between us and hopefully that can be shown all polished up tomorrow evening.
There are still some areas on the mould sections that will transfer blemishes once the true panel is released.
We will deal with those as the penultimate part of the project because right now the defects are concave but when everything is released they will be proud so much easier to take back with a DA.
We can also profile the whole thing a little better as it will be GRP and not balsa and will take the harsher process.
Catch you later
p
cheers
P
Having left the small repairs late yesterday evening they were ready to flat back tonight.
Pull the tape off and we have this.
Flat them back to almost flush with 400 and then scribble a chinagraph over the last bits,this shows how much you have left to go down.
Flat back with your 1200 and you should end up with something like this.
Dry the mould off and then lightly spread some decent cutting compound on with a brush but please dont use T crap or should that be cut?
The stuff we use is a 3M compound which is really expensive but it does the job properly first time every time.
Break out the machine polisher and give it a good blat.
A point maybe of interest here is the direction of rotation is always clockwise with a buffer and if you work backwards against the DOR you get a much better cut as you work the compound against itself.
This gives far better results and you use less compound because you are not firing it away from the polishing head as it spins.
Thus you use all of the material and get a superb finish.
Mmmm shiney.
Put that bit to one side and start on the next section
You can see that there are a few more repairs to do on this part and the process is exactly the same as before.
The weather is supposed to be poor tomorrow afternoon so No1 son and I are planning to hit the biggest section between us and hopefully that can be shown all polished up tomorrow evening.
There are still some areas on the mould sections that will transfer blemishes once the true panel is released.
We will deal with those as the penultimate part of the project because right now the defects are concave but when everything is released they will be proud so much easier to take back with a DA.
We can also profile the whole thing a little better as it will be GRP and not balsa and will take the harsher process.
Catch you later
p
cheers
P
Good work but as a tip I save any small tins or plastic tubs as disposable resin/paint/gel holders i.e. tins from tuna and tubs from cottage cheese/coleslaw etc. HTH
Big Tone
www.cobratone.co.uk
www.cobratone.co.uk
Hi all
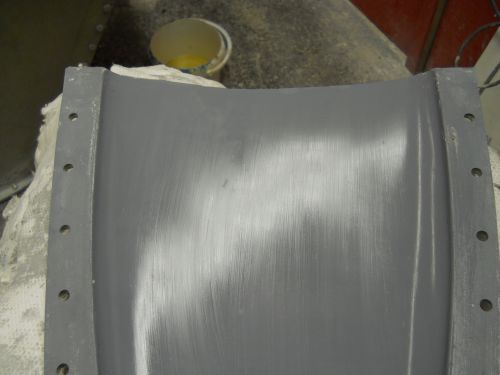
Well the weather man got it right and it has rained since 10.30 this morning so we set to and got the main section back up on the trestles and DA'd the life out of the poor thing.
The reasons behind the 3 coats of gel become apparent now because we have material to play with at this stage.
Some moulders just use 1 coat and there is little or no room for any marks etc in the mould to be worked.
So after three full passes with 400 disc's and then 4 passes with 1200 we end up with a mould that has a very slight sheen to it.
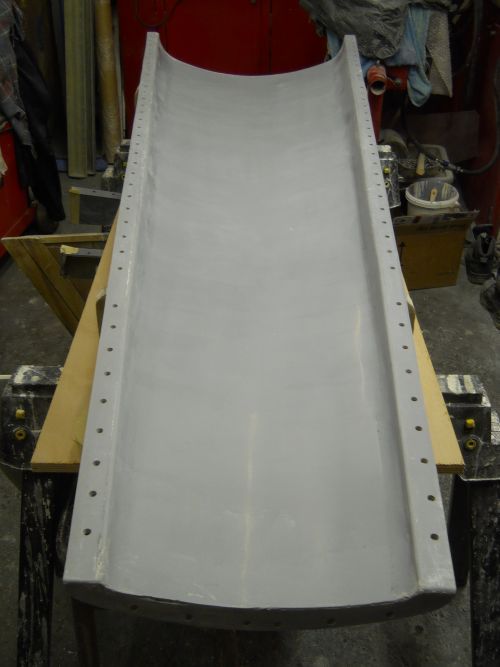
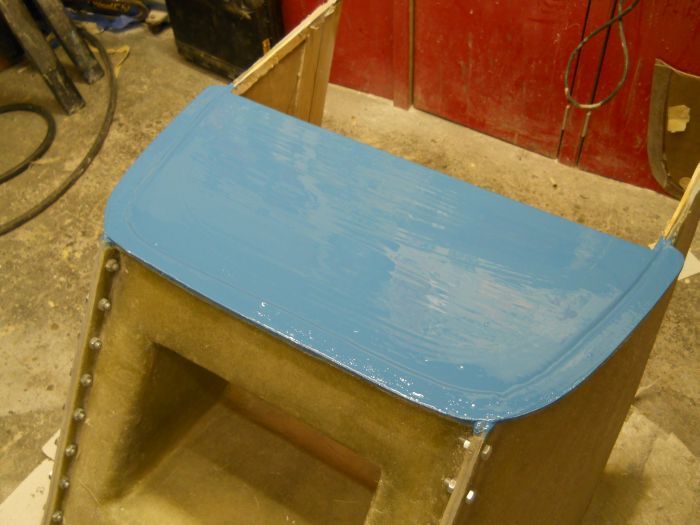
We then polish the life out of the poor thing and end up with this.
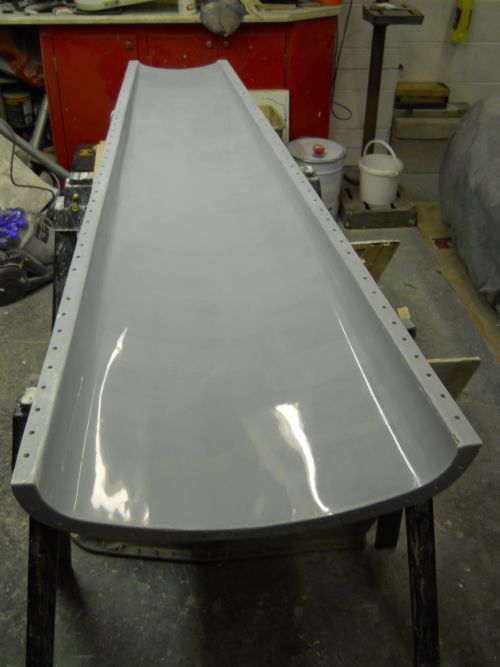
This is now ready to bolt up to all of the other sections once they are prepared and then we can make something good.
Tony thank you for the tip about the pots.
We do use paper cups and more often than not buckets of varying sizes for gel and resin.
As we work on some very expensive power boats and yachts if we were to leave a tin with gel in it on a polished surface overnight by mistake there would likely be a rust ring the following morning and some folks are just so tetchy about this kind of thing when they see it .
We also then have to clean it up!!
We have to be very careful with what we use as sometimes unpleasant reactions can happen when the materials cure so erring on the side of caution we tend too use stuff that is known to be completely safe.
More tomorrow
cheers
P
Well the weather man got it right and it has rained since 10.30 this morning so we set to and got the main section back up on the trestles and DA'd the life out of the poor thing.
The reasons behind the 3 coats of gel become apparent now because we have material to play with at this stage.
Some moulders just use 1 coat and there is little or no room for any marks etc in the mould to be worked.
So after three full passes with 400 disc's and then 4 passes with 1200 we end up with a mould that has a very slight sheen to it.
We then polish the life out of the poor thing and end up with this.
This is now ready to bolt up to all of the other sections once they are prepared and then we can make something good.
Tony thank you for the tip about the pots.
We do use paper cups and more often than not buckets of varying sizes for gel and resin.
As we work on some very expensive power boats and yachts if we were to leave a tin with gel in it on a polished surface overnight by mistake there would likely be a rust ring the following morning and some folks are just so tetchy about this kind of thing when they see it .
We also then have to clean it up!!
We have to be very careful with what we use as sometimes unpleasant reactions can happen when the materials cure so erring on the side of caution we tend too use stuff that is known to be completely safe.
More tomorrow
cheers
P
-
topcatcustom

- Forum Contributor
- Posts: 2965
- Joined: Sat Aug 09, 2008 11:53 am
- Location: Essex
- Contact:
