

Genius!
Chris.
New project
Moderator: phpBB2 - Administrators
-
unstable load
- Top Dog

- Posts: 1278
- Joined: Mon May 04, 2009 6:53 am
Fascinating stuff, thanks.
I am keen on learning the craft because I want to make a fairing and seat for a motorcycle, so I will be "stealing with my eyes" as you go along.
I was involved in fitting the engines to a 30 foot catamaran many years back, but was not really interested at the time in the processes of the plug to mould to finished product, but I do remember it as a mammoth undertaking for the laminators.
Cheers,
John
John
Evening All
Here's tonight's instalment then.
Are you paying attention John ?
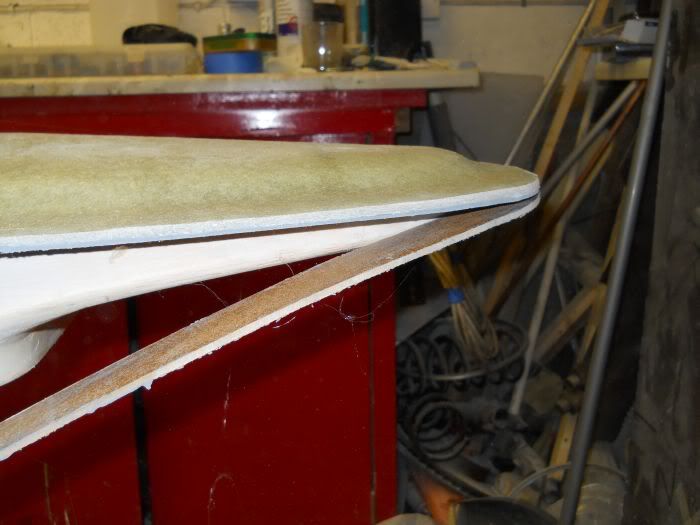
Using the air hacksaw and a wazzer the edges of the forward section were trimmed and then ground back to the fences.
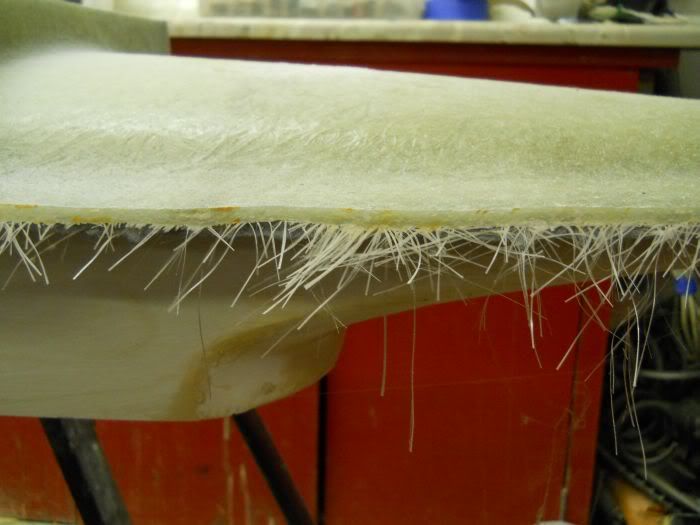
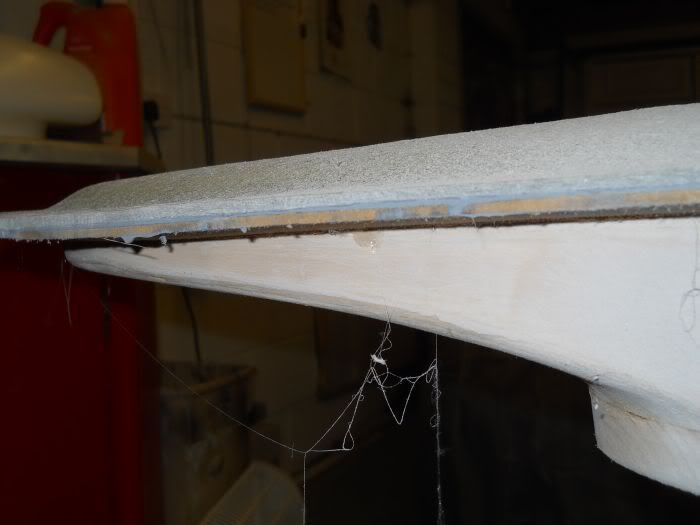
Following that the top fence was separated with a thin scraper and then fully pulled through with a body filler spreader.
The botttom sections then just peel away ( the importance of waxing is clear to all at this stage)

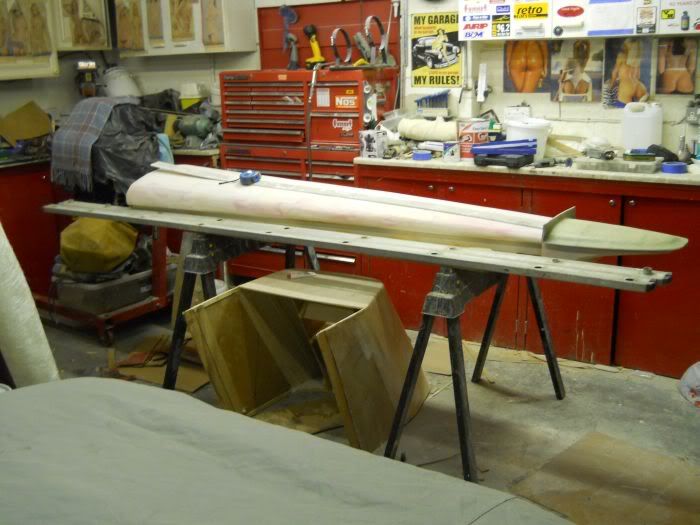
Attention then turned to what could be used for fences running up the sides of the plug.They had to be rigid enough to hold their shape but also suitable to laminate over so two sections of an old Youngman trestle board were taken and cut to length and then held in position with blocks of timber underneath. This was perfect for what was required.
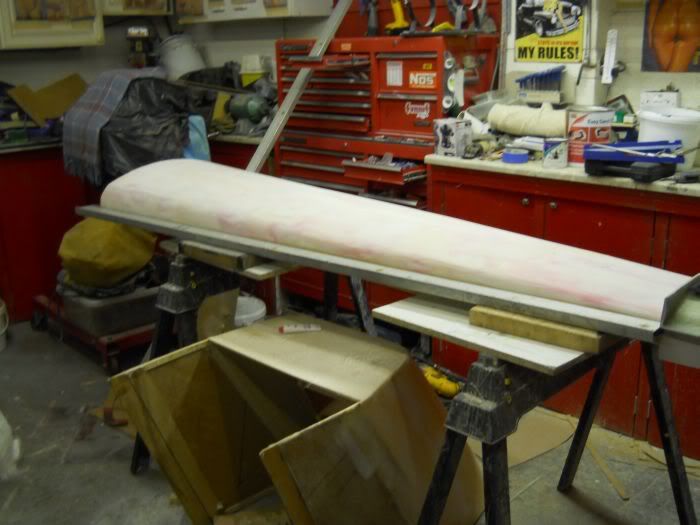
Blue masking tape was then pulled up the lengths to get an even line and then the full Miagii took place (Wax on Wax off).
Next out came the Plasticine and the coving ball and susages were rolled out on the bench before trying to apply it to the ali fences and the plug.
Getting the plasticine nice and warm helps tremendously when coving as it can be shaped very easily.
Coving can take quite some time and it is important to get it as neat as you can because this is in effect the joint between parts of the mould and you will thank yourself for taking the time to do it properly at this stage.
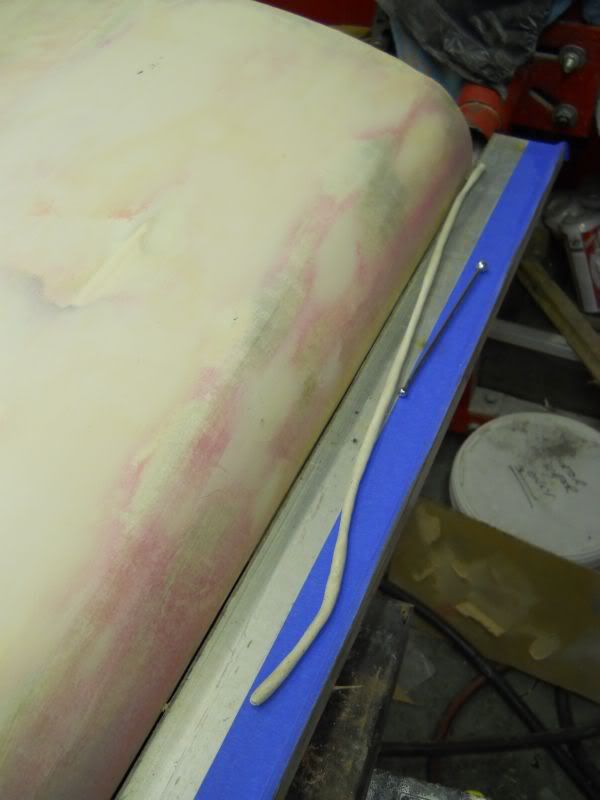
Work neatly into the corners and then give yourself a pat on the back cause it takes a bit of practice to get right.
The next stage is gelling again but this time instead of using a brush to apply a small roller will be used instead
Stay turned for the next thrilling installment (yawn yawn)
cheers
P
Here's tonight's instalment then.
Are you paying attention John ?
Using the air hacksaw and a wazzer the edges of the forward section were trimmed and then ground back to the fences.
Following that the top fence was separated with a thin scraper and then fully pulled through with a body filler spreader.
The botttom sections then just peel away ( the importance of waxing is clear to all at this stage)
Attention then turned to what could be used for fences running up the sides of the plug.They had to be rigid enough to hold their shape but also suitable to laminate over so two sections of an old Youngman trestle board were taken and cut to length and then held in position with blocks of timber underneath. This was perfect for what was required.
Blue masking tape was then pulled up the lengths to get an even line and then the full Miagii took place (Wax on Wax off).
Next out came the Plasticine and the coving ball and susages were rolled out on the bench before trying to apply it to the ali fences and the plug.
Getting the plasticine nice and warm helps tremendously when coving as it can be shaped very easily.
Coving can take quite some time and it is important to get it as neat as you can because this is in effect the joint between parts of the mould and you will thank yourself for taking the time to do it properly at this stage.
Work neatly into the corners and then give yourself a pat on the back cause it takes a bit of practice to get right.
The next stage is gelling again but this time instead of using a brush to apply a small roller will be used instead
Stay turned for the next thrilling installment (yawn yawn)
cheers
P
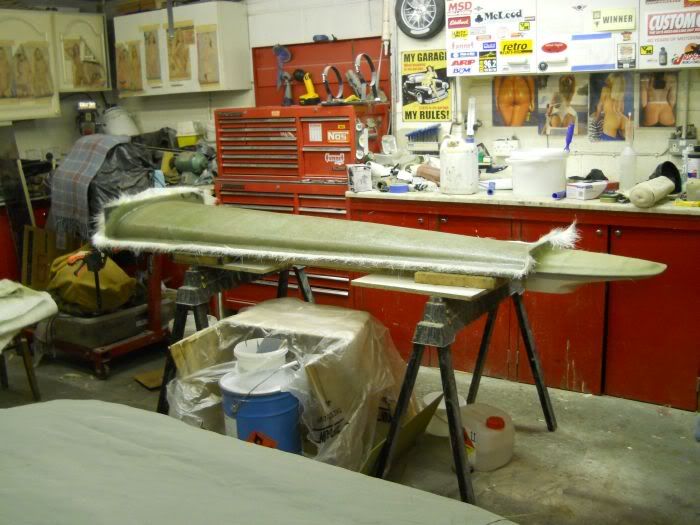
Genuinely fascinating stuff Mr Monkey, I love seeing how these kind of things are properly done by the pro's. Inspiring stuff! Some of those pics give a real feel or how long that thing is too, must be about 6 or 7' long?!!  Good work fella
J
J
I wish I had a pound for every time some one told me "My Dad had one of those!"
'78 Cavalier Coupe GLS 2000
'78 Cavalier Coupe GLS 2000
Hi
The plug is based on an 8'x4' sheet of MDF I chopped nthe sides off it but nothing off the length. . . the slingshot has a wheel base of 168" when you add in the diamiter of the front wheels and 3'6" for the back of the chassis plus the rear body work of about 2 foot it comes out at about 20 foot total oh it will probably have 4@ of weelie bars sticking out the back eventually. The chassis just fits between the garage door and the back wall, this is a distance of 17" 6 it will have to be stored front wheels off and without the back bodywork.
Best regards
Mike
poppet valves rule!
That certainly is a beast Mike! so I guess it'll be a case of bolting all the bits together each time you want to go racing then? This thing is one of the coolest things I've seen being built in the last few years Although I don't get out much 
James
James
I wish I had a pound for every time some one told me "My Dad had one of those!"
'78 Cavalier Coupe GLS 2000
'78 Cavalier Coupe GLS 2000
-
unstable load
- Top Dog
- Posts: 1278
- Joined: Mon May 04, 2009 6:53 am
Cool, another instalment!
OK, silly question time.....
I see you use a "coving ball", which I assume is the metal stick with a ball on each end, right?
Is the function of rounding the plasticine to allow it to be easier to wax and then gel the mould, I assume you will do the same once you turn it all over for the other half of the mould. Wouldn't this give you a thick seam once you separate the mould from the fence or am I jumping the gun a bit?
Cheers,
John
John
Hi John
The idea of the coving ball (correct in thinking stick with balls on the end, go straight to the top of the class) and the plasticine is to get an even edge to one side of the mould and the fences,it also helps to take up any discrepancies between mould and fence (there were a few areas on the sides which needed to be filled with the plasticine)
The waxing is done before coving.
Once the fences are released and the mould turned over the undersides are waxed but not coved indeed the plasticine is taken out to create a locating ledge for the next section.
This makes getting the mould out of alignment virtually impossible.
Having holes in the flanges for bolts also helps to locate everything correctly.
Once the true panel is released you only have to sort out the parting lines which if you have done your job properly will be neat and small and take very little time to sort out.
I hope this answers your question ?
I will be back on the case tonight so there will be more photos and more of my drivel to follow.
cheers
P
Ow do all
You know sometimes when you think everything is ok but in the back of your mind you know you have missed something important out?
Well the other night when it was stated that the next stage was gelling the main section I had one of those moments,something important was missing.
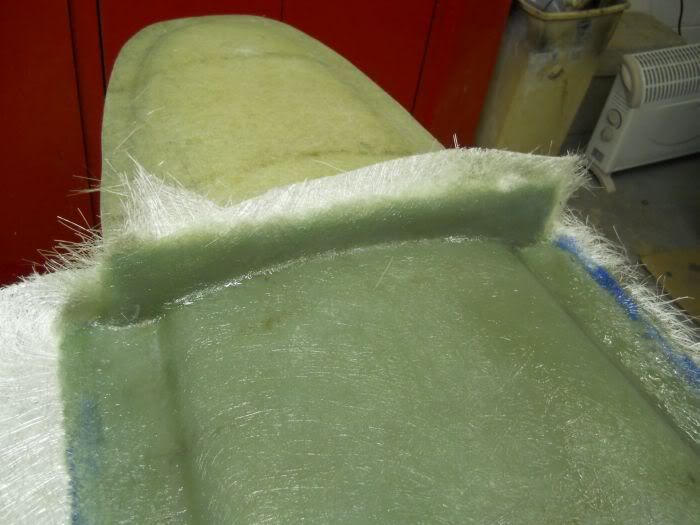
It bugged me all day yesterday and then when I went out to the garage tonight I found the cause of my nagging (NO not Mrs G ) doubt.
I had not made and fitted the fence to the back of the mould
As I went to get some perspex from the shed I caught my reflection in the garage window and saw a donkey looking back.
Moving on swiftly...
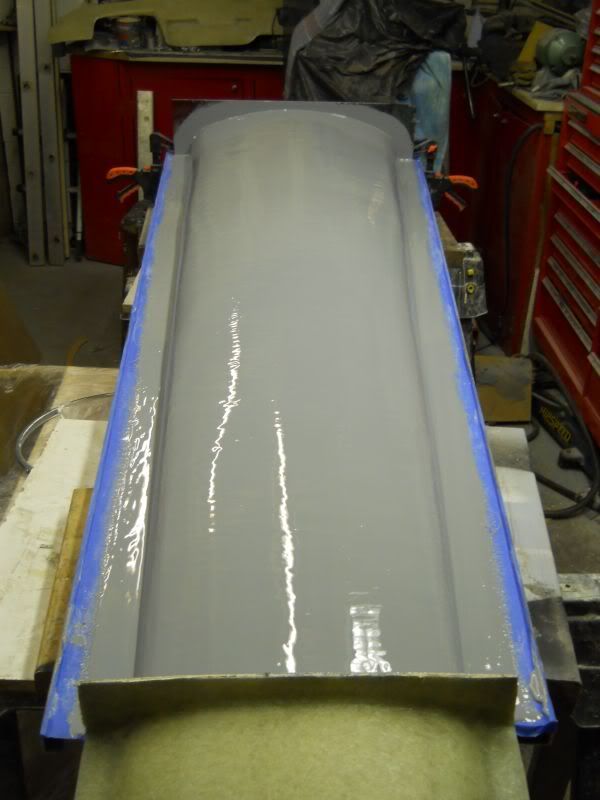
Once the fence was fitted it was coved and then I mixed up some white gel with a black pigment in it
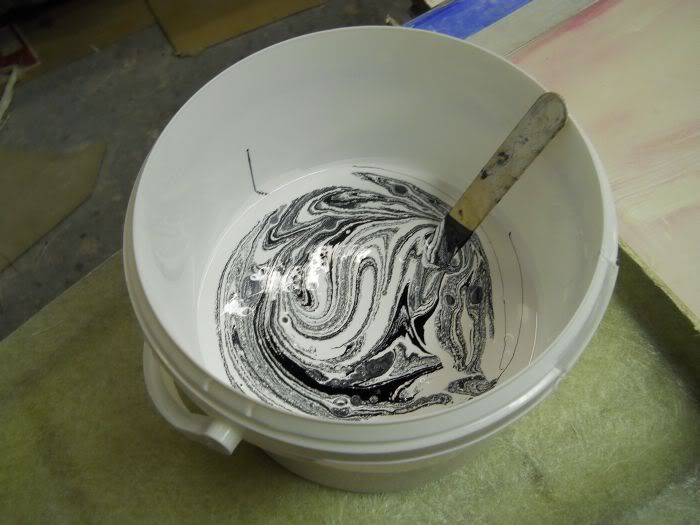
This was mixed until an even colour was obtained

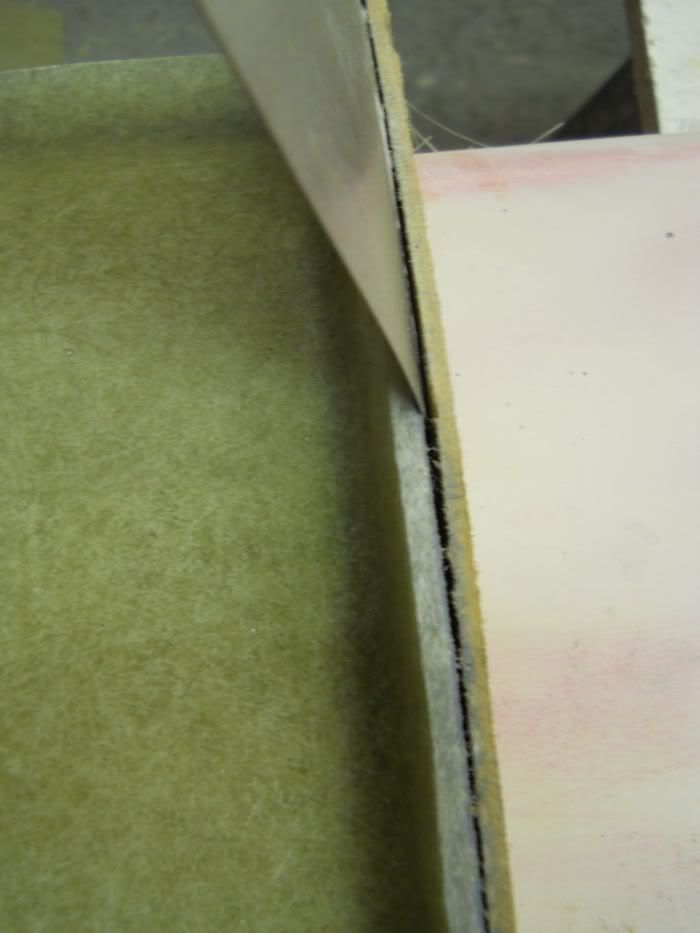
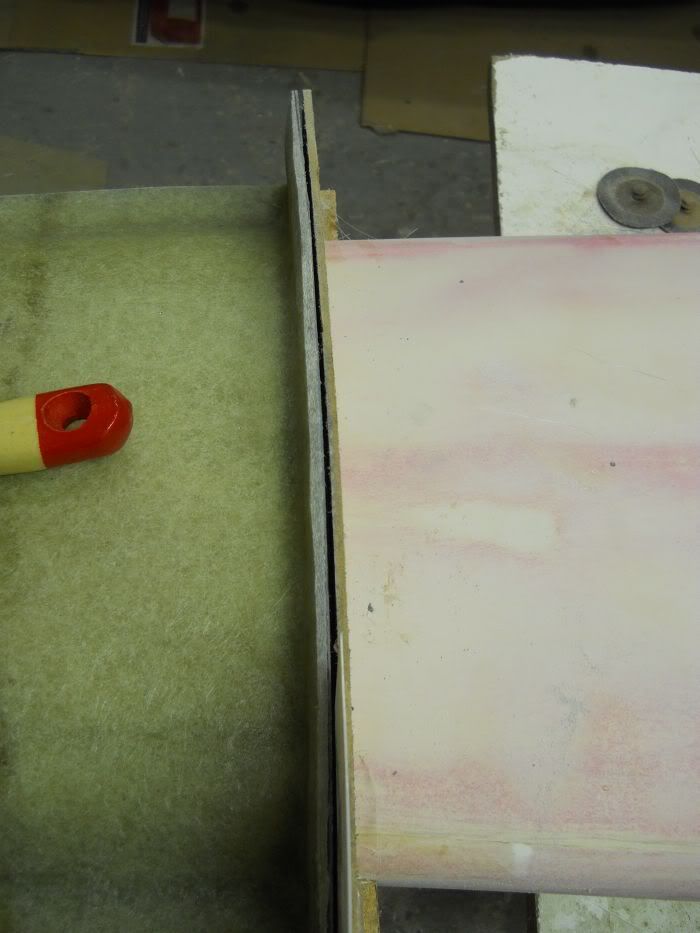
The reason that we use a different mould colour to the final true panel colour is so you can see where to separate the mould from.
If the same colour was used throughout then it would be tricky splitting them from one another and very possibly cause damage.
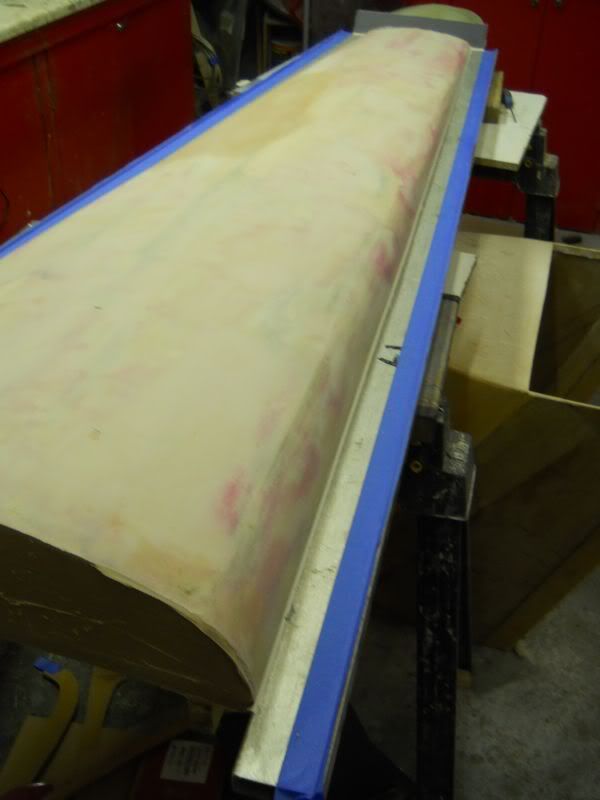
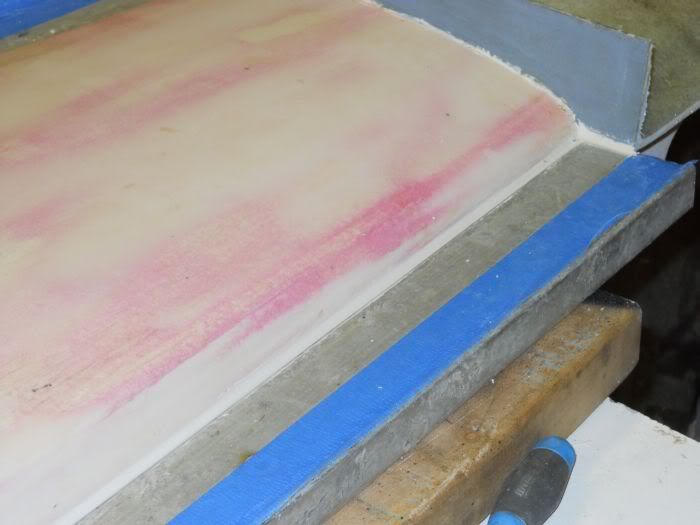
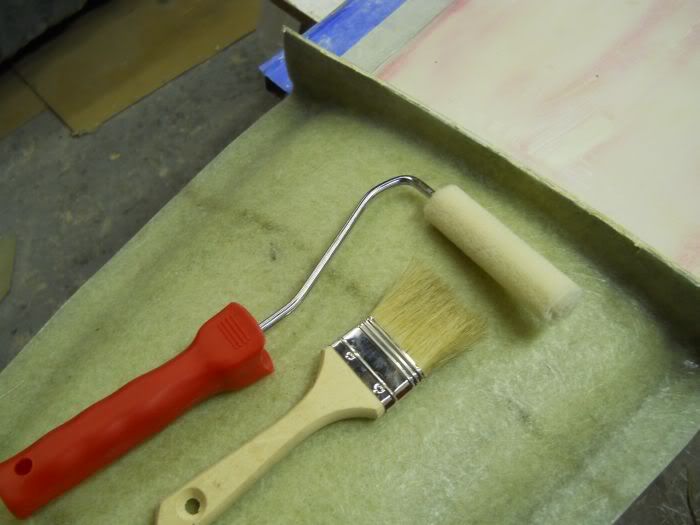
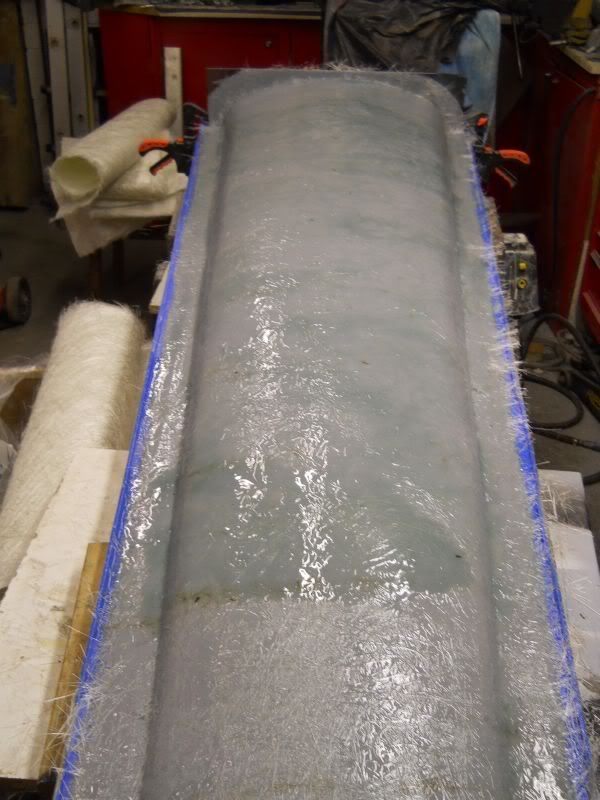
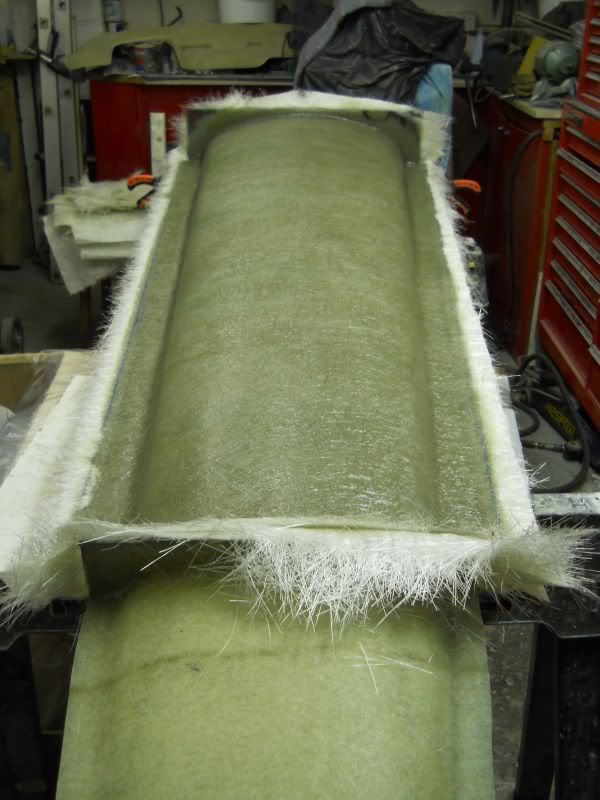
As the main section of the mould is quite large a 4"Velour roller is used to apply the gel.
The gel was poured on in a fairly even line down the length of the mould and then rollered out.
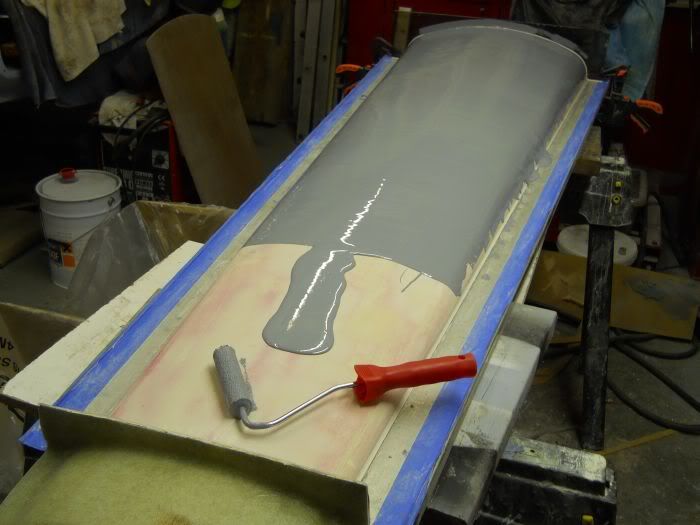
Using this kind of roller helps to create an even spread of the gel and then it more or less self levels.
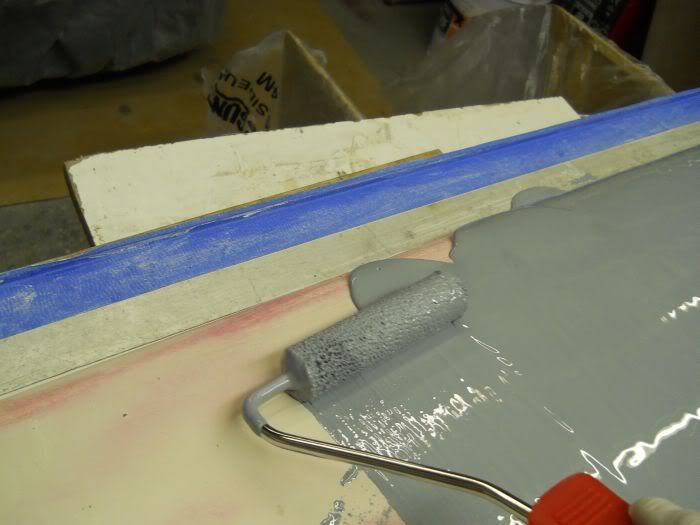
You will also see that the gel was taken out over the blue tape and the reason for this will be explained at a later stage
Using the 2" brush you can then work the gel into the coved corners and onto the fences(the roller does not work well in confined areas.
Once this has been completed time has to be allowed for curing and shrinkage before the next coat goes on.
This is a good time to have a brew,tidy up or go and post on your favorite Forum.
Or all of the above
Another 4 coats have to be applied but as it is getting late now so only 1 more coat will go on tonight and then the rest tomorrow.
Right thats it, back out to the garage
TALLY HO
P
PS I think the fumes are getting to me
You know sometimes when you think everything is ok but in the back of your mind you know you have missed something important out?
Well the other night when it was stated that the next stage was gelling the main section I had one of those moments,something important was missing.
It bugged me all day yesterday and then when I went out to the garage tonight I found the cause of my nagging (NO not Mrs G
I had not made and fitted the fence to the back of the mould
As I went to get some perspex from the shed I caught my reflection in the garage window and saw a donkey looking back.
Moving on swiftly...
Once the fence was fitted it was coved and then I mixed up some white gel with a black pigment in it
This was mixed until an even colour was obtained
The reason that we use a different mould colour to the final true panel colour is so you can see where to separate the mould from.
If the same colour was used throughout then it would be tricky splitting them from one another and very possibly cause damage.
As the main section of the mould is quite large a 4"Velour roller is used to apply the gel.
The gel was poured on in a fairly even line down the length of the mould and then rollered out.
Using this kind of roller helps to create an even spread of the gel and then it more or less self levels.
You will also see that the gel was taken out over the blue tape and the reason for this will be explained at a later stage
Using the 2" brush you can then work the gel into the coved corners and onto the fences(the roller does not work well in confined areas.
Once this has been completed time has to be allowed for curing and shrinkage before the next coat goes on.
This is a good time to have a brew,tidy up or go and post on your favorite Forum.
Or all of the above
Another 4 coats have to be applied but as it is getting late now so only 1 more coat will go on tonight and then the rest tomorrow.
Right thats it, back out to the garage
TALLY HO
P
PS I think the fumes are getting to me
Hi All
Big session today,even before work took me to a boatyard 2 more coats of gel were applied to the main section and then upon return home to Gelmonkey Towers the final coat was put on before dinner tonight.
Once that was cured 5 layers of laminate were cut and roughly trimmed to fit the mould.

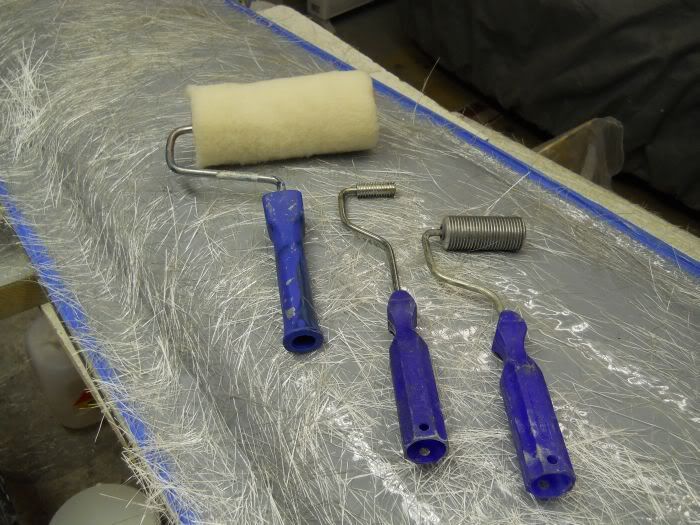
With that done it was time to break out the big fluffy roller for laminating.
This kind of roller helps make light work of such big areas and you can load it right up with resin and slap it on.
The smaller rollers are for gertting rid of the air bubbles that will certainly be there once the laminates are wet out.
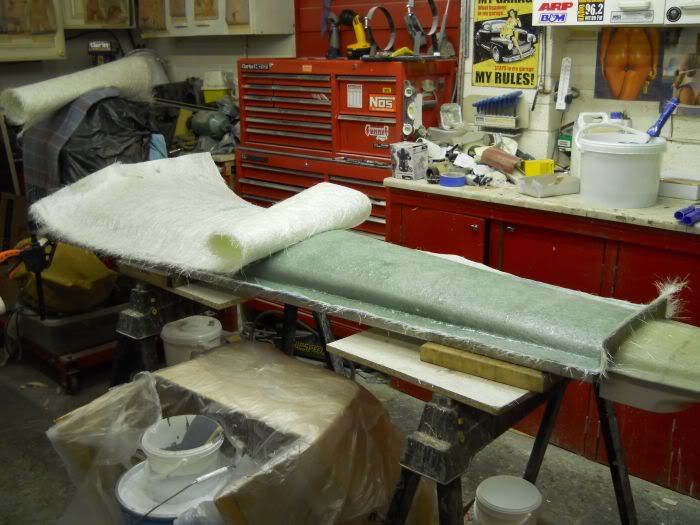
The gel is then wet out and the first of 5 layers goes on.
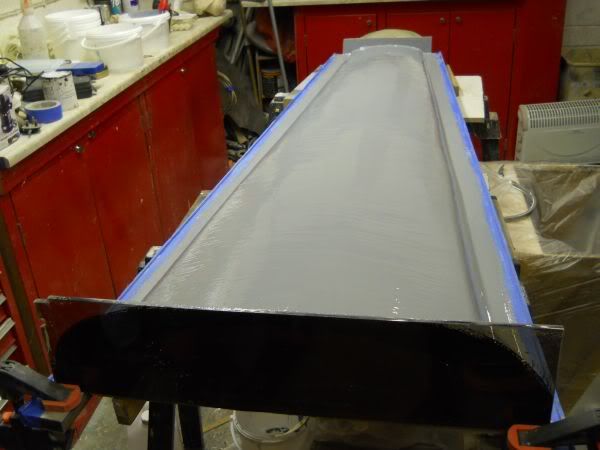
2 layers were put on and rollered out and you can see from this next shot that you can literally put on layer after layer making sure that you wet out and roller as you go.
The corners and the uprights can be tricky but by taking a bit of time you can work the laminates in and make nice neat areas using a 2" brush.

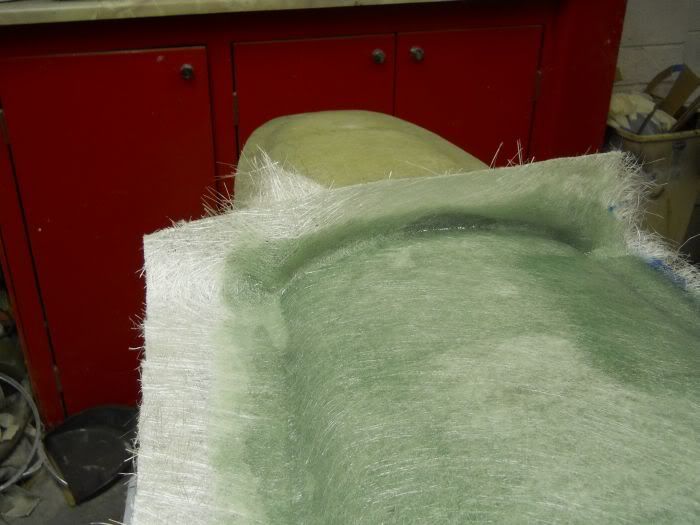
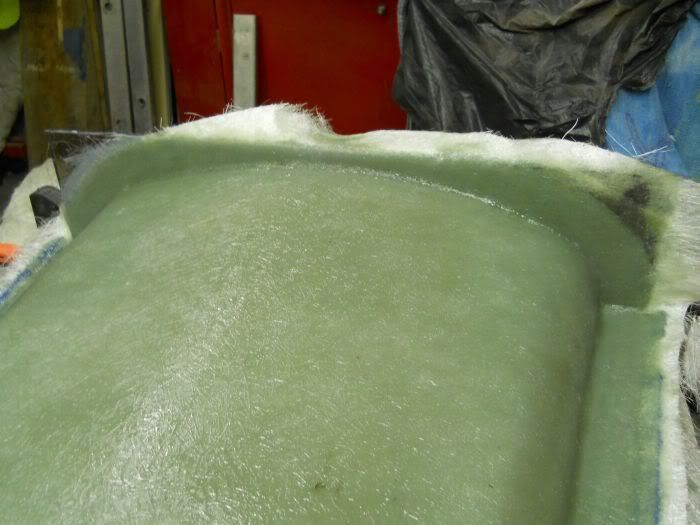
Once all the laminates are on time is then taken to do a final gentle roller to get rid of any last few bubbles and the final thing looks like this.
 .
.
The next stage is cut and fit a couple of foam bracing pads and then to design and fit the cradle.
That's it for tonight now.
Catch you later.
cheers
P
Big session today,even before work took me to a boatyard 2 more coats of gel were applied to the main section and then upon return home to Gelmonkey Towers the final coat was put on before dinner tonight.
Once that was cured 5 layers of laminate were cut and roughly trimmed to fit the mould.
With that done it was time to break out the big fluffy roller for laminating.
This kind of roller helps make light work of such big areas and you can load it right up with resin and slap it on.
The smaller rollers are for gertting rid of the air bubbles that will certainly be there once the laminates are wet out.
The gel is then wet out and the first of 5 layers goes on.
2 layers were put on and rollered out and you can see from this next shot that you can literally put on layer after layer making sure that you wet out and roller as you go.
The corners and the uprights can be tricky but by taking a bit of time you can work the laminates in and make nice neat areas using a 2" brush.
Once all the laminates are on time is then taken to do a final gentle roller to get rid of any last few bubbles and the final thing looks like this.
.The next stage is cut and fit a couple of foam bracing pads and then to design and fit the cradle.
That's it for tonight now.
Catch you later.
cheers
P
-
unstable load
- Top Dog
- Posts: 1278
- Joined: Mon May 04, 2009 6:53 am
