Monkey business

General Chat About Exhaust, Cylinder Heads, Fuel Systems And Intake

Moderator: phpBB2 - Administrators

gelmonkey
Sergeant Monkey Face
Posts: 1307
Joined: Sat Jun 27, 2009 11:58 am
Location: plymouth

Post by gelmonkey »

Hi All
How time flies when your bogged down under a mountain of work.
I cant believe it was March when I last posted and I really have not had the time to work on this up until last Friday evening.
Bloody boats :twisted:

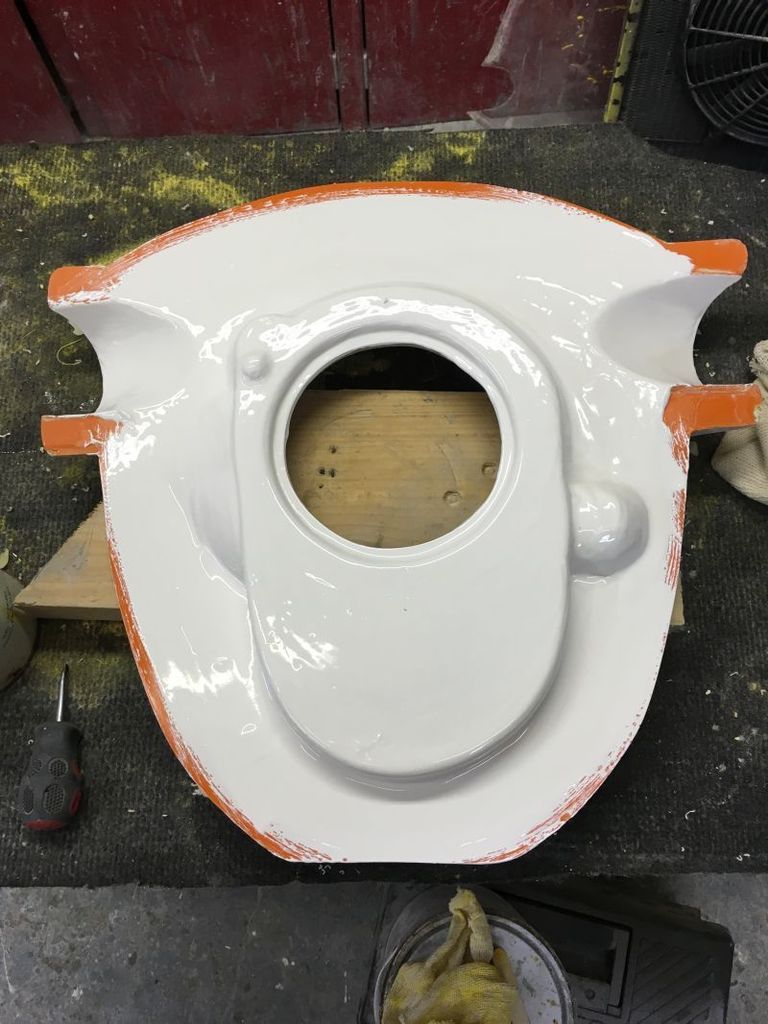
I got all of the little tiny spot repairs flatted back polished and then waxed.
Next it was out with the gel and slap a coat on.
I did not take it all the way to the edge on the first application as this is just a waste of time and material although on the last coat I did so that when it comes to release time I have an edge to look for in the white against the orange (if that makes sense?)
Image

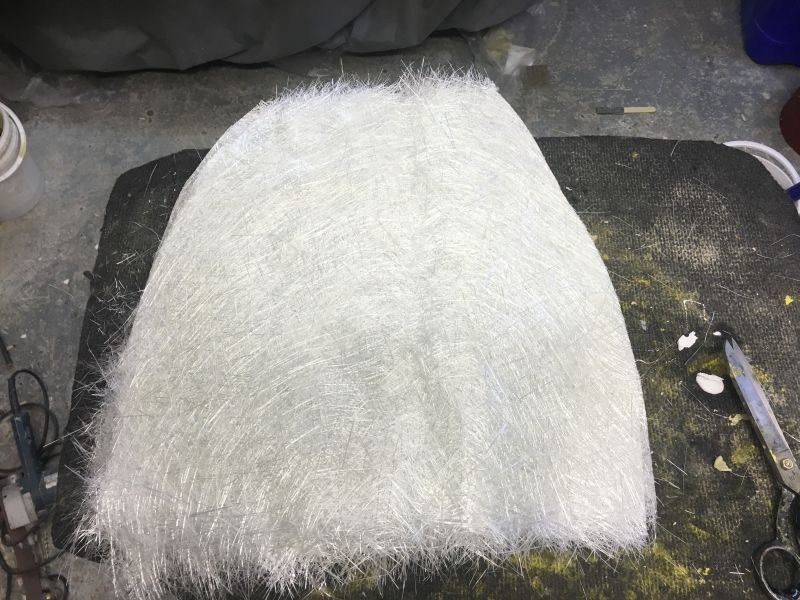
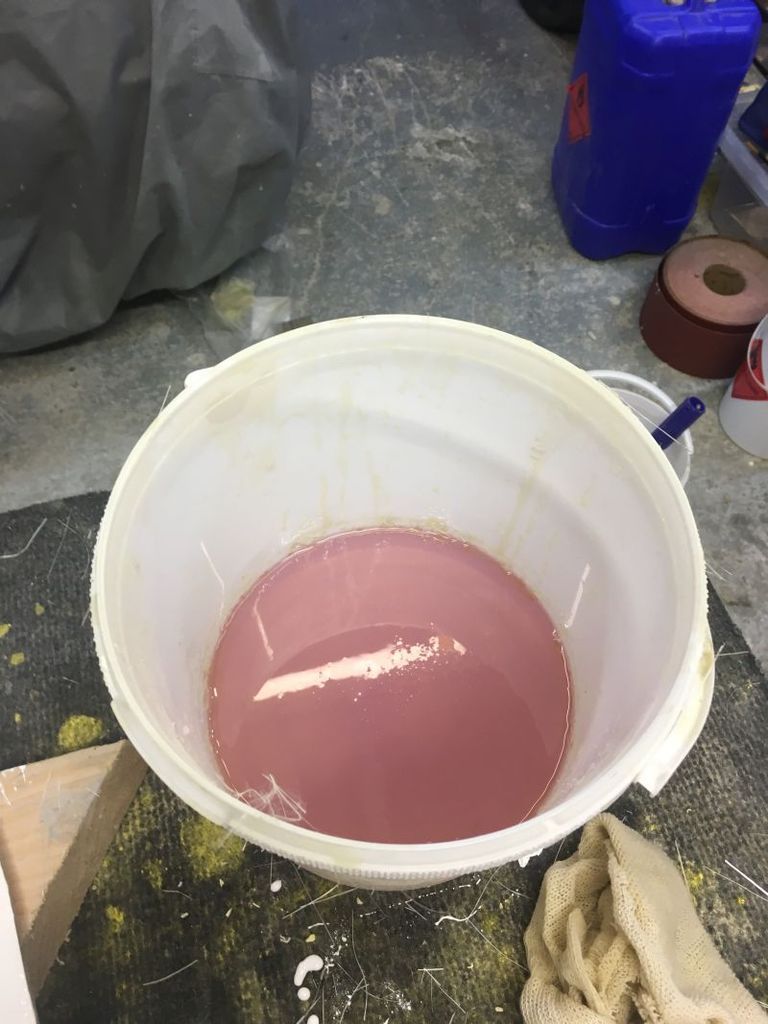
3 coats of gel were applied in total and allowed to cure overnight so on Saturday I prepared the glass and then opened the can of special heat resistant resin that was made for me.
It is like water and pink in colour as opposed to the normal blue resin that we use on the boats.
Image

Image

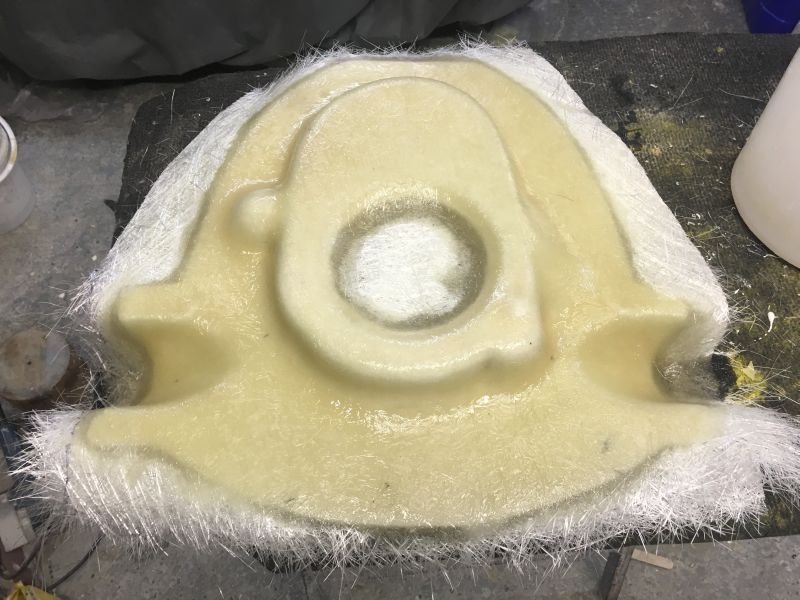
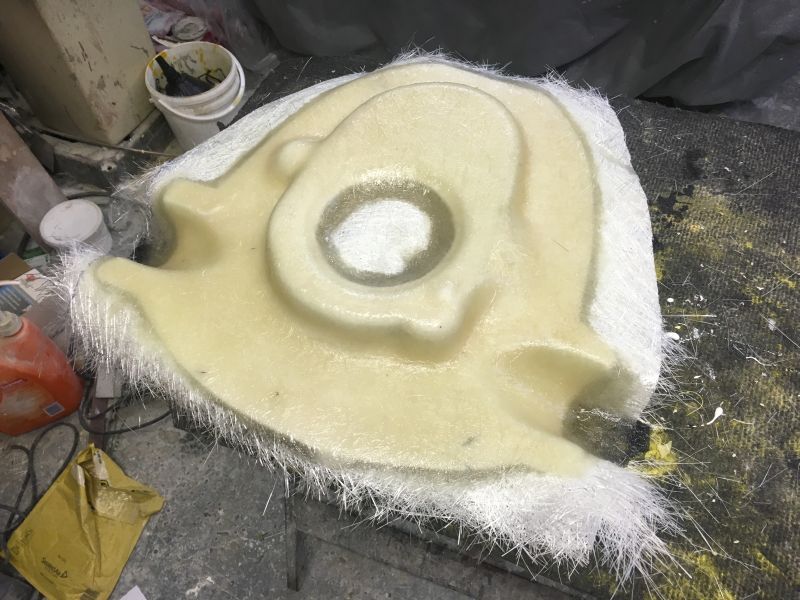
With minimal catalyst added to the resin (as I wanted a really slow cure ) The glass was wet out and rollered in the normal way and in a short space of time I ended up with this.
Image


Image

The only thing I did not notice was that the resin fell through the lower sections of the glass at the base of the tube area and has stuck like poo to a blanket on the board that has a material on it !

Best I cut that off then.
Once that is done I will trim the edges and then allow this to cure for a couple of weeks and post cure it as well.
I will explain this post cure process soon as it make a difference.

Back out there tonight so may have some more to show you later.

cheers
P


unstable load
Top Dog
Top Dog
Posts: 1278
Joined: Mon May 04, 2009 6:53 am

Post by unstable load »

Welcome back, mate!
Please explain "Post cure" ...
Cheers,
John

gelmonkey
Sergeant Monkey Face
Posts: 1307
Joined: Sat Jun 27, 2009 11:58 am
Location: plymouth

Post by gelmonkey »

Hi John and anyone else following along.

Post curing then....
In laymans terms then Post Curing is basically cooking the item you have laminated to specific tempertures for a specific amount of time in a clave or fabricated box usually made from plywood.

Because work gets in the way of things as it does for most people I am unable to get this going as soon as I would like so hence the really minimal catalyst mixed into the resin.
The laminates will cure but not as quickly as normal (I have already trimmed the mould) and so if I get time at the weekend I can make my box and then cook the unit with my infra red lamp whilst being able to keep and eye on the temperatures inside it.
The box in my case only needs to be four sided but a proper clave is fully enclosed.
The reasoning behind a post cure is to ensure that the resin and its specific temperature range can be utillised to its maxmium potential.
As I have previously mentioned way back in the past on this project I have had concerns about the heat coming from my motor and I do not want to have a horrible slumped mess under the bonnet after its first run out.

Belts and braces really but I feel that this needs to be done although it may well be okay if a post cure was not employed.

I hope this explains well enough but if anyone needs further info then please just ask and I can high techy techy bore you with infinite detail :lol:

Cheers
P

User avatar
Darkspeed
Guru
Guru
Posts: 913
Joined: Sun Sep 02, 2007 4:43 pm
Location: Shropshire
Contact:

Post by Darkspeed »

I'm here with note pad. ;)

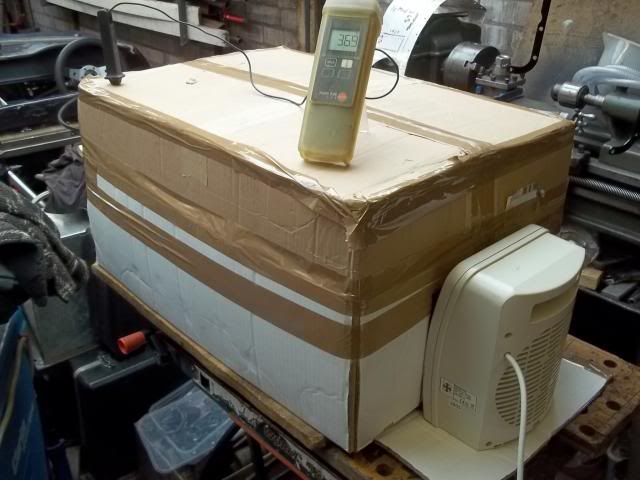
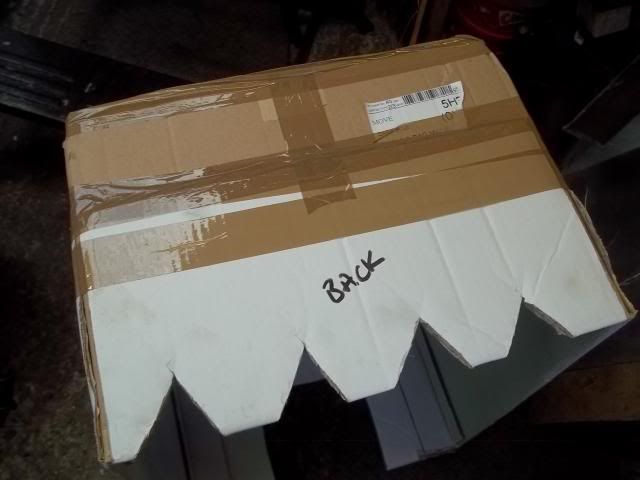
My low temp oven

Image

Image

I can set this for temps between 30 and 55C It's had another couple of layers of Cardboard on it since that picture to increase the insulation level of it.

This was my low bake paint oven for getting paint to dry when it was near freezing in the garage.
4.5L V8 Ginetta G27

gelmonkey
Sergeant Monkey Face
Posts: 1307
Joined: Sat Jun 27, 2009 11:58 am
Location: plymouth

Post by gelmonkey »

Hi Andy
That will do just fine as a oooker.
I need to get mine up to 130 degrees so reckon cardboard might not take that much heat.
A perfect example of my ramblings though
Thank you

P

stevieturbo
Forum Contributor
Forum Contributor
Posts: 3979
Joined: Sat Nov 18, 2006 6:22 pm
Location: Northern Ireland

Post by stevieturbo »

It's still a work of art compared to what I'm making a mess of at the minute !! LOL

And the masking take I used ( fancy blue stuff ) did kind of stick to the gelcoat lol

Was just filling a hole so not a big deal. And still getting those damn air bubbles !
9.85 @ 144.75mph
202mph standing mile
http://www.youtube.com/watch?v=XgWRCDtiTQ0

gelmonkey
Sergeant Monkey Face
Posts: 1307
Joined: Sat Jun 27, 2009 11:58 am
Location: plymouth

Post by gelmonkey »

Steve
When you say you are still getting bubbles do you mean in the gel under the tape ?
Are you using the tape to hold gel in as I have shown or am I missing something
If yes to the last question keep the pot you mixed the gel in and keep an eye on it
When it's starts to cure and gets to a rubbery stage very carefully remove the tape and any pinholes or bubbles in the repair site will have time to close over before fully curing
Cheers
P

stevieturbo
Forum Contributor
Forum Contributor
Posts: 3979
Joined: Sat Nov 18, 2006 6:22 pm
Location: Northern Ireland

Post by stevieturbo »

gelmonkey wrote:Steve
When you say you are still getting bubbles do you mean in the gel under the tape ?
Are you using the tape to hold gel in as I have shown or am I missing something
If yes to the last question keep the pot you mixed the gel in and keep an eye on it
When it's starts to cure and gets to a rubbery stage very carefully remove the tape and any pinholes or bubbles in the repair site will have time to close over before fully curing
Cheers
P
I bought this for the front of my car..

http://www.motomobil.com/front-spoiler- ... 472-1.html

Oddly...either it's supposed to be the shape it is, or it's a bit skewed and I'm trying to correct it.
I'm also filling in the lower of the air holes. I had this covered with the reverse side of the blue masking tape so I could apply gel/glass from the rear to fill the hole. The gel did stick to the masking tape. Not terribly, but the release tape I got from easycomposites defo works better for that sort of stuff.

As for the bubbles. I mean when I'm glassing, ie at any corner, step, interface. I just cant get the glass to mould to the contours without lifting. None of it is critical here though.

I'm adding a flat underside to the spoiler for easier mounting, and creating a side flange where the two pairs go together, again for easier and better mounting. But towards the centre, the spoiler shape is a little odd, so I've cut a small bit off and trying to alter it's shape slightly. Hard to describe really and havent taken any photos yet. Only just started it a few days ago, and literally just adjusted shape and gelcoated it a couple of hours ago.
If it all works out ( after some filler ) I might then take a mould of it so I've a spare. And then when it's fitted I want to then create another bolt on piece so it actually extends much closer to the ground so it actually will have some aero benefit ( but impractical for road use hence it needs to be 2 piece and easily fitted and removed when doing the top speed runs )
9.85 @ 144.75mph
202mph standing mile
http://www.youtube.com/watch?v=XgWRCDtiTQ0

gelmonkey
Sergeant Monkey Face
Posts: 1307
Joined: Sat Jun 27, 2009 11:58 am
Location: plymouth

Post by gelmonkey »

Ok
So here's how to tackle the odd shape and getting it correct to your car
Fix one side to the valance and then offer up the other half so that its close
Then drill some 3mm holes into the valance through the second half and pull it into place
Glass it from behind and allow to fully cure
This will bring the shape into true and you can then let the cut out section back into the part you cut it out of
For the under tray get some acylic sheet and glass up as shown on my previous posts but make sure that the sheet is well waxed
Hot glue this into place first though
Once glassed you can add foam mounting points as per my splitter post and you can add a lower section by screwing straight through into the glassed foam
May be better off bolted through if doing very high speed runs
Does this help?
P

stevieturbo
Forum Contributor
Forum Contributor
Posts: 3979
Joined: Sat Nov 18, 2006 6:22 pm
Location: Northern Ireland

Post by stevieturbo »

It's not odd shape in terms of fitment...just odd shape lol

As said, it's hard to describe. The fold along the length of the spoiler...it looks like towards the centre someone sat on the mould and it flattens out a little instead of keeping the same angle all the way.

I'm not cutting and trying to fix that, but I've glued it to a flat piece of polypropylene ( sitting on a wooden board ) and trimmed the part of the spoiler I think raises up because of this mis-shape...and I'm going to add material to it so the lower portion will all be level, instead of raising up at the middle.

So the leading edge should all be level when I'm done and the underside be totally flat extending rearwards to where I can make good fixings to the car.
This new flat base should also make it easy to affix a lower section to.

I'll get a photo of it tomorrow, although TBH I havent tried fitting it to the car just yet other than holding it up to it briefly.
I dont particularly like the spoiler, but I think if I can make something to create a proper splitter type near teh ground it will offer some benefit for the top speed runs, so I'm prepared to live with it.
Current spoiler is just the OEM 2.8i rubber 2 piece ( albeit with a steel brace behind for support )
9.85 @ 144.75mph
202mph standing mile
http://www.youtube.com/watch?v=XgWRCDtiTQ0

gelmonkey
Sergeant Monkey Face
Posts: 1307
Joined: Sat Jun 27, 2009 11:58 am
Location: plymouth

Post by gelmonkey »

Ok mate
I obviously misunderstood what you were saying earlier
Please put up some pics so I can see what you are trying to do and if there is an easy way of sorting it out I will try to help
Cheers
P

unstable load
Top Dog
Top Dog
Posts: 1278
Joined: Mon May 04, 2009 6:53 am

Post by unstable load »

stevieturbo wrote:As for the bubbles. I mean when I'm glassing, ie at any corner, step, interface. I just cant get the glass to mould to the contours without lifting. None of it is critical here though.
Good question, I need a few pointers here, too please.

I recently did a small repair to an ABS seat back panel on one of our choppers. The panel is a simple, non-structural cover for the back of the Pilot's seat and is held on with velcro.
Flimsy design and ham fisted passengers resulted in the corner of the panel breaking off, so I removed it and scuffed the back with a rotary file to promote adhesion and then mixed up some structural adhesive and pre-impregnated a light woven mat between 2 sheets of plastic. For what it's worth, the adhesive is either Hysol EA9309-3NA or EA9396, depending on what's in the store at the time...

The panel is contoured in the repair area, so when I laid the mat down, it didn't go down into the corners without wetting it up a LOT, and as soon as I used the brush to stipple the excess out, it lifted off again, leaving a void under the mat.
I got around it by placing a layer of plastic over it and some foam on top of that with a weight to hold it all down while it cured, but there have been cases in the past where access has not allowed me that option, so how can I get the mat to follow the profile of the panel without over-wetting it, or is it a case of tough luck, you win some, you lose some?
Cheers,
John

stevieturbo
Forum Contributor
Forum Contributor
Posts: 3979
Joined: Sat Nov 18, 2006 6:22 pm
Location: Northern Ireland

Post by stevieturbo »

I'll stick pictures up on the other thread, as it's a little less specific to gelmonkey's work and a more generic topic for all ?

http://www.v8forum.co.uk/forum/viewtopi ... 4&start=30
9.85 @ 144.75mph
202mph standing mile
http://www.youtube.com/watch?v=XgWRCDtiTQ0

gelmonkey
Sergeant Monkey Face
Posts: 1307
Joined: Sat Jun 27, 2009 11:58 am
Location: plymouth

Post by gelmonkey »

John Steve and anyone else who is interested.
Getting laminate into the corners or to follow tight radii can be a bit of a mare but you can do it.
For tight corners you can always use a fillet of bodyfiller with a slow hardner mix and let that into the tight areas and make a nice curve from top to bottom etc.
This will allow the glass when applied to flow from one surface to the next without creating bubbles and giving maximum strength.

If you refer back to my Making a front splitter from scratch thread Steve you will see I did exactly that but with a different material as I wanted high strength at the leading edge.

If you dont want to use car body filler you can use a filler powder mixed in with the resin to help with the corners
The powder makes the resin heavier and pushes the laminate down into the corners.

Instead of using tape to cover holes and to make a 'plant' just use acrylic sheet to cover up with.
Its so much easier and always releases even if a small amount of wax has been applied.


John
With regard to your seat repair instead of using plastic to make a former you could always use cardboard WITHOUT wax on it
By doing this the resin soaks into the cardboard and helps to keep the laminate in shape
Once cured peel the cardboard away (it does not matter if some of it sticks ) and then just sand back t the right profile.

Hope this helps you guys and anyone else having problems with this kind of work.

cheers
P and yes I still hate boats
:lol:

stevieturbo
Forum Contributor
Forum Contributor
Posts: 3979
Joined: Sat Nov 18, 2006 6:22 pm
Location: Northern Ireland

Post by stevieturbo »

I was going to use the polypropylene sheet, but tape seemed easier and you said masking tape would work lol
I had the other release tape I could have used too...but I need to try stuff to see what I can make work ( or screw up :D )


Hard sheet would have been better as the tape does seem to have concaved slightly, not a big deal as I will just add a little filler. Not 100% sure if it should be totally flat or with a small curve anyway so I'm sure it would have needed some filler no matter what way I did it.

I think for the corners this time....if I tear the glass a little before pushing it into the corners, it's bound to contour better ? rather than just using a part of the flat roll ?

I think you did that before in some areas ? Will try it over the weekend anyway
9.85 @ 144.75mph
202mph standing mile
http://www.youtube.com/watch?v=XgWRCDtiTQ0

Post Reply

Return to “Exhaust, Cylinder Heads, Fuel And Intake Area”