
Andrew
Yes you are right light weight wovens are very strong and need few layers.
I made many years ago, an Elva body for a guy out in Japan and we used a very light chopped strand and then a fine woven on top and that was fantastic.
If weight is an issue foam cores are superb to use and you can just glass over the top.
I did that on my splitter project a while back and its very strong.
I always try to use a single sheet on a lay up instead of bits because as you rightly point out uniformity is good and it avoids hot spots where layers overlap.
Cheers
P
Monkey business
Moderator: phpBB2 - Administrators
Which creates more strength, the resin or the glass/carbon/kevlar ? It looks to be as if the resin really is a key structural component ?
Just the same principal as steel reinforced concrete.The resin does have some strength obviously but it is always the laminate that holds the most structural strength.
Dax Rush 4.6 supercharged V8 MSII
-
stevieturbo
- Forum Contributor

- Posts: 3979
- Joined: Sat Nov 18, 2006 6:22 pm
- Location: Northern Ireland
But there are different grades of steel and concrete lolSuperV8 wrote:Which creates more strength, the resin or the glass/carbon/kevlar ? It looks to be as if the resin really is a key structural component ?Just the same principal as steel reinforced concrete.The resin does have some strength obviously but it is always the laminate that holds the most structural strength.
Some of the carbon stuff I've seen is just so incredibly thin, yet seems to be strong.
In reinforced concrete, the concrete have a relatively low tension strength but good compression strength. Consequently the steel is placed accordingly in the tension zone of the member to take the tension forces and to reduce cracking.
I assume the glass fibres are employed in a similar fashion.
I assume the glass fibres are employed in a similar fashion.
1950 A40 Devon Hotrod with 5.0 twin turbo RV8.
EDIS8 wasted spark, Holley Injection.
Been as far as the Moon and back in 57 years of driving. Same Car, 5 engine upgrades !!!
EDIS8 wasted spark, Holley Injection.
Been as far as the Moon and back in 57 years of driving. Same Car, 5 engine upgrades !!!

-
stevieturbo
- Forum Contributor
- Posts: 3979
- Joined: Sat Nov 18, 2006 6:22 pm
- Location: Northern Ireland
Not really sure. But I think that's more pre-stressed concrete you mean, like bison slabs where literally the steel is stretched during setting so the unit always remains in tension.
Normal re-enforced is simply steel rebar inside the concrete, steel is formed into a mesh and concrete simply poured around it. So not too unlike resin/glass I guess.
On a similar note....Mythbusters.
Wood shavings and newspapers. In ice !
Both of these inside the ice ( resin ? ) increased the strength by huge amounts. I think on one episode they actually shot a bullet into a block of it and it resisted well, whereas straight ice just exploded.
Interesting information. As a retired Reinforced Concrete designer I am pretty familiar with the working of most forms of concrete. In fact glass strands are used in one particular type of reinforced concrete.stevieturbo wrote:Not really sure. But I think that's more pre-stressed concrete you mean, like bison slabs where literally the steel is stretched during setting so the unit always remains in tension.
Normal re-enforced is simply steel rebar inside the concrete, steel is formed into a mesh and concrete simply poured around it. So not too unlike resin/glass I guess.
On a similar note....Mythbusters.
Wood shavings and newspapers. In ice !
Both of these inside the ice ( resin ? ) increased the strength by huge amounts. I think on one episode they actually shot a bullet into a block of it and it resisted well, whereas straight ice just exploded.
In pre-stressed concrete the steel is pretensioned as you say but the unit when cured always remains in compression not tension.
In normal Insitu Reinforced Concrete such as beams and suspended floor slabs the design reinforcement is placed un stressed in the tension zone as the concrete would otherwise fail when loaded because it has relatively low tension strength. Mesh reinforcement tends to be used in large areas of floor slabs to speed up fixing time on site. Ground bearing slabs tend to have mesh reinforcement to control cracking but the rebar will be biased towards the tension zone where heavy point loads or wheel loads are expected.
I have no idea if fibre glass resin is stronger in compression or tension but placing the glass throughout the thickness of the panel will give strength from impact in either direction.
1950 A40 Devon Hotrod with 5.0 twin turbo RV8.
EDIS8 wasted spark, Holley Injection.
Been as far as the Moon and back in 57 years of driving. Same Car, 5 engine upgrades !!!
EDIS8 wasted spark, Holley Injection.
Been as far as the Moon and back in 57 years of driving. Same Car, 5 engine upgrades !!!
WOW!!
So much information on this site its mind boggling at times dont you agree?
Speaking from a glassing side of things structural strength and thickness's can be a bit confusing to say the least as each laminate has it's own properties and uses as do carbon's and kevlars.
For instance
CSM ( chopped strand matting ) is widely used for its all round capabilities as the fibres are not uniform and as such can spread loads in every direction at the same time and is very very easy to use and has multiple applications from boats to ponds to car bodies and so on and so on.
Wovens and combination laminates have high strength and can be used for larger surface areas but are not that thick which means the finished project whatever it is remains relatively light yet strong.
Combinations of CSM and wovens can be used to increase strength massively but at a weight cost.
Bi axials and Tri axials tend to bugger the theory up a bit though and this is a perfect example of that.
Some years back we were asked to get involved with a very high spec never been done before retro fitment of a Gyroscopic stabiliser for a multi million pound yacht.
Space was extremely limited and our task was to remove two sections of the main longditudinal bearers just aft of the main engines and tie in two new bearers which we made but had to dog leg out from the engine room into a machinery space and then dog leg back into the original in the crews quarters.
We had to be millimeter perfect on the placement of these things as the table on which the Gyro sat on was fixed position and width between the mounting feet was also critical.
The Gyro had large hydraulic rams which transferred vast loads through the table and into the new bearers and subsequently throughout the rest of the original structure.
Core cell foam was used which was very light at 3" thick and over 10 ft in length but massively strong.
Bearing in mind that it took several days to cut out the original structures which were made from timber and very heavily glassed we used only 3 very thin layers of a laminate called Diagonap ( A tri axial ) coming in at a thickness of just over 4mm in total once fully glassed.
The laminate was a complete pig to work with BUT because of the weave of the glass the placement of the diagonal pattern and the fore and aft lay of the stitching within the laminate it was stronger than the original.
4mm thick think about that for a minute......
This small amount of glass and lightweight foam was transferring tons and tons of fore and aft thrust at the same time as each ram moved to stabilise the boat from rocking on the water once the system was initiated
The factory original structures came in at almost twice the thickness!
Carbons and Kevlars have these same properties and although you can get what is known as ribbons or tapes generally speaking the stuff comes in a diagonal weave pattern which as just explained is incredibly strong but thin.
What is not so commonly know is that laminates have a 'memory' and will in all but the most extreme impacts stretches and compressions return to its original form as the weave spreads the load in the direction of the diagonal patterns.
Bullet proof vests are made from small width diagonal pattern carbon kevlar and once impacted with force from said bullet the loads are spread outwards form the point of impact.
Because the pattern is small it compress's beneath the shock but spreads the load instantly outward from the point of impact leaving almost no witness marks.
There is so much more that could be discussed regarding laminates and their properties but hopefully this may answer some questions?
cheers
P
-
stevieturbo
- Forum Contributor
- Posts: 3979
- Joined: Sat Nov 18, 2006 6:22 pm
- Location: Northern Ireland
Hi Steve
Yeah that itch is something special isn't it
What do you want to use ?
Carbon or and ordinary woven.
Carbon very expensive, resin very temperature sensitive and finally would you feel confident in getting the pattern straight always supposing you want the carbon weave to be seen ie not painted.
An ordinary woven such as a 290T is super lightweight fairly simple to use and not too expensive.
Mould can be gelled prior to laminating the woven but after a 300gsm csm to dumb down possible laminate footprint once cured and shrunk.
My understanding of clear carbon finish is the use of a special varnish but I could find out about this if required.
As I dont use Carbon very much at all these days there may be products that are new to me which can also be applied to the mould prior to laminating.
All of the carbon and kevlar stuff I did was years ago on an experimental wing sail for what was supposed to be a revolutionary new yacht design and whilst it worked it looked like a horses ass out at sea so never grabbed the sailing limelight.
It was all internal load bearing and structural stuff so not seen by the eye.
If you need answers quickly then come back to me asap as away next week.
cheers
P
-
stevieturbo
- Forum Contributor
- Posts: 3979
- Joined: Sat Nov 18, 2006 6:22 pm
- Location: Northern Ireland
I was lucky enough, well gloved etc so kept itch to a minimum...did get stabbed a few times though.
If doing carbon, appearance wouldnt not be critical for me, I'd be painting the parts anyway.
And didnt know there were different carbon patterns lol
The more this goes on, the more it gets confusing with more variations ! lol All interesting though.
If doing carbon, appearance wouldnt not be critical for me, I'd be painting the parts anyway.
And didnt know there were different carbon patterns lol
The more this goes on, the more it gets confusing with more variations ! lol All interesting though.
With regard to the itch a really good way of getting rid of it or easing it at leat try this.
Get your wifes nylon puff ball (or your own if that way orientated ) and soap the effected areas.
Then just clean yourself down wiping in one direction.
The nylon plucks the fibres out of your skin and you feel so much better after.
God !
The crap that I know
Let me know what you decide regarding laminates (ref pm sent the other day )
cheers
P
Hi All
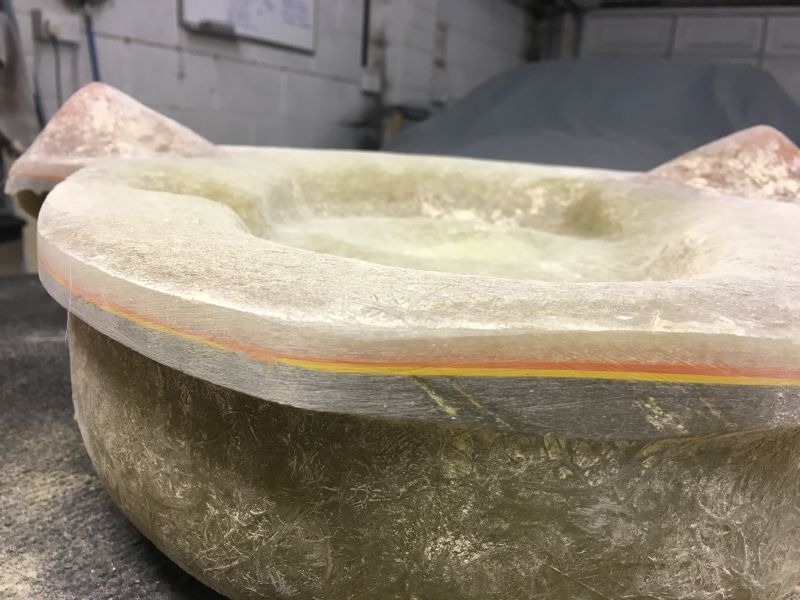
I finally got home after my working away and was keen to get back on the case as soon as possible really so Wednesday night saw me cut and sand back around the perimeter of the mould.
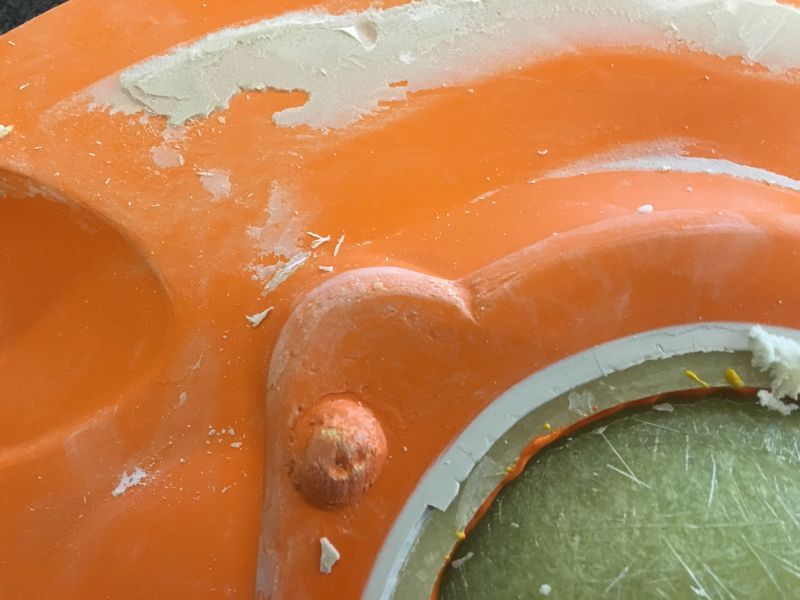
In this first picture you can clearly see the two coloured gel coats which makes for showing the parting lines very clearly.
Imagine if it was the same colour and you had to try and find the joint!
Next I took a Stanley blade and with a very gentle tap from a pin hammer slid the bade between the two halves and then pushed a wallpaper scraper in between as well.
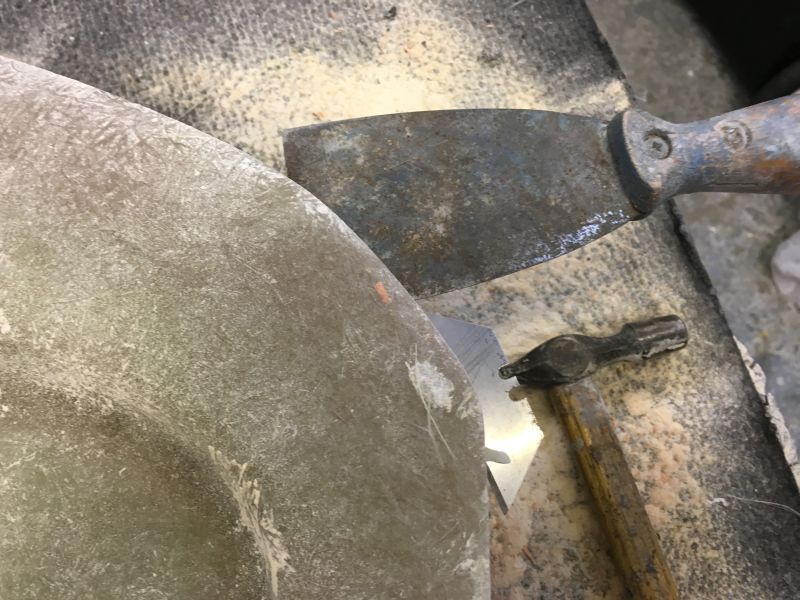
Then gently tapping two filler spreaders in and then a third between those two I slid the whole lot around the outside of the mould.
A point of interest ( maybe ) is when releasing a mould it will pop and crackle and make all sorts of ominous sounds but it is nothing to worry about as its just the sound of releasing/
As always make sure right at the very beginning there is plenty of wax on the whole thing or it will never release.
Whilst sliding the spreaders around I could feel the mould starting to lift which was a good sign.
it was also obvious because I could see this
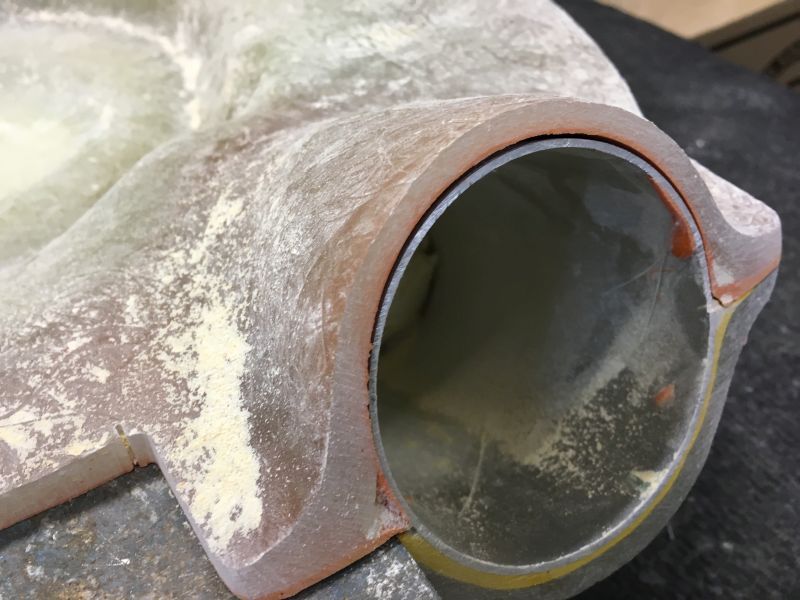
I think it took about five spreaders to lift the whole lot enough for me to get my digits underneath and then it as a simple case of just lifting the whole lot away and this is exactly shown as it was turned over for inspection.
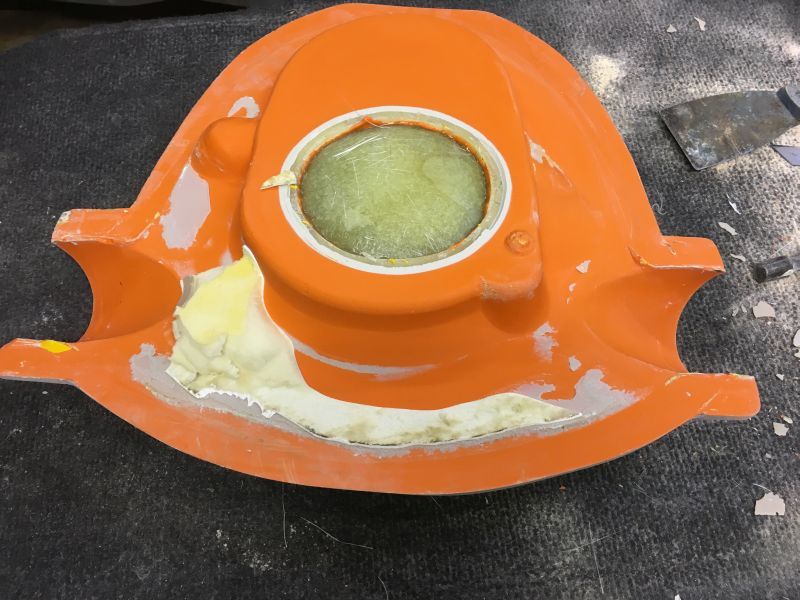
Clearly there was a bit of damage to the plug but that does not matter at all as it was only the former and the bits of filler and foam that you can see will be scrapped away and then sanded back to profile.
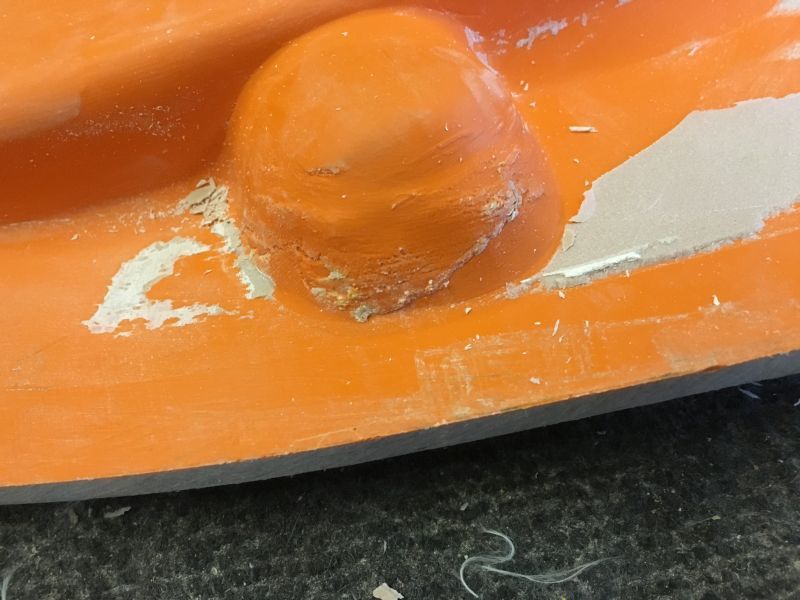
Also clearly shown are a few small areas that were quite difficult to work on originally but now will be very simple to work on as they are in relief .
A couple of small areas will also need a bit more profiling but again very simple to sand back now.
I will get all of this sorted and then final sand on 1200 grit wet and dry before machine polishing to a high gloss prior to actually making the real thing.
Huge thanks to everyone who is following this project and also for the questions and kind comments.
Catch up again very soon
cheers
P
I finally got home after my working away and was keen to get back on the case as soon as possible really so Wednesday night saw me cut and sand back around the perimeter of the mould.
In this first picture you can clearly see the two coloured gel coats which makes for showing the parting lines very clearly.
Imagine if it was the same colour and you had to try and find the joint!

Next I took a Stanley blade and with a very gentle tap from a pin hammer slid the bade between the two halves and then pushed a wallpaper scraper in between as well.

Then gently tapping two filler spreaders in and then a third between those two I slid the whole lot around the outside of the mould.
A point of interest ( maybe ) is when releasing a mould it will pop and crackle and make all sorts of ominous sounds but it is nothing to worry about as its just the sound of releasing/
As always make sure right at the very beginning there is plenty of wax on the whole thing or it will never release.
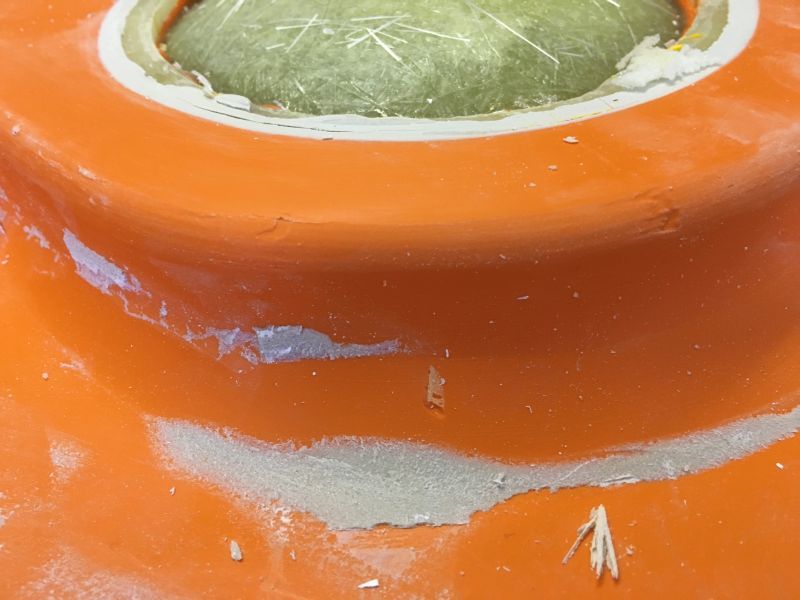
Whilst sliding the spreaders around I could feel the mould starting to lift which was a good sign.
it was also obvious because I could see this

I think it took about five spreaders to lift the whole lot enough for me to get my digits underneath and then it as a simple case of just lifting the whole lot away and this is exactly shown as it was turned over for inspection.

Clearly there was a bit of damage to the plug but that does not matter at all as it was only the former and the bits of filler and foam that you can see will be scrapped away and then sanded back to profile.
Also clearly shown are a few small areas that were quite difficult to work on originally but now will be very simple to work on as they are in relief .
A couple of small areas will also need a bit more profiling but again very simple to sand back now.


I will get all of this sorted and then final sand on 1200 grit wet and dry before machine polishing to a high gloss prior to actually making the real thing.
Huge thanks to everyone who is following this project and also for the questions and kind comments.
Catch up again very soon
cheers
P
