Page 1 of 2
Rotor Arm Issues and Problems
Posted: Tue Oct 09, 2007 5:06 pm
by thefatcapri
Here's the problem... I can't get hold of a rotor arm that works! I have a collection of 5 now - some pattern, one Britpart and a couple of genuine Lucas ones and if you remove the dizzy cap and hold the king lead near (10-15mm) the rotor arm, the spark will jump right across - implying the insulation between the brass plate on top and the distributor shaft has broken down.
I have had limited success by pulling the rotor arm up off the top of the shaft slightly to create a small air gap to reduce the risk of the spark simply going straight to earth rather than out to the plugs, but now I can't get the engine to start at all.
I have two distributors - one converted to Luminition and one a standard OPUS unit and neither of them work with any of my rotor arms. I'm using a new 12v ballasted coil and Bosche plug leads with correctly gapped NGK plugs.
Anyone got any ideas before I ditch the lot and buy an MSD or Mallory distributor?
Posted: Tue Oct 09, 2007 6:38 pm
by kiwicar
This is probably stating the obvious but could the problem be the cap? is it a genuine lucas one for the distributor, just I followed a thread on the old forum ages ago similar to this and the upshot was you had to have a matched set of distributor/ rotor arm and cap all lucas as the pattern parts weren't close enough.
Mike
Posted: Tue Oct 09, 2007 7:54 pm
by thefatcapri
I've tried different caps, but the problem is really before it gets to the cap and distribution of the spark... the spark is running straight to earth through the rotor arm before it gets a chance to travel out through the leads to the plugs. The result is a spark so weak at the plugs that it's not enough to start the engine.
Posted: Tue Oct 09, 2007 8:15 pm
by sidecar
You may well get the HT to jump from the king lead to the rotor arm then to earth with the cap removed as you are not giving the HT anywhere else to go. With the cap on at least it has the choice of going down one of the posts to a plug.
I also had problems with pattern rotor arms breaking down (in terms of insulation) after about 50 miles of driving. Jim from JRV8 supplied a rotor arm that sorted out the problem.
I also spotted what I believe is another problem with the standard dizzy (Jim disagrees!) which is that the rotor does not line up with the posts very well at the point of firing the plug.
You can check this by turning the engine to 8 degrees BTDC (or whatever you run), make sure that it's on the firing stroke. Check where the rotor is pointing and try to work out if it lines up the the dizzy post for number one cylinder, mine was miles out!
I ground out the locating peg and made a new one for one of my rotors and that fixed the problem. (Out of some stainless steel bar pushed into a hole drilled in the side of the rotor. I glued it in place and also put some heat shrink tubing round the centre of the rotor to help stop the bar flying out if the glue fails)
You need to think carefully where the new peg goes to take account for the bob weight and vac advance. (It's not easy to work out!)
I also found that once a rotor has broken down it's knackered for good!
HTH,
Pete
Posted: Wed Oct 10, 2007 4:44 am
by ian.stewart
Firstly what gaps on the plugs are you running?? I have has all sorts of problems with Rotor arms on the RV8, There are 2 distinct different types both look identical, but the depth you can push the arm on to the shaft is different, if you have a Points dissy or early electronic dissy you need a arm that will not push onto the shaft too far as the early and late dissy shafts are shorter or longer, try packing the inside of the rotor arm with some greased washers to lift it up by about 3-4 mm and also pull the carbon pip in the cap down a bit, the 2 rotor arms are not allways listed in the parts books which leads to even more confusion if the rotor arm is not in contact with the pip, you will only get a very WEAK spark at the plugs.
Next remove all the plugs and see if they are wet, if so, dry and regap to 32thou, if the engine was flooded, make sure the choke is off, floor the throttle and turn the engine over on the starter to purge the cylinders, refit plugs and try again,
are you sure the coil is correct12v ballasted??, should make it a 7v coil with a 12 unballasted feed, if you are unsure, hot wire the coil direct to 12v, but if the engine starts you have to remove this feed from the coil to stop the engine
Ian

Posted: Wed Oct 10, 2007 3:36 pm
by Paul B
sidecar wrote:
I also spotted what I believe is another problem with the standard dizzy (Jim disagrees!) which is that the rotor does not line up with the posts very well at the point of firing the plug.
You can check this by turning the engine to 8 degrees BTDC (or whatever you run), make sure that it's on the firing stroke. Check where the rotor is pointing and try to work out if it lines up the the dizzy post for number one cylinder, mine was miles out!
Am I missing something here, or is there some reason you can't just turn the distributor until the rotor arm lines up with the post? That is how you alter the timing, surely? You don't set the engine to 8BTDC, you set the distributor.
Posted: Wed Oct 10, 2007 4:50 pm
by sidecar
Paul B wrote:sidecar wrote:
I also spotted what I believe is another problem with the standard dizzy (Jim disagrees!) which is that the rotor does not line up with the posts very well at the point of firing the plug.
You can check this by turning the engine to 8 degrees BTDC (or whatever you run), make sure that it's on the firing stroke. Check where the rotor is pointing and try to work out if it lines up the the dizzy post for number one cylinder, mine was miles out!
Am I missing something here, or is there some reason you can't just turn the distributor until the rotor arm lines up with the post? That is how you alter the timing, surely? You don't set the engine to 8BTDC, you set the distributor.
You can't just turn the dizzy round as that effects the timing.
The dizzy wants to fire a plug every 45 degrees when the trigger wheel "tells" it to. You can spin the dizzy found and it will move these 45 degree set points but at the same time you are moving the dizzy cap. Now if the firing points are offset from the points where the rotor arm is pointing at a cylinder dizzy post then it can cause problems with either the wrong plug firing, no plug firing or even two plugs firing!
Spinning the dizzy around won't remove this offset error that many distributors have, the only way to do it is to either modify the the trigger wheel location or the rotor location.
It may seem odd to you that manfucturers make dizzys with these sort of errors built in, but believe me they do!
I have read at least two "tunning" books that devote several pages to sorting out the problem.
The reference to 8 BTDC assumes that this is the static timing that the motor runs. Yes you turn the dizzy to effect the timing but what you are doing is changing the relationship between the dizzy and the crankshaft (and therfore pistons).
Once the engine is turned to 8 degrees (or whatever you happen to run) the rotor arm should be pointing at post number one on the dizzy cap. Infact it is even better if the trailing edge of the brass strip is pointing at the post, that way as the mechanical advance kicks in and the spark happens earlier hopefully the leading edge of the brass strip is pointing at number one post. In other words, at both extremes of the ignition timing at least some part of the brass strip is still in line with the dizzy post.
Regards,
Pete
Edit...I've thought of a way that may help you visualize the problem without having to relate it to the actual engine timing.
If you were looking striaght at the top of the dizzy you could line it up so that the cylinder posts were at 0, 45, 90, 135, etc degrees around its edge.
You would want the the rotor to point at these posts when it was time to fire a plug.
The problem is that the trigger mechansim under the rotor may try to fire a plug at 20, 65, 110, 155 degrees. These firing points are still 45 degrees apart from each other but they are offset by 20 degrees compared to the cylinder posts so the rotor will not be pointing at the right place.
Moving the dizzy around moves both the cylinder post AND the firing points so they remain offset by 20 degrees no matter how much you spin the dizzy around.
Posted: Thu Oct 11, 2007 2:57 pm
by Paul B
sidecar wrote:
You would want the the rotor to point at these posts when it was time to fire a plug.
The problem is that the trigger mechansim under the rotor may try to fire a plug at 20, 65, 110, 155 degrees. These firing points are still 45 degrees apart from each other but they are offset by 20 degrees compared to the cylinder posts so the rotor will not be pointing at the right place.
Ahaaa, all becomes clear, the ignition might fire at a different time than your rotor arm is lined up correctly with a plug post. I never thought of that actually.
I'm not sure exactly where the rotor arm needs to be to give the best 'spark line' to the cap pin though, as there is a goodly chunk of brass along its outer edge. Fully abreast, just before etc?
Seeing as the cap is keyed into the dizzy, filing the key/slot off a cap and slowly rotating the cap a couple of degrees might give an indication, such as a rise in rpm, intake vacuum etc? Or doesn't it work that easily?
Posted: Thu Oct 11, 2007 4:03 pm
by sidecar
Paul B wrote:sidecar wrote:
You would want the the rotor to point at these posts when it was time to fire a plug.
The problem is that the trigger mechansim under the rotor may try to fire a plug at 20, 65, 110, 155 degrees. These firing points are still 45 degrees apart from each other but they are offset by 20 degrees compared to the cylinder posts so the rotor will not be pointing at the right place.
Ahaaa, all becomes clear, the ignition might fire at a different time than your rotor arm is lined up correctly with a plug post. I never thought of that actually.
I'm not sure exactly where the rotor arm needs to be to give the
best 'spark line' to the cap pin though, as there is a goodly chunk of brass along its outer edge. Fully abreast, just before etc?
Seeing as the cap is keyed into the dizzy, filing the key/slot off a cap and slowly rotating the cap a couple of degrees might give an indication, such as a rise in rpm, intake vacuum etc? Or doesn't it work that easily?
Hi Paul,
Your idea of filing off the location lug is a good one although you would then have to find a way of locking it in place. Also the clips that hold my cap on will only work on one area of the cap. I have seen something that sits between the cap and the dizzy to allow adjustment as well as adjustable rotor arms.
I'm not sure that the revs would rise and fall as you moved the cap as you are not actually changing the timing, it's more a case that you can end up with high RPM misfires that you might not even notice whilst driving the car, especially if the offset got worse as the mechanical advance kicked in. Even worse you could end up firing the wrong plug right in the middle of the compression stroke which won't do that cylinder any good at all. (Or in my case the leaking HT caused the rotor insulation to break down and make the rotor useless)
Most books reckon that getting the rotor as near to the post as possible over the entire RPM and ignition sweep range is your best bet to avoiding these problems.
Regards,
Pete
Posted: Thu Oct 11, 2007 4:26 pm
by thefatcapri
Thanks for a number of good ideas Ian... will be out testing thoroughly at the weekend!
I've gapped the plugs to 30 thou (.75mm) and have checked the height of the rotor arm relative to the cap, so pretty sure I'm OK there. The original ballast resistor in the Capri loom died and fed 12v to the coil, so as a precaution, I replaced the coil with a new 12v ballasted coil and wired it direct to a 12v feed from the ignition.
Will spin it over again and have all the plugs out to check their condition and report back. Thanks for your help so far

Posted: Mon Oct 22, 2007 5:06 pm
by thefatcapri
Finally... some time to myself and I've been right through the complete ignition system. Having failed miserably to get it to run with different combinations of distributor, rotor arm, cap, plug gaps I decided to start again.
With around 1/8" to play with on the height of the 'best' Lucas rotor, I used his gap to my advantage by filling it with two part epoxy to try and increase the insulation thickness further.
Rocker cover off and plug to confirm TDC on piston no 1, I took off all the HT leads and reset the static ignition timing. Carefully going throught the firing order, all HT leads back on...
Turned the key and guess what? It starts and sits ticking over as if there's never been a problem! Don't know whether to laugh or cry!! Just putting some charge back in the battery and I'm off out for a spin
Posted: Mon Oct 22, 2007 6:33 pm
by Paul B
thefatcapri wrote:Finally... some time to myself and I've been right through the complete ignition system. Having failed miserably to get it to run with different combinations of distributor, rotor arm, cap, plug gaps I decided to start again.
With around 1/8" to play with on the height of the 'best' Lucas rotor, I used his gap to my advantage by filling it with two part epoxy to try and increase the insulation thickness further.
Rocker cover off and plug to confirm TDC on piston no 1, I took off all the HT leads and reset the static ignition timing. Carefully going throught the firing order, all HT leads back on...
Turned the key and guess what? It starts and sits ticking over as if there's never been a problem! Don't know whether to laugh or cry!! Just putting some charge back in the battery and I'm off out for a spin
That sounds too simple. Far too simple.
Be afraid. Be very afraid, as I fear something else has been changed that really caused you all the grief, and you don't know what it is....

Posted: Thu Nov 01, 2007 12:02 am
by dwgriffith
It may seem like a great idea to ensure that the posts line up with respect to the trigger rotor points, however, the vacc advance unit moves the base plate (which has the rotor fixed to it) round to vary the timing. This action will negate any attempt you have made to ensure it's firing position?
Posted: Thu Nov 01, 2007 7:09 am
by Eliot
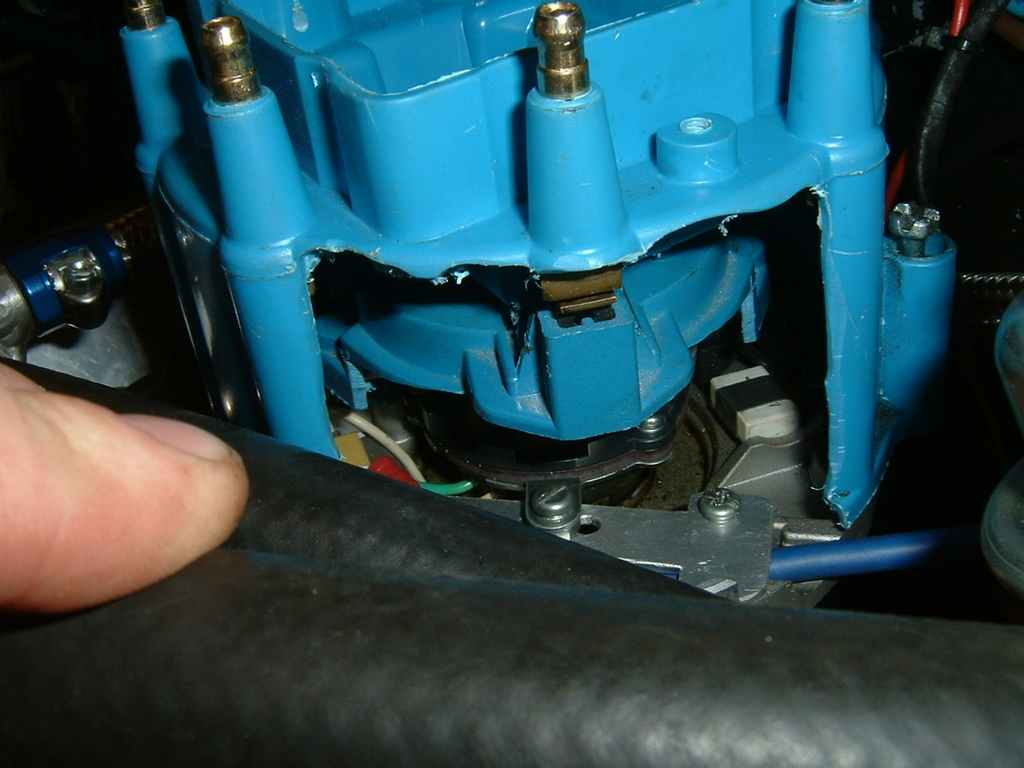
Wrt to checking the alignment, you could always just cut a hole in the side of a spare cap to see whats going on.
http://www.mez.co.uk/dcam/DSCF0330.JPG
Posted: Thu Nov 01, 2007 2:47 pm
by sidecar
dwgriffith wrote:It may seem like a great idea to ensure that the posts line up with respect to the trigger rotor points, however, the vacc advance unit moves the base plate (which has the rotor fixed to it) round to vary the timing. This action will negate any attempt you have made to ensure it's firing position?
It is quite possible to have the leading edge of the rotor in line with the post initally and then have the trailing edge of the post in line at full advance. That is why the brass strip is fairly wide.
In practice this is quite time consuming to get right and I may have even got what I said back to front! It was ages ago when I did all this.