Page 16 of 17
Posted: Tue Jul 19, 2016 10:58 pm
by JSF55
Top job that

Posted: Wed Jul 20, 2016 5:29 am
by Ian Anderson
Paul
Looks fantastic!
Now a question based on fluid dynamics.
Are you forcing the engine to breathe through the top of the carb filter in the main?
Reason I ask,
To get air through the side of the main filter it first has to go through another filter.
So based on lines of least resistance the top could be drawing more than its fair share.
Or put another way do you need the two front filters?
Ian
Posted: Wed Jul 20, 2016 4:29 pm
by gelmonkey
Ian Anderson wrote:Paul
Looks fantastic!
Now a question based on fluid dynamics.
Are you forcing the engine to breathe through the top of the carb filter in the main?
Reason I ask,
To get air through the side of the main filter it first has to go through another filter.
So based on lines of least resistance the top could be drawing more than its fair share.
Or put another way do you need the two front filters?
Ian
Hi Ian
Whilst i know nothing about fluid dynamics or anything clever like that I worked this on the basis of the old school apparatus where you placed a tube into a bottle pf ink and then blew through another tube to lift the ink and spray it onto the paper.
My thoughts and ideas also based on Kiwicar comments to me when he came down to pick up his slingshot body and we had a discussion about my plans then.
By having the filter on the top it is able to draw air from the high pressure area at the base of the windscreen and draw that unforced air through the vent at the back of the bonnet.
As this air is drawn down into the carb (in my mind) it helps draw air from the front filters along with the airflow through the front of the car.
By just using the top filter would in fact decrease the filter surface area even more than I had originally and the whole point of the excersise was to get more air in in the first place.
The original filter was only 2" and 24" around the perimeter so what I have effectively done is increase that area considerably and with noticeable results in my opinion.
Hopefully this answers your question?
cheers
P
Posted: Wed Jul 20, 2016 5:13 pm
by stevieturbo
Looks superb.
Posted: Thu Jul 21, 2016 4:48 am
by unstable load
Looking good, Mr Monkey!
If you are going to show that, you may end up with some orders.
I'd be cheeky and put a price on it when you open the bonnet to display it....

How about a photo montage of the manufacturing for the show?
Posted: Thu Jul 21, 2016 8:12 pm
by Darkspeed
Lovely job there and a real credit to effort (and skills) put into it.
Posted: Fri Jul 22, 2016 2:49 pm
by gelmonkey
Thanks Guys
With regard o selling the housings it had never crossed my mind.
The only trouble with doing that would be delivery times and folk would also have to pay for the filters and the tubing which I got very cheap as Muscle Manta brought all three of them back from the states for me a couple of years ago.
As you know work often keeps me away from playing in the garage but if someone wanted one I could make it without too much hassle.
How you going with your moulding stuff Andrew?
cheers
P
Posted: Fri Jul 22, 2016 4:37 pm
by Darkspeed
gelmonkey wrote:...How you going with your moulding stuff Andrew?
P
Slowly - as I have been involved with the repair to a front damage G15 - restoring wings from the moulds that I made and now fettling the nose mould (not mine) to suit the car - We had not bargained for the amount of rectification works - Old repairs onto dirty unprepared surfaces and all that sort of thing. It's getting there and I will drop a few pictures onto my thread. Once that is complete I will be doing the sunroof fill in repair on my G15.
Posted: Fri Jul 22, 2016 6:45 pm
by gelmonkey
Please dont think I am trying to teach you how to suck eggs but please call me before you do the roof repair .
I might be able to save you a ton of materials and time in doing it and also make it stronger than original.
Keep up the good work
cheers
P
Posted: Thu Aug 04, 2016 3:58 pm
by Muscle-Manta
Looks fantastic Paul. Gets the cold air in where it should be. Very smart and functional.
Posted: Thu Aug 04, 2016 6:30 pm
by ged
Sergeant Monkey Face,
Credit where credit is due. I take my hat off to you sir, a superb job!!
PS another promotion

Posted: Fri Aug 05, 2016 1:26 pm
by gelmonkey
Thanks Ged and Muscle Manta
Took a while to get where I needed to be but am pleased with the results.
Thank you also for the promotion to Sergeant Monkey Face,
When I got busted all those years ago thanks to Muscle Manta I have had to walk around with my head bowed in shame before my peers and have never been able to climb back up the formal ranks
MR COOPS YOU LOOKING AT THIS.???
cheers
P
Posted: Fri Aug 26, 2016 2:42 pm
by Coops
you don't get promoted that easy mate
Posted: Fri Aug 26, 2016 6:50 pm
by mgbv8
gelmonkey wrote:Hello again all
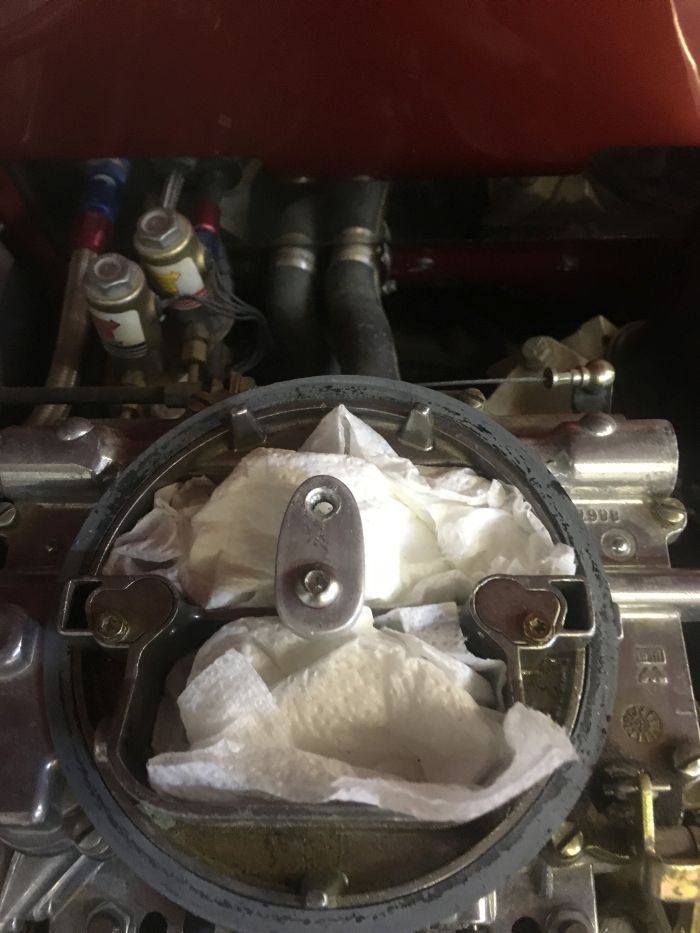
With the show looming I did my absolute best to get the filter housing sorted and fitted to the carb.
After getting the glassing done it was a case of sanding back and doing a little more profile work to get things looking good.
Following that it was out with the acid etch primer and give it a few coats but this proved to be a challenge in itself as the nozzle of the brand new can was either blocked or did not have a full hole from manufacture and all it did when pressed was pour paint down the side of the can and make a hell of a mess so it was out with the ordinary primer and hope for the best.
Came out alright in the end.
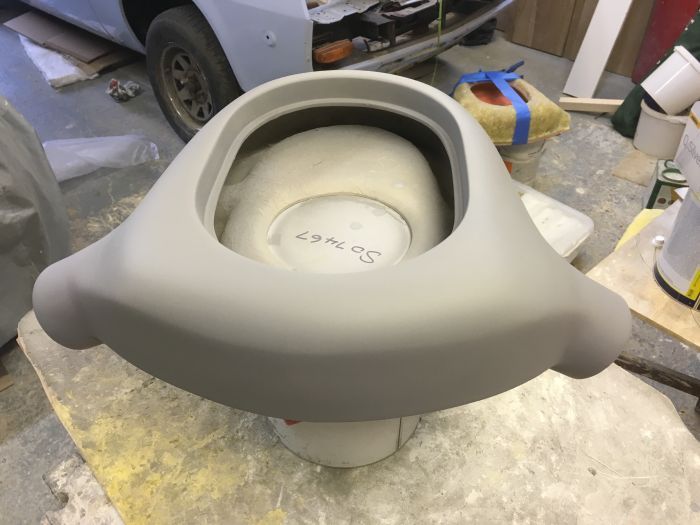
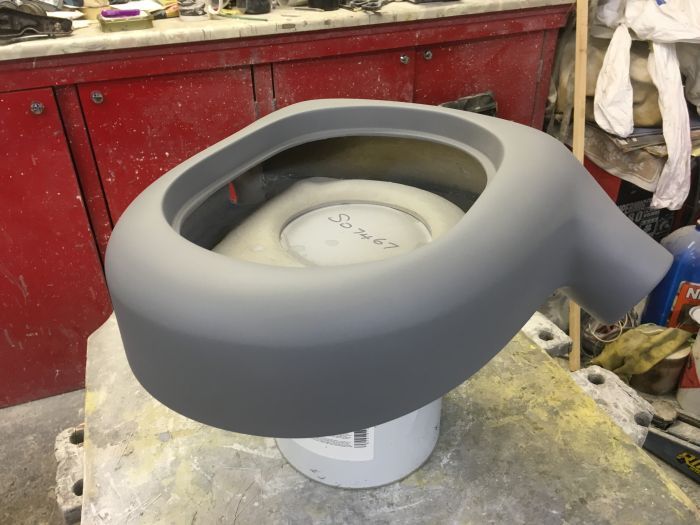
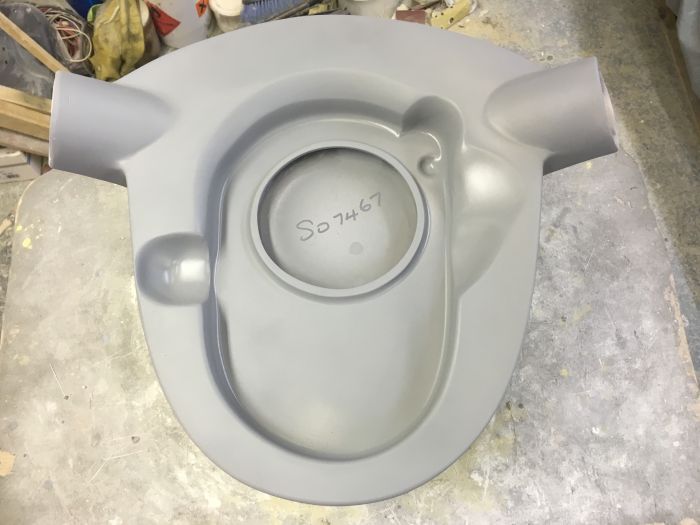
With that done out with the satin black and give that a good blast as well.
Following that I had to decide where to put the rocker cover breather so after determining that I drilled a hole and then used a carb fuel inlet fitting as my hose connector.
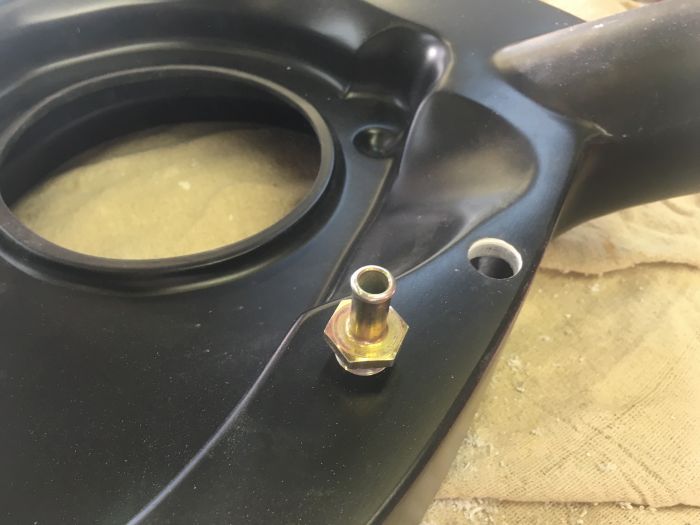
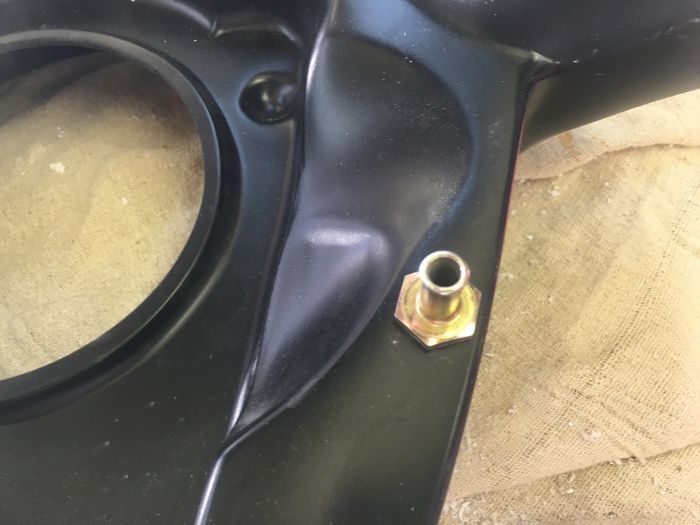
I had previously made a small filter screw extension piece as the filter would sit a bit further back than the original one on the car and this was fitted.
With that all done I then profiled and painted the cone filter brackets and mounted those to the rad and then plumbed the whole thing together and this is how it turned out.
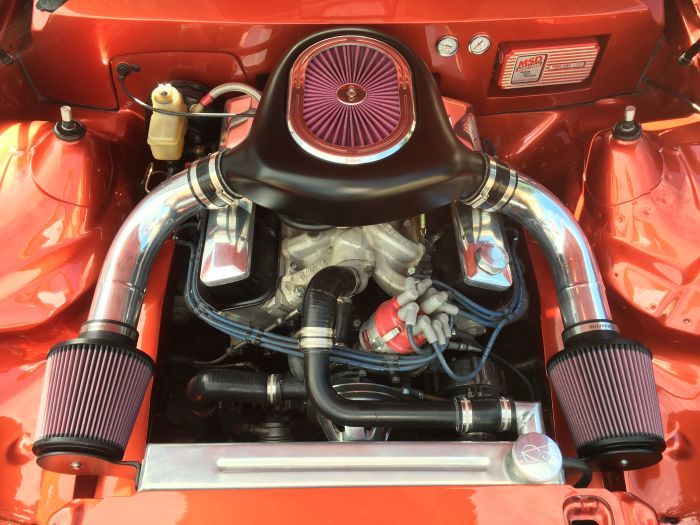
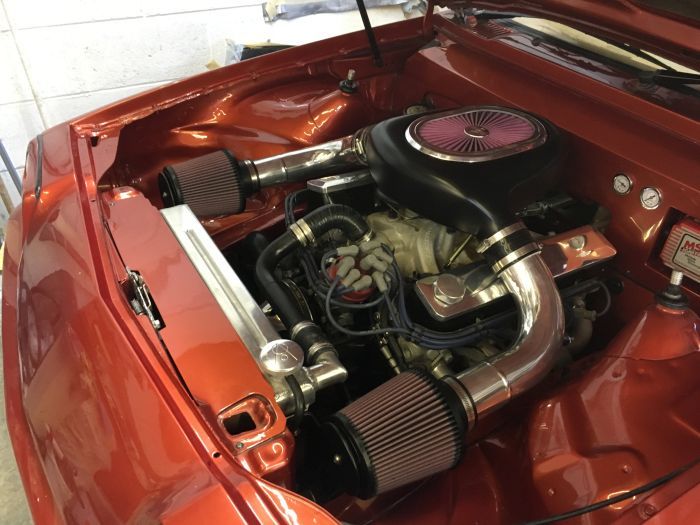
In all honesty I did have a slight clearance issue which was rectified by doing an 8 mm section job but it was done quickly and gave me all the clearance I needed so no dramas there.
Did I get it done in time for the show?
Well yes is the answer to that and does it work?
A big fat yes to that as well as the engine was instantly better on pick up not that it was a slouch anyway and just feels much much better throughout the entire rev range.
Thanks to all that have followed along with my project and thank you once again for all of the kind comments and questions which I have tried to answer as best as I could.
THE END
cheers
P
PS Bored now
I've just seen this Paul !!
Absolutely stunning me old love sausage
You should do this poop for a living

Pel x
Posted: Fri Aug 26, 2016 6:53 pm
by mgbv8
ged wrote:Sergeant Monkey Face,
Credit where credit is due. I take my hat off to you sir, a superb job!!
PS another promotion
I'm thinking Colonel at least now
But that title does have the word Colon in it ??


